Noahs top 5 leather tools
Interview: what leather tools do you use for leather projects?
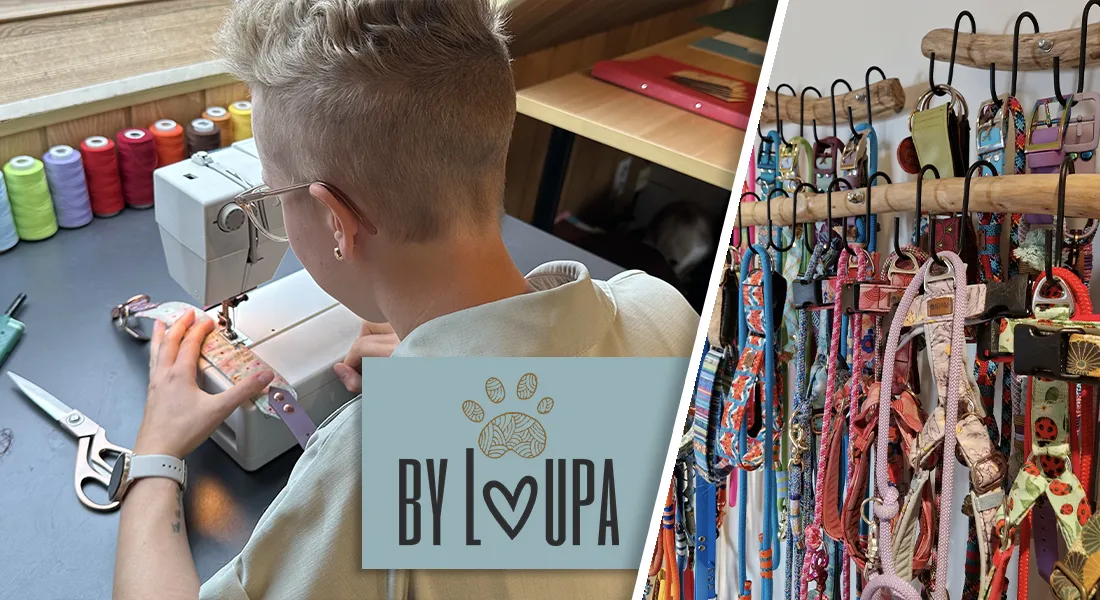
What tools are needed to get started with leather crafting at home? Leatherworker Ilja Maurer is often asked this question by her customers and workshop participants. This is her answer.
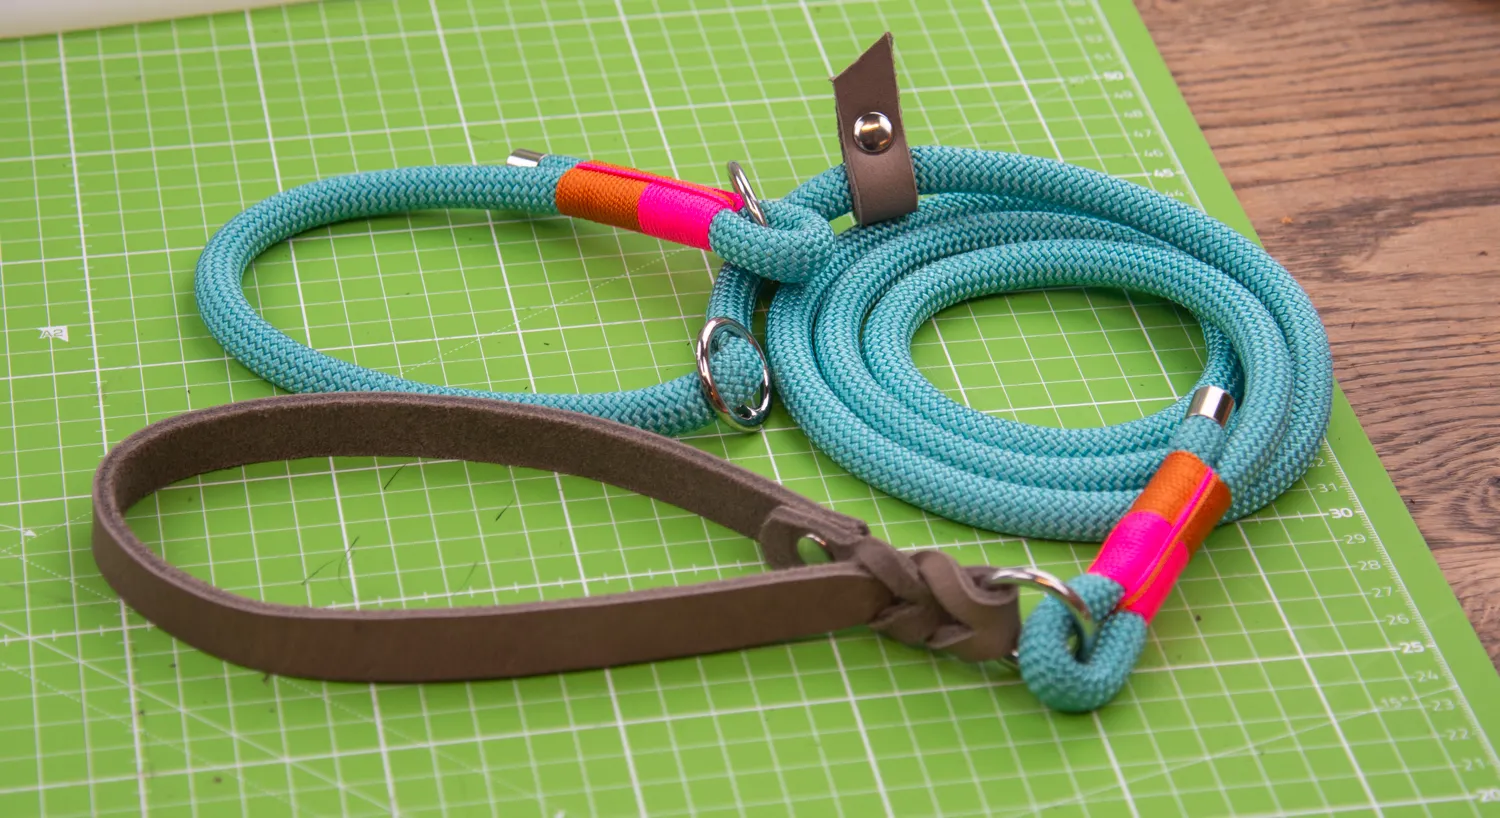
Ilja Maurer began crafting dog collars from leather and paracord back in 2019. She liked it so much that she continued doing this. These days she sells her creations through her online shop and teaches workshops herself in making leather collars.
Besides her creative work with leather and paracord, Ilja has also been a dog groomer for years. Handicrafts and dogs therefore feature strongly in her daily life. She tells us what tools she uses for working with leather.
Measuring and cutting
The first thing to do when starting your leather craft project is to cut the leather to the right size. There are various tools you can use for this.
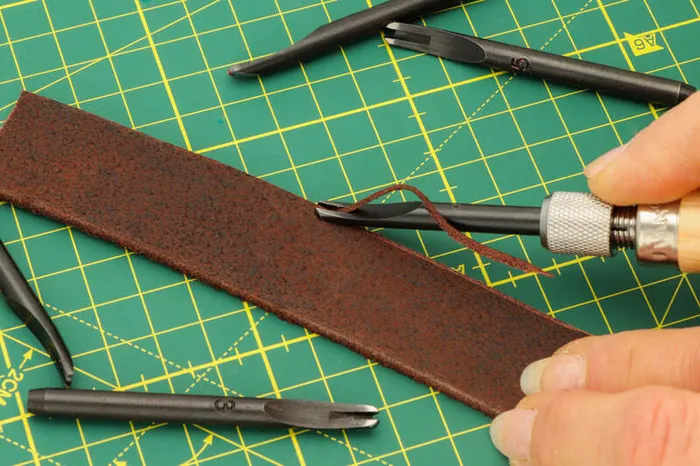
Rotary cutter
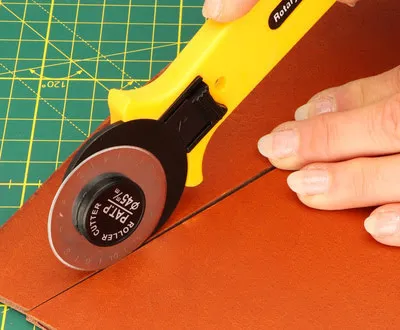 "The advantage of this rotary cutter is that the blade glides smoothly through the leather. The round shape makes it tricky to cut corners. So if you want to cut corners, you need another knife to work more accurately."
Craft knife
Ilja uses the precision craft knife for the corners that cannot be cut properly using the rotary cutter. "This knife is ideal for cutting corners, or for making more precise cuts. It's great to use in conjunction with the rotary cutter, which is more convenient when you want to make round cuts."
Ruler
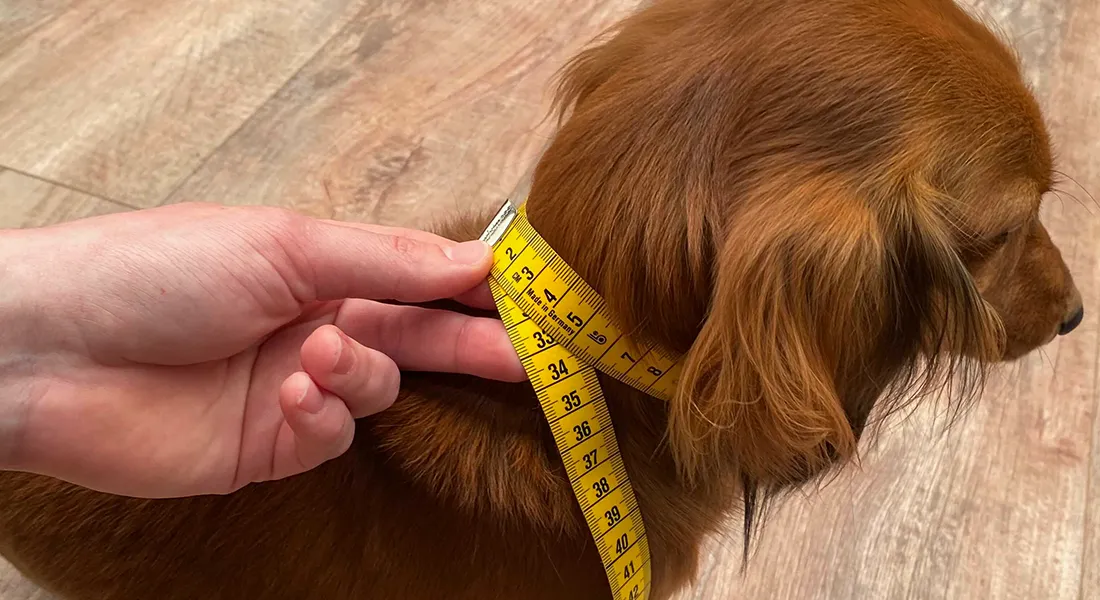
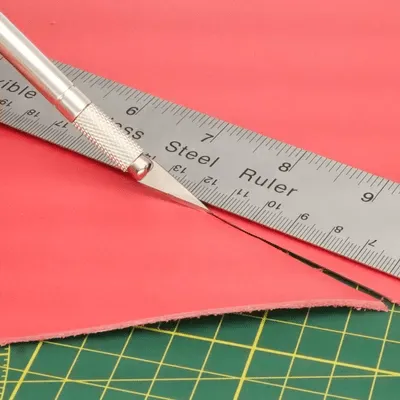 You need to measure the leather before you start cutting, of course. "I use a metal ruler for measuring, and also as an aid when cutting the leather itself. Then you can cut exactly to the right spot without having to make marks on the leather in any way."
"If you were to use a tape measure for this, you run the risk of cutting it if you go too far with your knife. That wouldn't happen with a metal ruler. In addition, it's ideal to actually cut along the edge of the ruler to get a totally straight cut."
Ilja recommends using a metal ruler. "Metal is best able to withstand a sharp blade. You could also use a thick plastic ruler, but if only slightly damaged, it can cause damage to the leather."
With hard objects such as a ruler, there is always the risk of accidental damage. Ilja: "Always put the ruler down next to your leather once you are done with it. This avoids accidentally damaging anything."
Finishing the edges
Once you have cut the leather to size, you need to work on the edges of the leather.
Edge beveler
First you need to bevel the edges, and for this you use an edge beveler. Ilja: "I usually use size 3 or 4 from this set. Use the smaller size for thinner leather. I would never use larger than a size 4 for a collar, as it would waste too much leather."
Working without an edge beveler is out of the question for Ilja. "If you don't use such a beveler, the leather won't keep its shape properly during burnishing. You end up with an extra edge you can't get rid of."
Fiebing's Gum
Whenever you want to dye the leather, you have to burnish it first. "To make it easier to burnish, first apply some gum onto the leather. You might decide instead to use loads of water instead of gum, but then burnishing will take more time. You then have to rub longer to generate the necessary heat."
"You can use this product on almost any type of leather. I wouldn't use it on Napa leather, it's too thin for that."
Edge paddle for gum and dye
"You use this edge paddle to apply the right amount of gum and Edge Kote onto the leather," says Ilja. "Since the paddle has two sides, you can use one side for the gum and the other side for the colour coating. The paddle is also easy to clean with water."
Wooden slicker
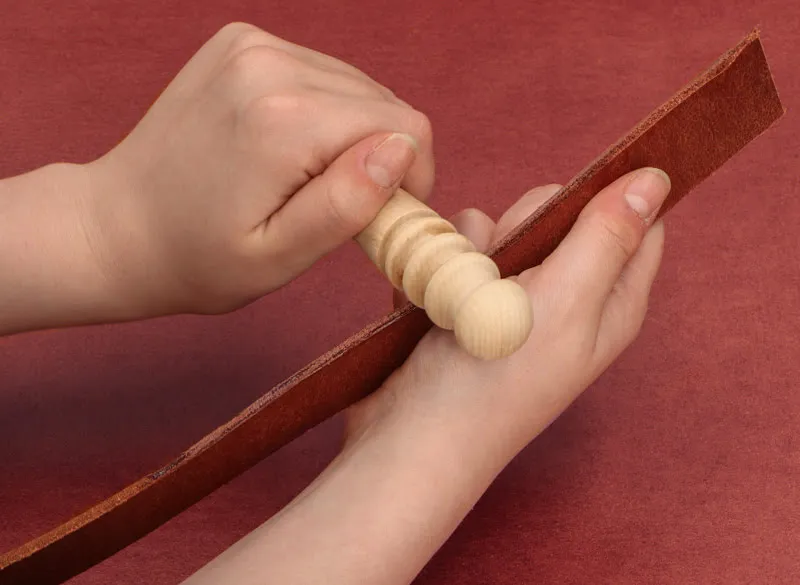 Once you've applied the gum, you will start to actually polish the leather. You can use a slicker for this.
“Burnishing is all about generating heat using a smooth piece of wood. So you could smooth down a piece of wood yourself and use that. But be careful: the wood has to be really smooth."
The wooden slicker has several grooves. "The thinner the leather, the narrower the groove you use," explains Ilja. "I usually use two grooves for each collar. That works best for me, but other ways are possible."
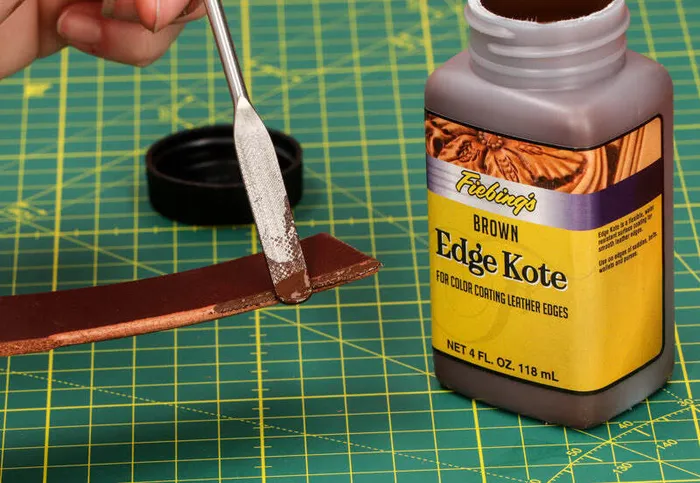
Edge Kote
Once the edges of the leather have been burnished, the colouring of the edges can begin.
"I use Edge Kote to colour the edges of the collars. It can be used for all your leather craft projects, so it won't sit there on the shelf gathering dust." The Edge Kote is water-resistant, but that is not particularly why Ilja uses it. "For me, the point of the colouring is just to make the edge look beautiful."
"I use the Edge Kote mainly for saddle leather, full grain leather and top grain leather. I wouldn't use it on Napa leather as this leather is too thin for that."
Ilja mainly uses the colours black, dark brown and tan. "These colours go best with the leather I usually use. I have to admit I also like to blend them, so you really can get just the right colour for that piece of leather."
Stitching the leather
You can stitch leather to add a lining, attach a buckle and D-ring, or just for decoration.
2-in-1 stitching groover
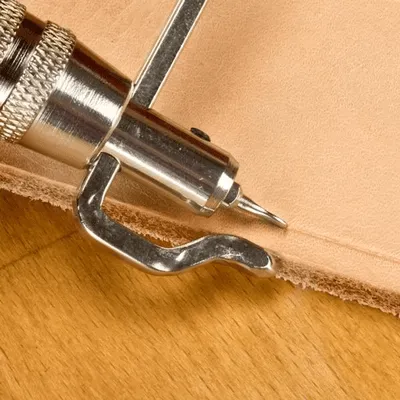 The stitching groover is a handy tool for when you are about to stitch the leather. "When stitching leather, you need a visual guide to get the holes in a straight line. You use a stitching groover to score a line parallel to the edge of the leather."
“What's great about this groover tool is its dual function. You can decide whether to actually cut the leather away, or just indent it. Opinions are split as to which is best."
"Personally, I find the advantage of cutting the leather away is that the stitching thread actually ends up in a groove, so it is also protected even more. A downside is that this weakens the leather slightly, because you are taking some of it away."
Is it also possible to work without this tool? Ilja: "You could also create a visual guide using an awl and a ruler. Personally, I find it much faster and more convenient to work with the stitching groover."
Fiebing's Cement
 "Fiebing's Leather Craft Cement is basically there to make your life as a leather crafter easier," says Ilja. "This leather glue ensures the layers stay exactly in place when punching holes for the stitching."
"I use this, for instance, when I'm going to stitch a lining onto the leather. What's good about this cement is that it does not form a permanent bond, you can peel the lining back off the leather easily."
You could use clamps instead, but you would then have to be careful not to damage the leather."
Leather stitching diamond chisel
You can use various kinds of chisel to punch holes for the stitching, such as the 6-prong chisel. "Use a nylon mallet to punch the holes in the leather with the chisel. With this particular chisel, you can make 6 holes at a time in the groove you made earlier."
Burnishing awl
"I mainly use this awl for marking hole positions and opening holes up for sewing," says Ilja. "I wouldn't say this product is really crucial, because if you use thin leather needles, you can achieve the same result with those instead. It is a convenient tool to have at home though."
Needles
Leather craft needles are crucial when it comes to leather crafting, Ilja is very clear about this. "I usually use two at a time. Most of the time I use the saddle stitch, where you sew on two sides at the same time using a needle in both hands."
Stitching pony
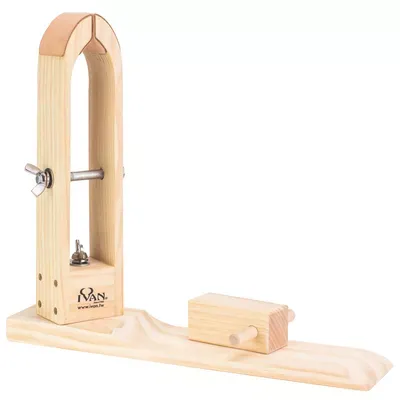 "When stitching leather, it is useful to have your hands free. So you don't want to have to hold the leather plus two needles and an awl. A stitching pony holds the leather in place, so you won't need your hands for holding the leather."
"You could in theory stitch leather without one of these stitching ponies, but the question is whether you should want to. I certainly don't do any leather stitching without one."
Want to learn more about Ilja? Follow her on Instagram or Facebook or take a look at her website.