Forest Spirit Paracord | Tutorial
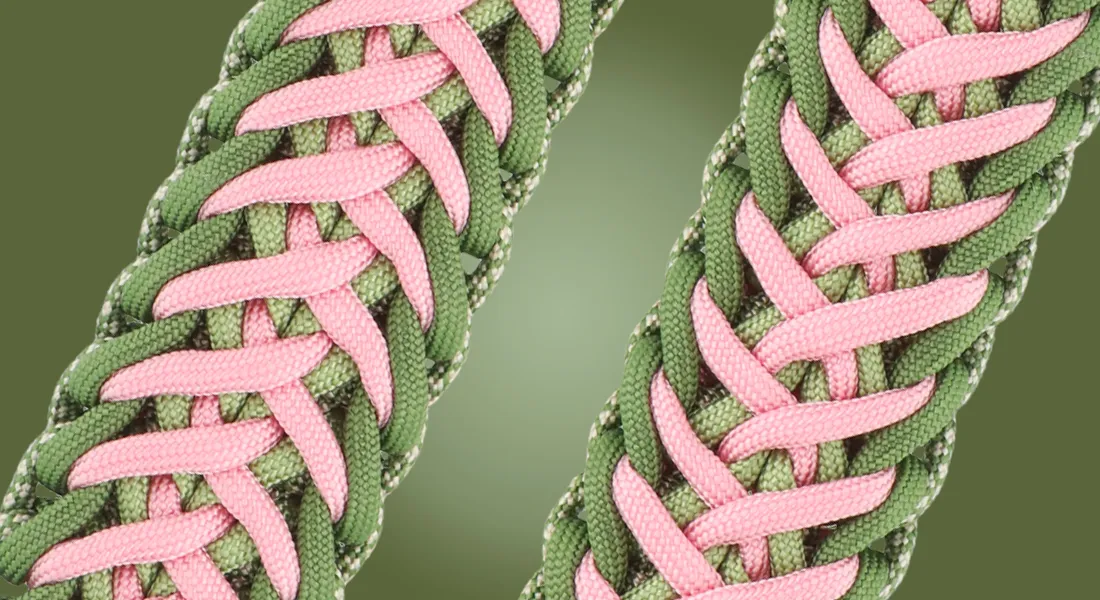
Looking for a challenge? Try the Forest Spirit knot! In this tutorial you will see how to make this paracord pattern with 5 colours.
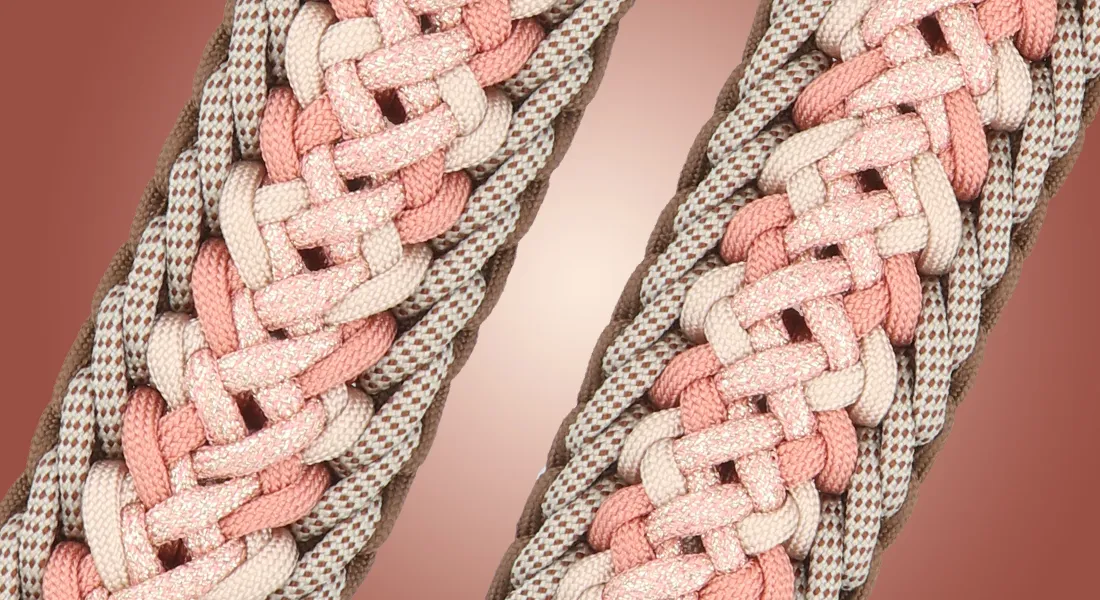
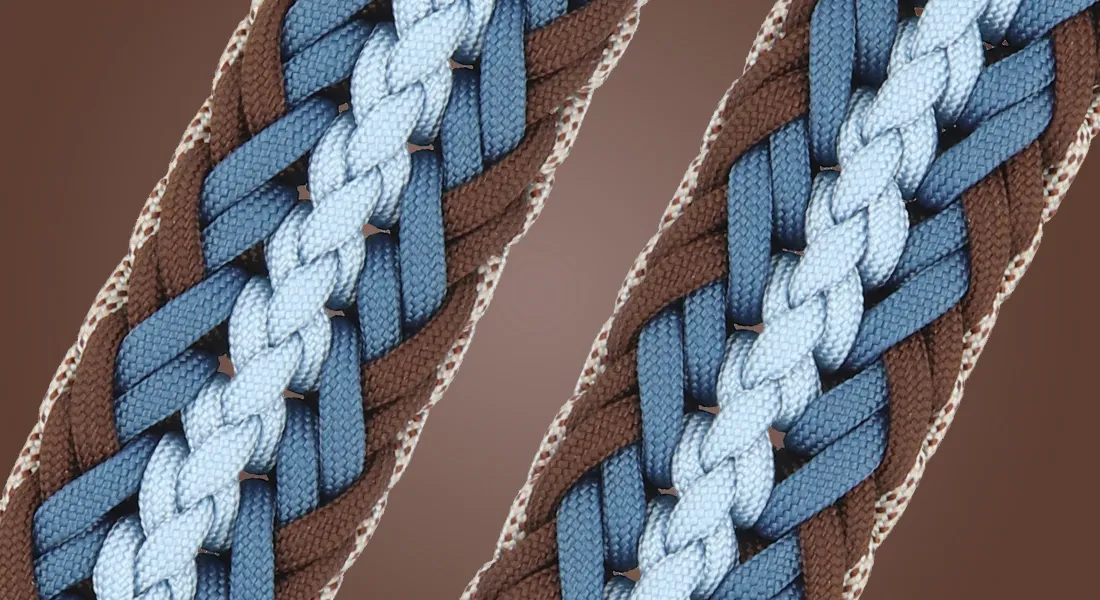
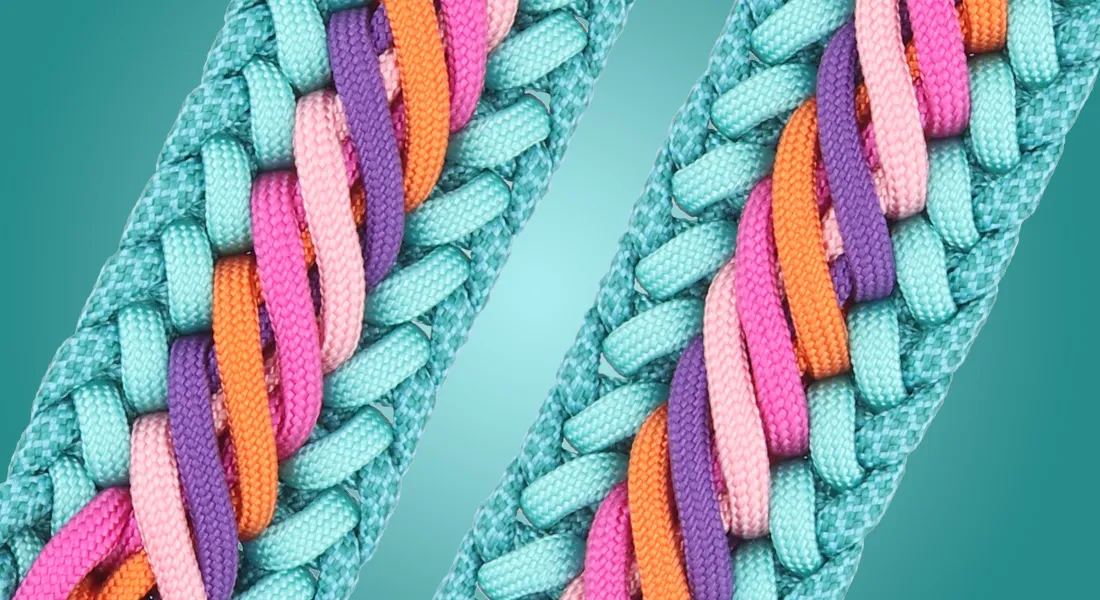
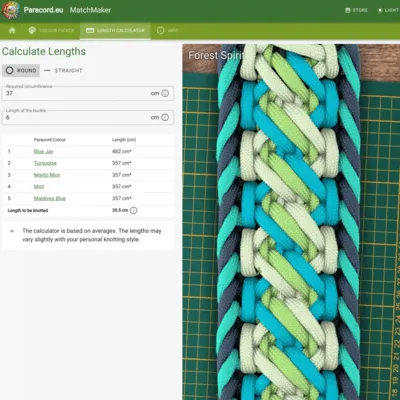 The paracord Forest Spirit knot by Liane Barth is 1.5 cm thick and 4.8 cm wide when knotted with paracord type 3. Is this too big for your taste? Then you can knot the pattern with thinner cord, for example with Paracord Type II or Type I.
Choose your colours and calculate how much paracord you need in the MatchMaker.
This knot may require some insight. Do you have little experience? Then the easier paracord knot Honey Bee might be a better knot to start with.
Setting up your knotwork
Are you making a dog collar with this knot? Then make sure that your knotting has a safe set-up. In this tutorial the Kosmetik 2.0 is used.
After you have made this single set-up with colour 1, you are going to add the other four colours.
- Pass colour 2 through the two cow hitch knots (the set-up knots) of colour 1.
- Using colour 4, tie a third cow hitch knot between the two set-up knots.
- Pass the colours 3 and 5 through the cow hitch knot of colour 4.
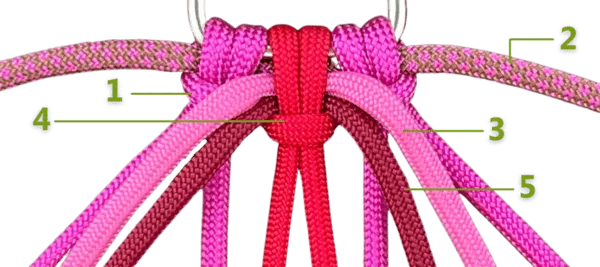
Colour 1: Passion Pink, colour 2: Hazelnut Brown & Passion Pink Diamonds, colour 3: Bubble Gum Pink, colour 4: Red Velvet and colour 5: Burgundy.
Knotting Forest Spirit
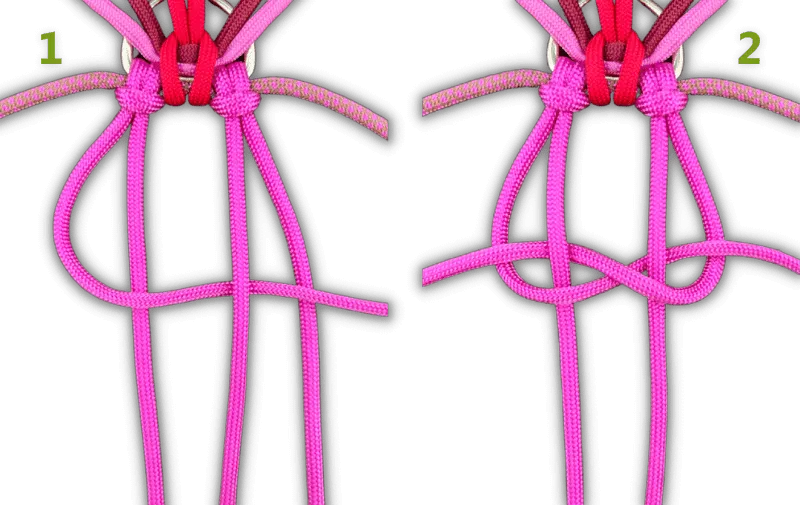
- Let the left strand of colour 1 go to the back between the two middle strands.
- Repeat for the right strand of colour 1. Put the strand in the loop on the left side.
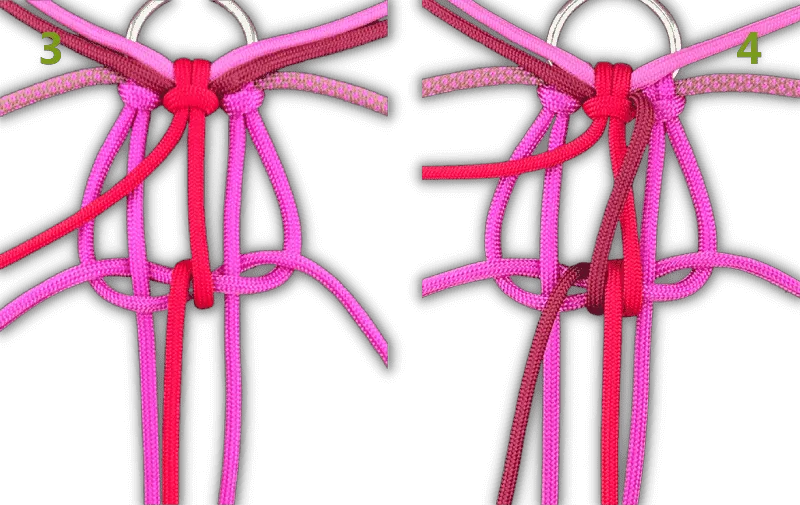
- Let the right strand of colour 4 go around the horizontal strands of colour 1 and come to the front to its own left.
- Do the same for colour 5 on the left of colour 4.
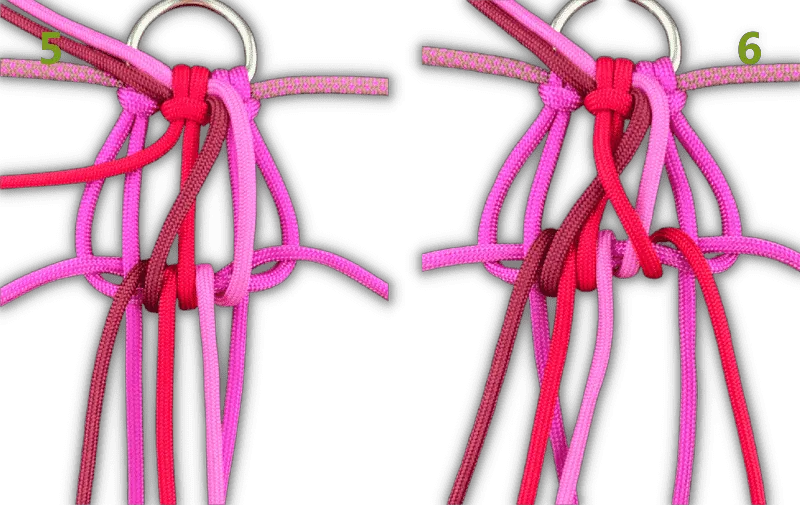
- Repeat for the right strand of colour 3 on the right of colour 4.
- Now bring the left strand of colour 4 over these cords to go around the horizontal strands on the right and come forward again on its own right.
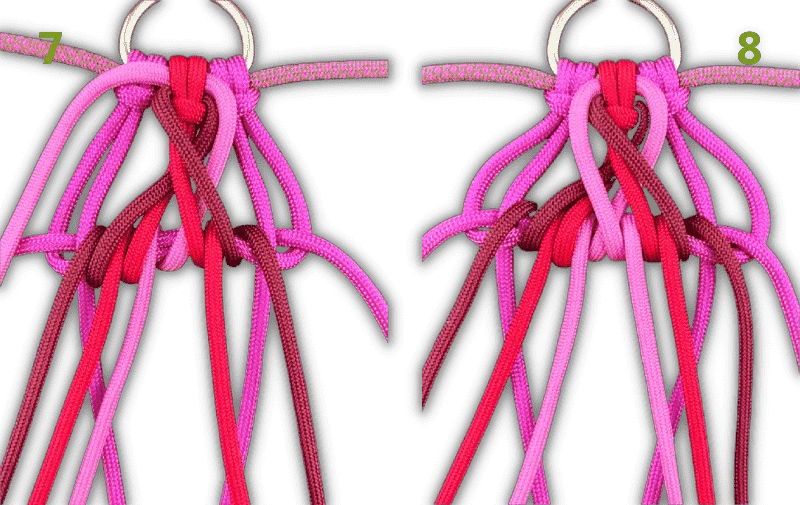
- Repeat for the left-hand strand of colour 5.
- Repeat for the left-hand strand of colour 3, but to the right of the other strand of this colour.
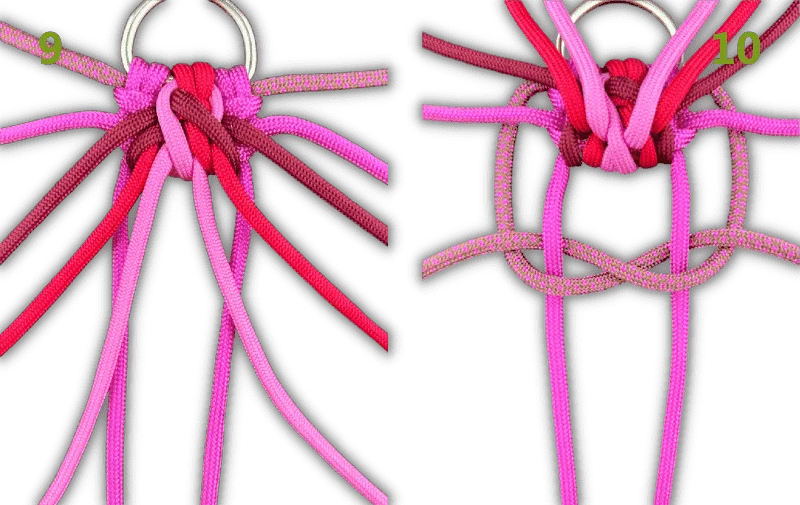
- Pull all the strands simultaneously to tighten the knot.
- Let both strands of colour 2 go to the back between the vertical strands of colour 1 and insert them in the loop at the side.
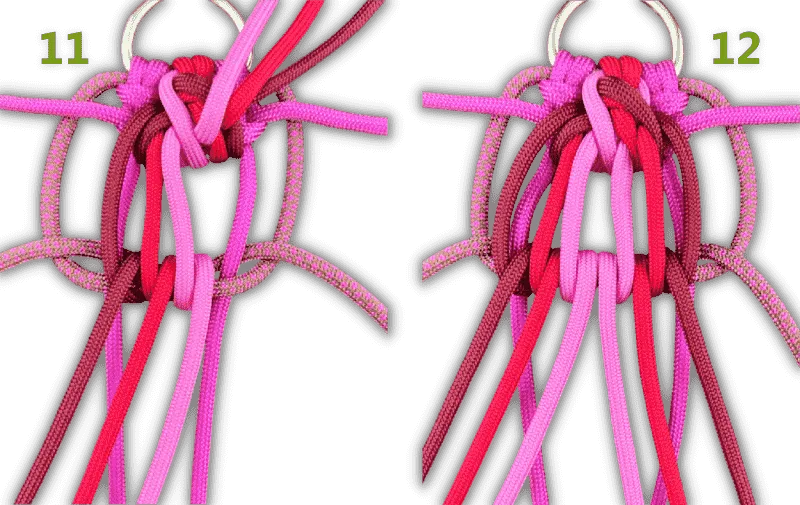
- Let the left-hand strands of colours 3, 4 and 5 go around the horizontal strands of colour 2 and come to the front again on their own right.
- Repeat this for the right-hand strands, all coming to the front again on their own left.
In this pattern, one time you have to cross the strands over each other, like in step 7 and 8. The other time, you do not cross the strands, as in steps 11 and 12. You do this alternately.
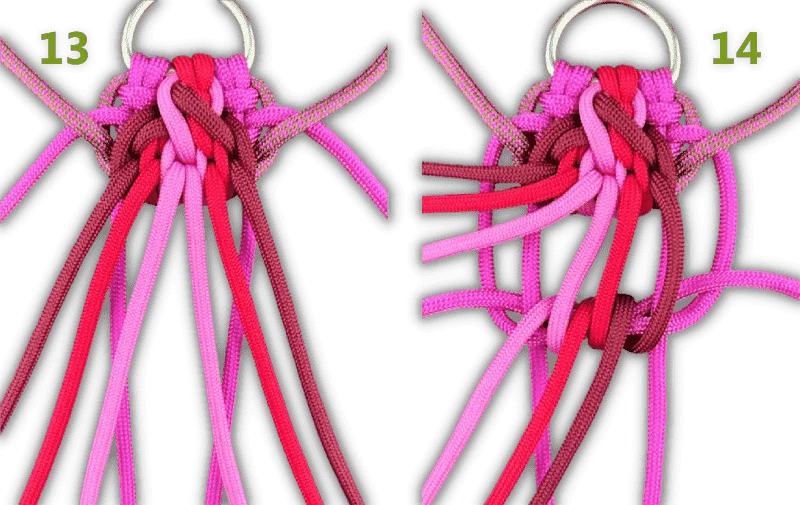
- Tighten the knot.
- Let the strands of colour 1 go to the back again between the middle strands and insert them into the loops on either side. Then let the right strands of colour 3, 4 and 5 go around the horizontal strands of colour 1 and come to the front again on their own left.
The photos below are slightly darker because they were taken at a different time.
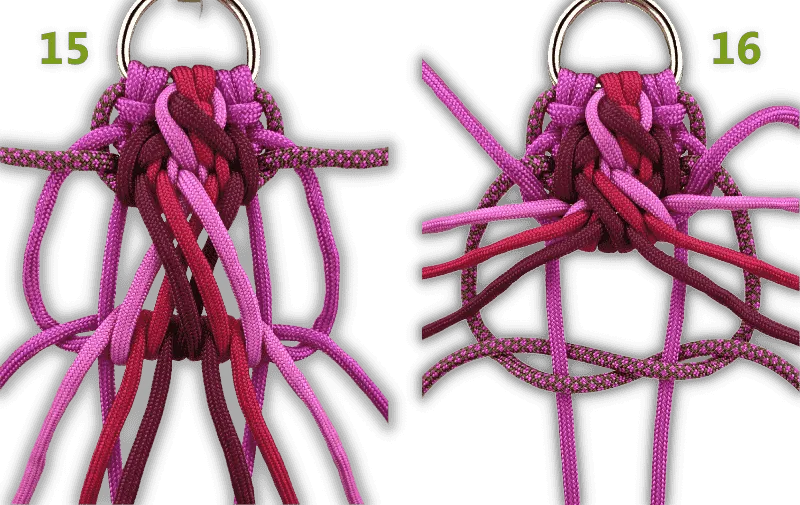
- Cross the left-hand strands over the other strands and let them go around the horizontal strands of colour 1. Let the strands come to the front again on their own right.
- Let the strands of colour 2 go to the back between the middle strands and insert them into the loops on either side.
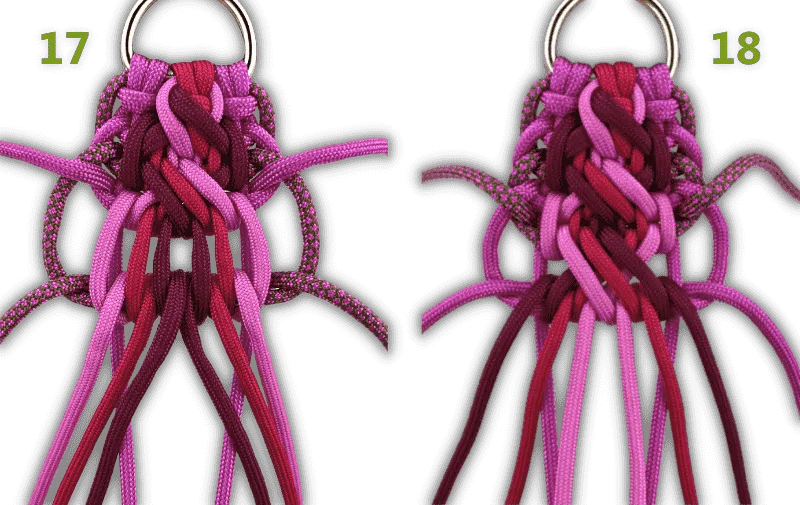
- Repeat steps 11-12, but keep the colour order as in the picture. The six strands do not cross each other in this step.
- Repeat steps 14-15, but keep the colour order as in the picture. The left-hand strands cross over the right-hand strands in this knot.
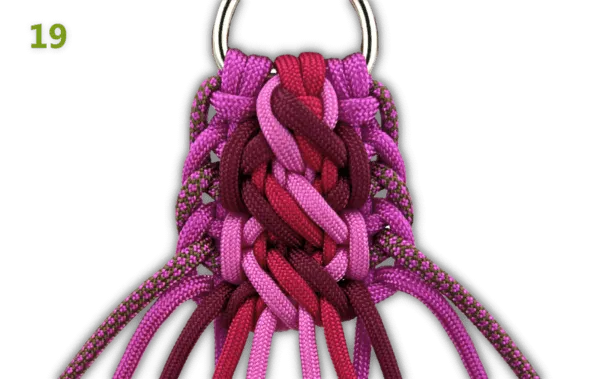
- Tighten the knot.
Continue to repeat the steps 11-18. This is how you get this pattern of alternating colours. Continue until you have reached the desired length.
Just as the set-up should be safe, the finish should be too. Here are some tips on finishing a paracord collar.
We thank the designer Liane Barth for letting us use this beautiful knot!
