Make the Niki's Butterfly knot | Tutorial
The "Honey Bee" knot by Silke Engels | Tutorial
Would you like to make your own paracord collar with the Honey Bee knot? Learn how to do it with this photo and video tutorial. The finishing off of your knotwork is also explained.
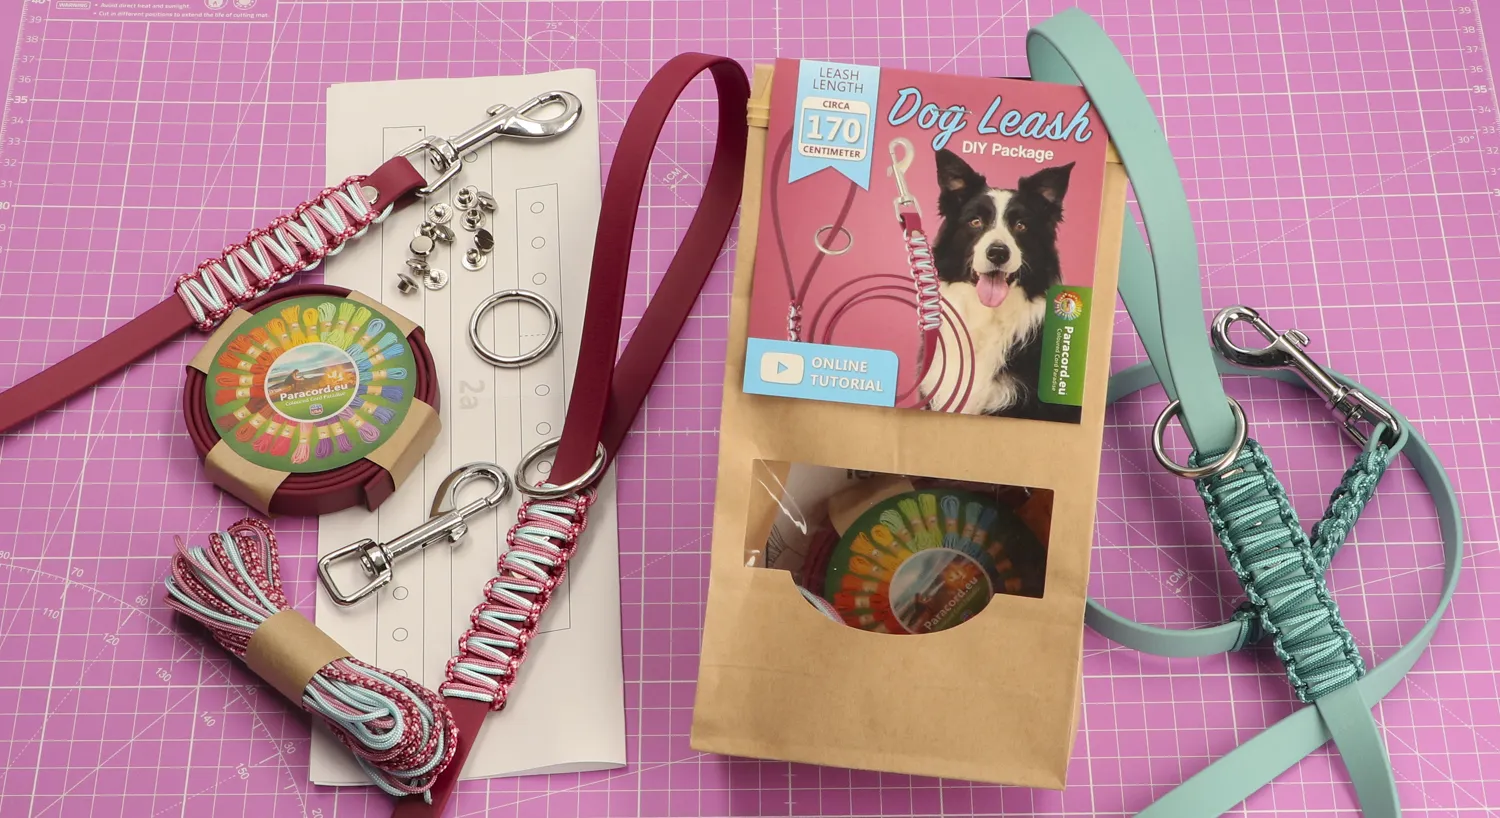
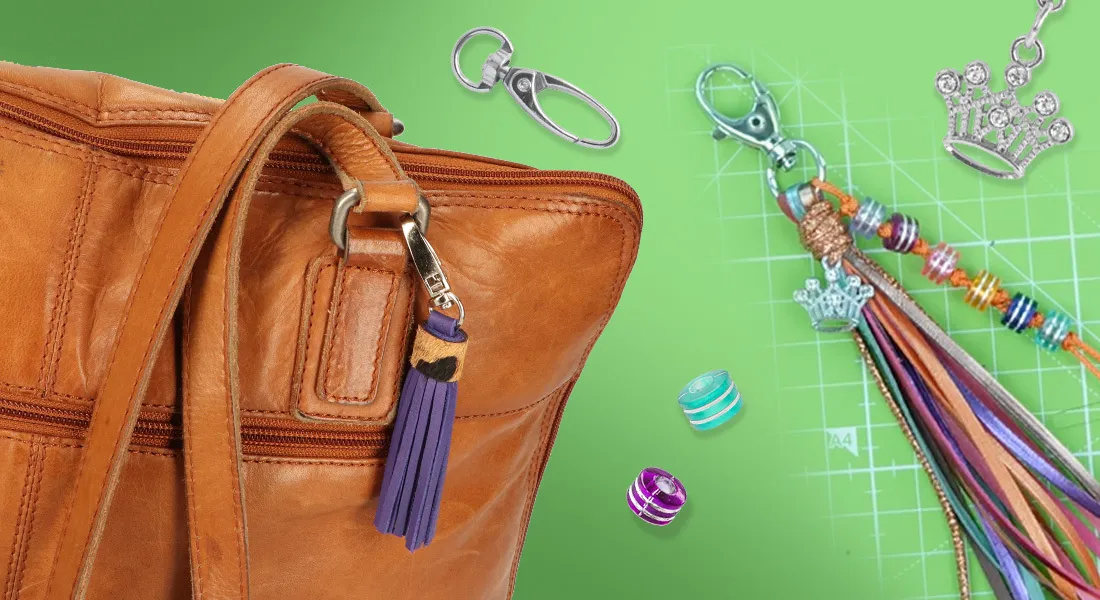
Materials
- 4x Paracord Type III
- 2x D-ring
- Jig (or other means of tensioning)
- Tape measure
- Scissors
- Paracord Type III needle
- Blowtorch
Calculate how many metres you need for your project using the Honey Bee length calculator (in the MatchMaker). Click on the tab 'Length Calculator' to open the Calculator.
The setup of your knotwork
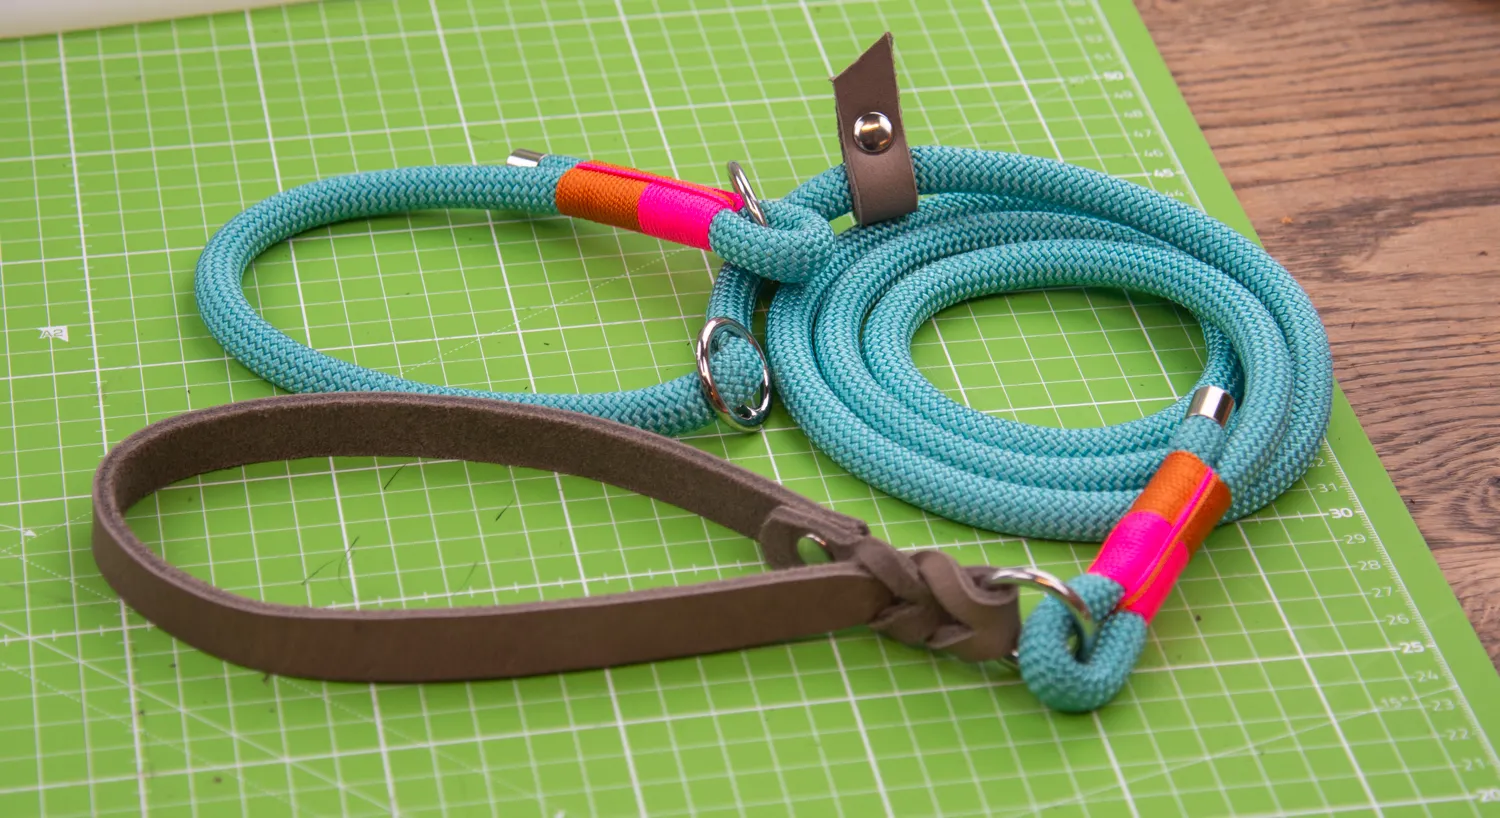
Are you making a dog collar with this knot? Then it is important that you use a safe setup. For this knot you can choose between a single setup (Kosmetik 2.0) and a double setup (Kosmetik 2.1).
In this tutorial a double setup is used.
Below you can see what the setup should look like.
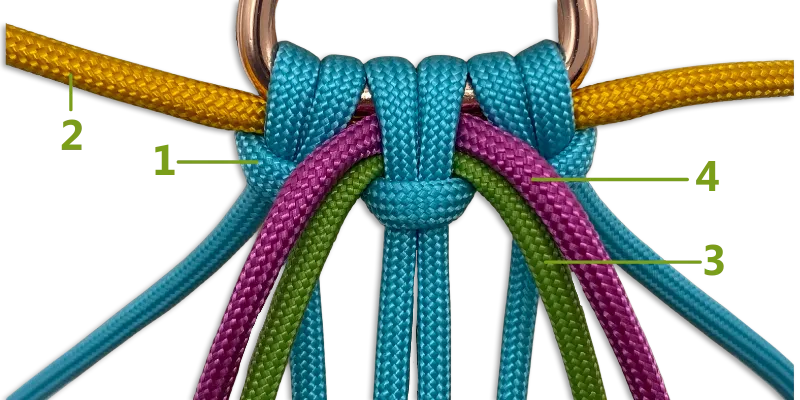
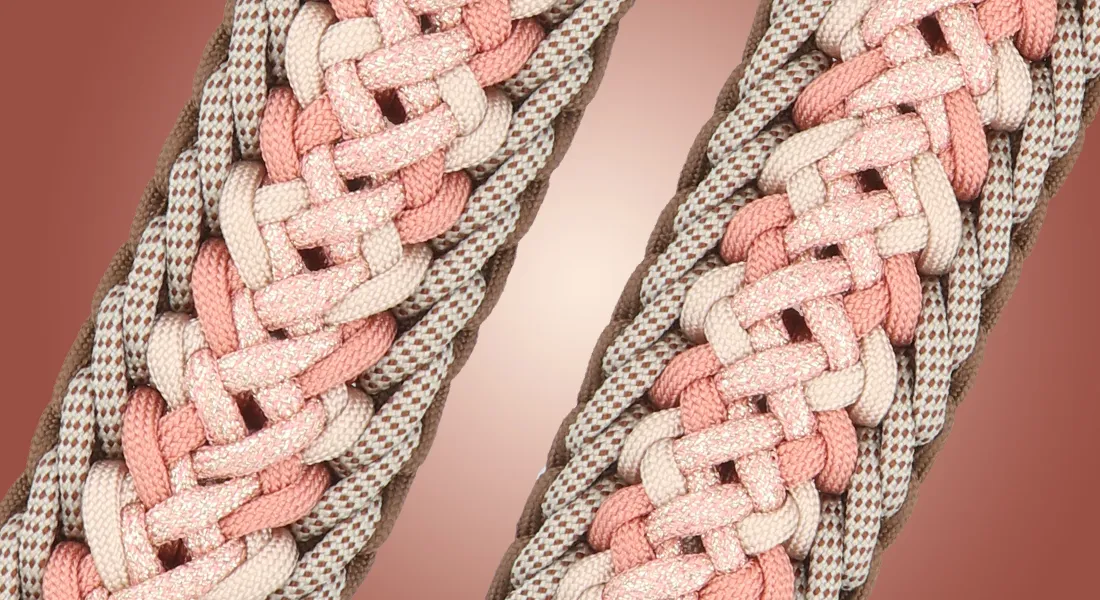
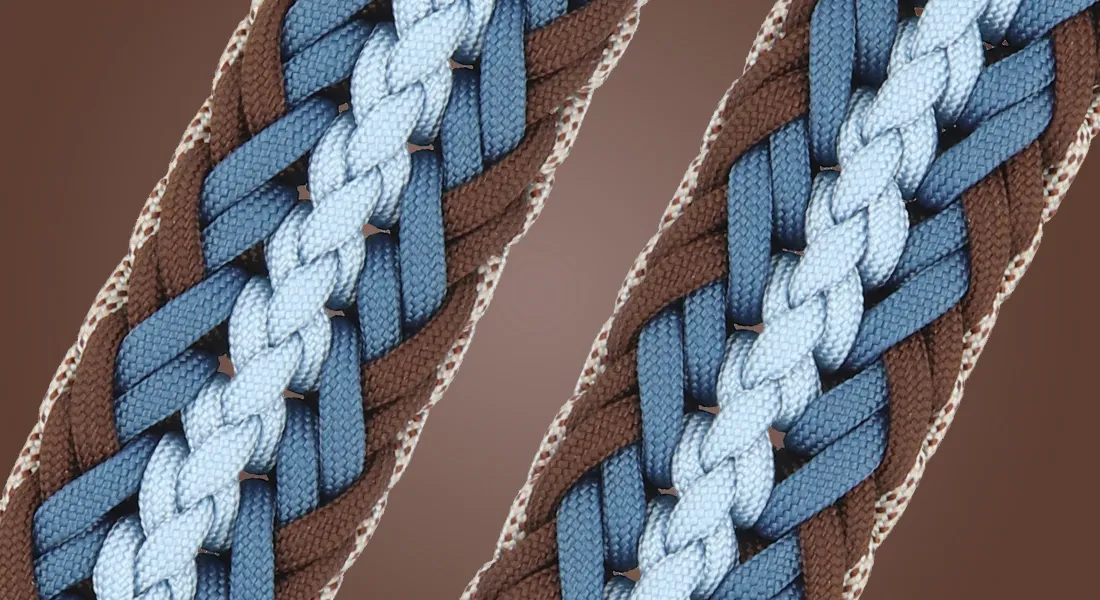
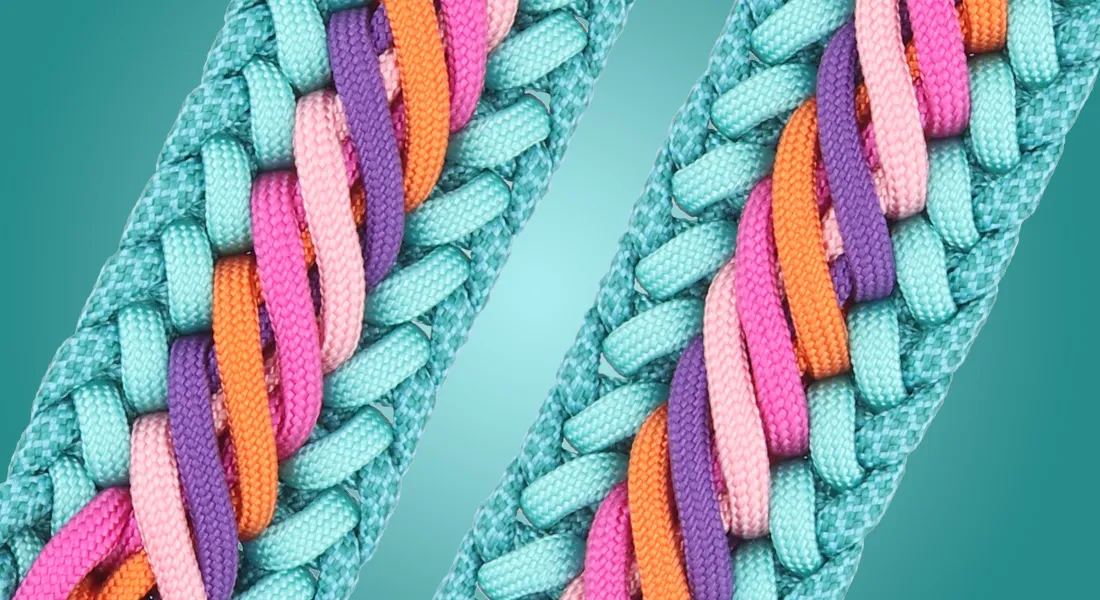
Colour 1: Turquoise, colour 2: Goldenrod, colour 3: Leaf Green and colour 4: Passion Pink.
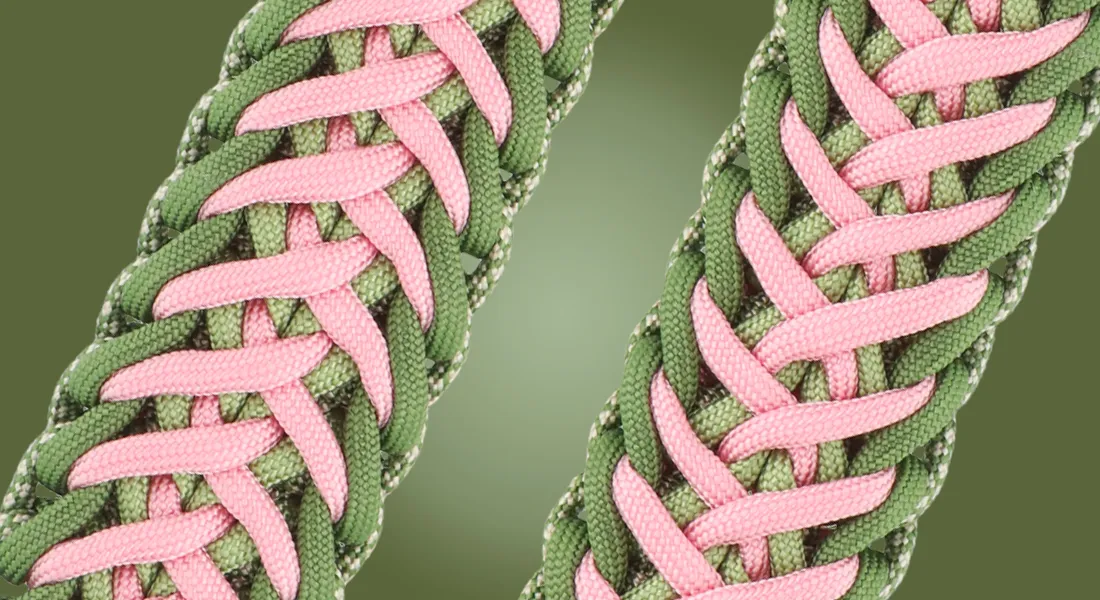
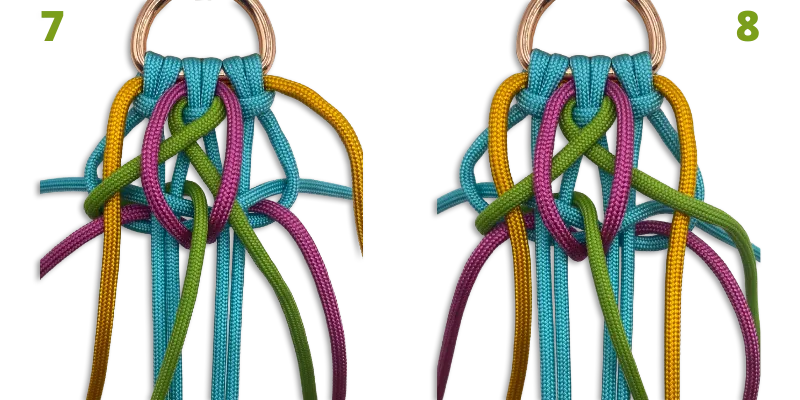
Knotting Honey Bee itself
Would you rather work with photos? You will find them below.
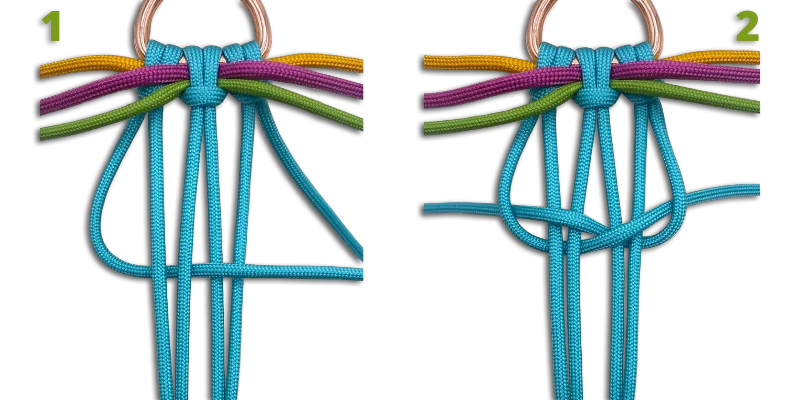
1. Take the left strand of colour 1 and bring it via the rear side between the two middle strands to the front.
2. Do the same for the right strand of colour 1. Insert the strand into the loop on the left.
3. Make the strands of colour 3 cross. Make sure you cross the strands the same with each knot (i.e. always left over right or right over left).
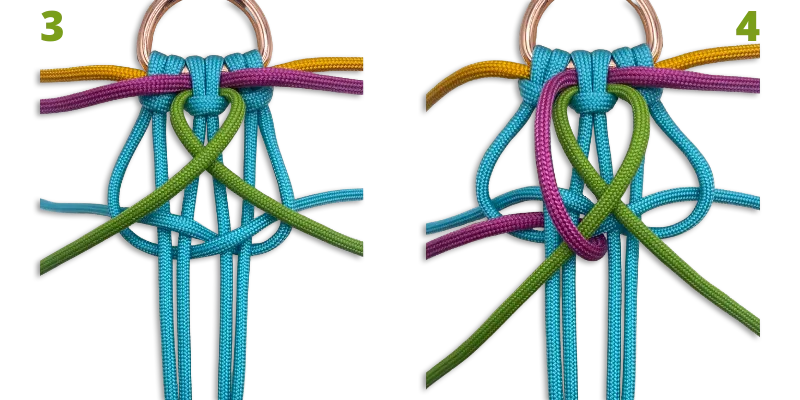
4. Let the left strand of colour 4 pass between the 2 middle strands to the rear and come back through the left loop of colour 1.
5. Repeat step 4 for the right-hand strand of colour 4.
6. Bring the left strand of colour 2 to the front. This strand passes under the left-hand strand of colour 3.
7. Bring the left strand of colour 3 around the left loop of colour 1 to the back. Let it come to the front again above the loop of colour 1 via the 2 middle strands of colour 1.
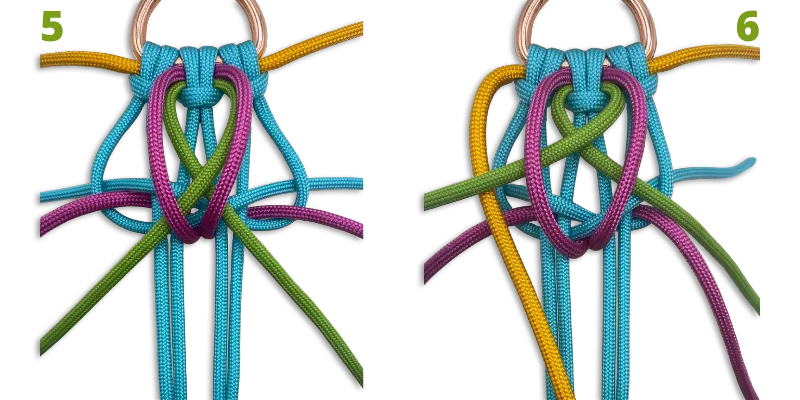
8. Repeat step 6 for the right strand of colour 2.
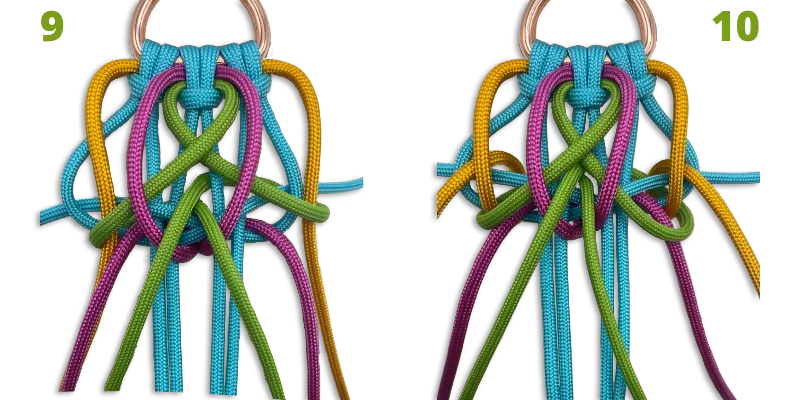
9. Repeat step 7 for the right strand of colour 3. Make sure that this strand passes over the other strand of colour 3.
10. Bring the left strand of colour 2 underneath to the rear and let it come to the front again around the loop of colours 1 and 3. Make sure that the strand comes to the front again on its outer side.
Do the same for the right strand of colour 2.
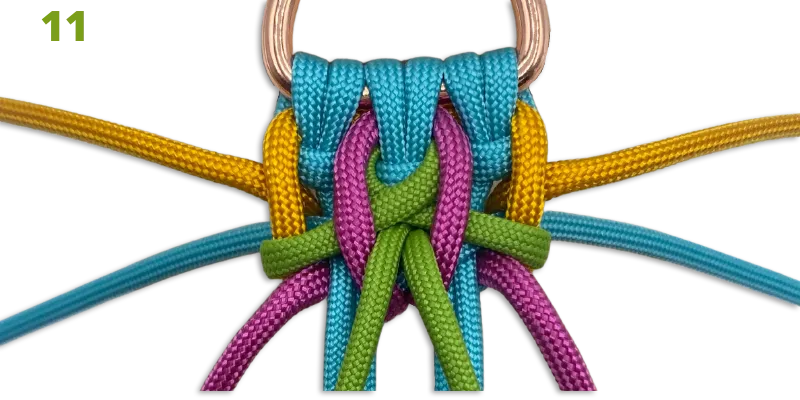
11. Pull all the threads tight. Now your first knot has been tied. Repeat these steps until you have about 0.5-1 cm space left.
Finishing off your project
Finishing off a paracord bracelet or collar can be done in multiple ways. The more experienced you get, the more you will develop your own preference and method. Here you find 5 tips for finishing off a paracord project.
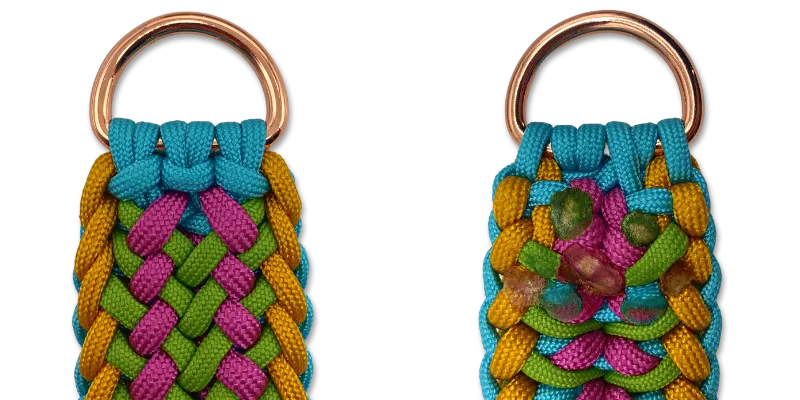
To the left of the picture you can see the front of the knotwork that has been completed. On the right you can see the backside of the finishing off.
This knot has been designed by Silke Engels. We want to thank her for her permission to use this knot.