Knot Papa Mojito from Paracord | Tutorial
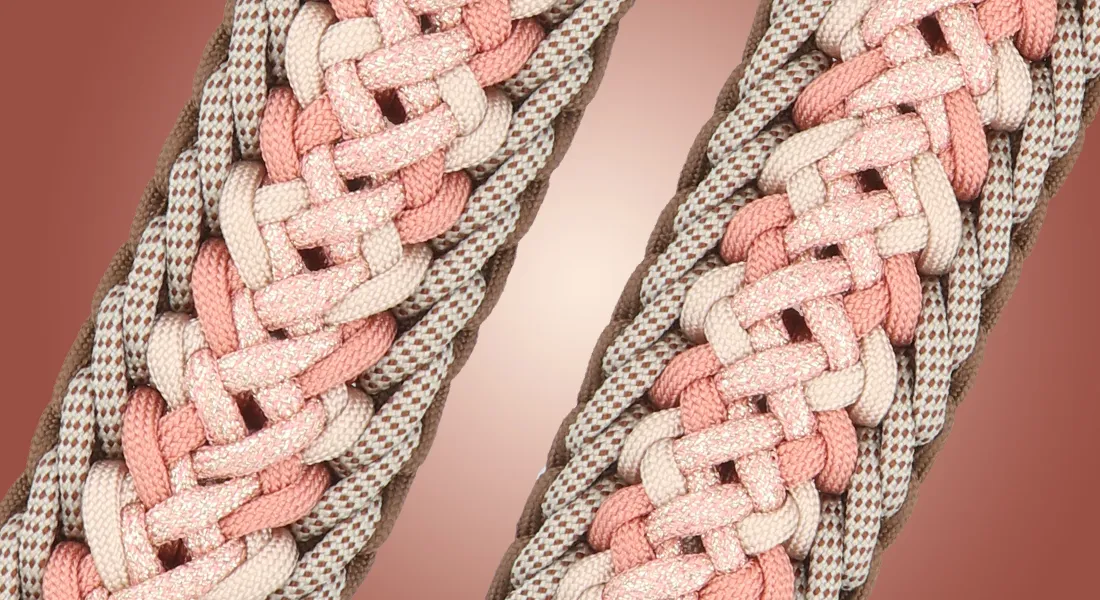
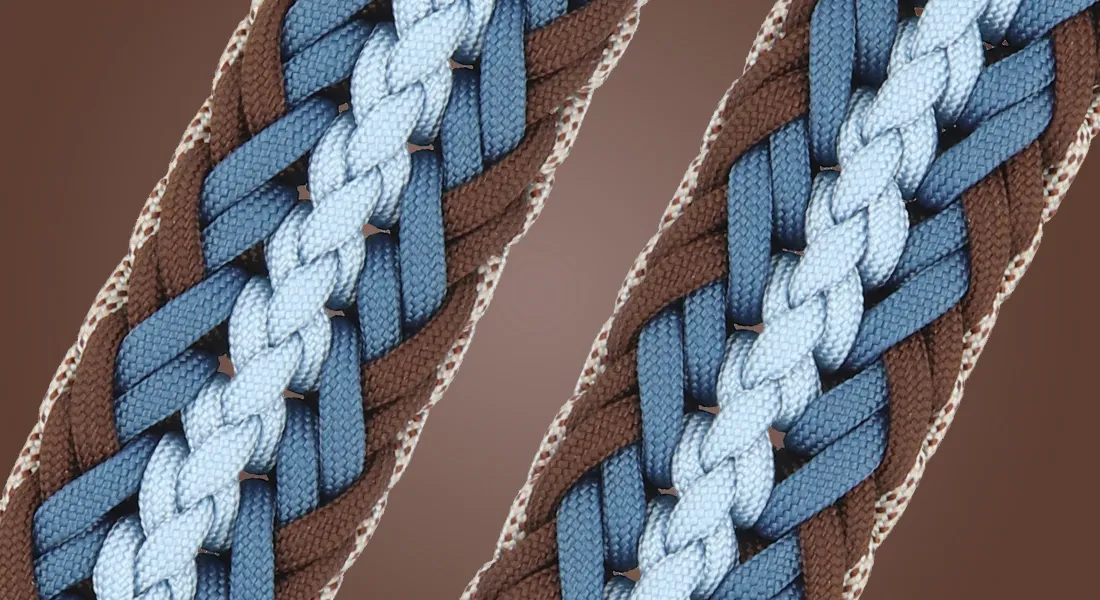
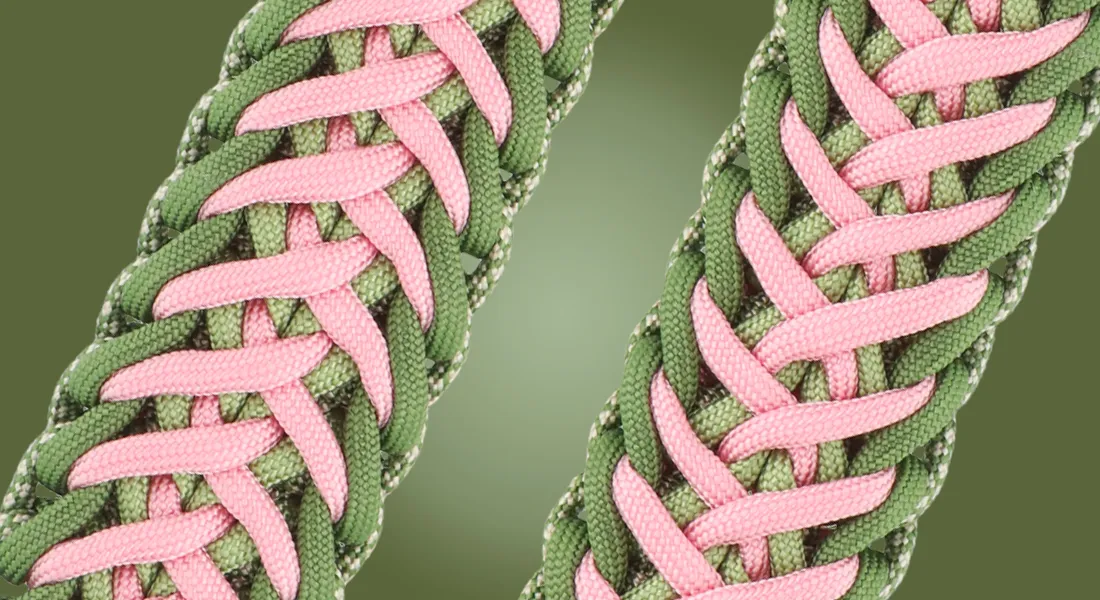
Use the Papa Mojito knot in your paracord project. In these instructions you will see step by step how to tie this 5 colour paracord knot.
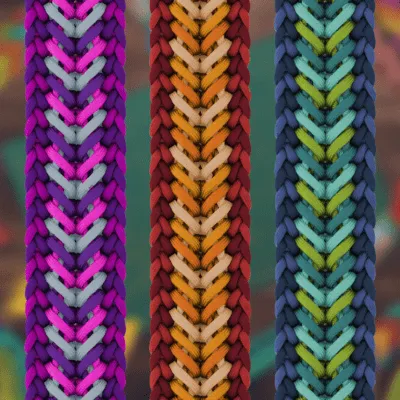 With the Papa Mojito Paracord knot you use 5 different paracord ropes. We use 5 different colours here, but of course you could also use colours more than once. You can combine the paracord colours and also calculate the lengths in the MatchMaker.
This knot is designed by Nicola Haim-Föttinger and is about 4.5 cm wide and 1.3 cm thick. Papa Mojito can be quite challenging for a beginner. It may be best to first try an easier knot like Bennos Happiness.
Start with the Paracord knot
There are several ways to start your knotting project. Are you making a dog collar? Then it is important that you ensure a safe attachment of your knotwork. Here you will find how to make a safe single setup (Kosmetik 2.0) for 3 different closures.
We use the variant where the single setup is attached to two D-rings. You can also use an adapter or a buckle, for example.
After you have attached the setup cord, you will add the other 4 cords.
- Colour 2 passes through the cow hitch knots.
- Now make a cow hitch knot with colour 3 between the two setup knots.
- The colours 4 and 5 pass through the cow hitch knot of colour 3.
The picture shows how it looks after adding all the ropes. You can also see with which number we will refer to which cord.
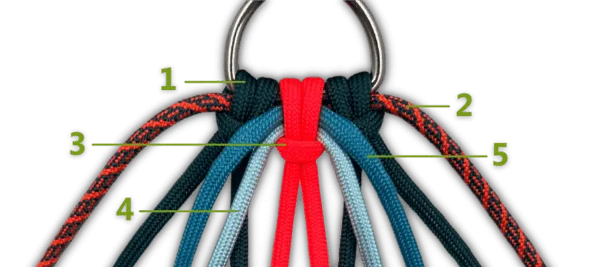
Colour 1: Teal, colour 2: Neon Orange and Teal Helix, colour 3: Neon Orange, colour 4: Pastel Blue and colour 5: Neon Turquoise.
It is important that your knotwork has the right length. Make sure as well that the two strands of every cord are the same length on the left and right.
Knotting Papa Mojito
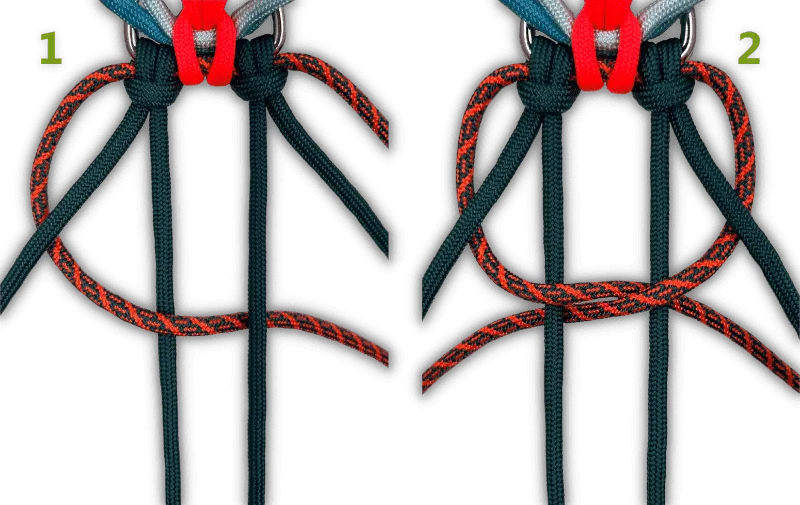
- Bring the left strand of colour 2 to the back between the two middle strands.
- Do the same on the right with the right strand of colour 2.
- Let the left strand of colour 1 go via the middle over colour 2 to the back. Bring it back to the front through the left loop of colour 2.
- Repeat on the right side with the right strand.
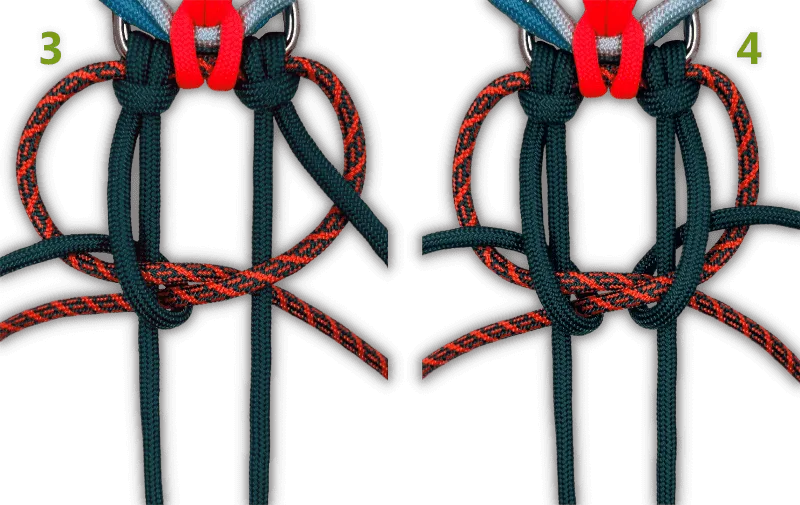
- Let the left strand of colour 3 go around the horizontal strands of colour 2 and come to the front again on its own outside.
- Repeat for the right-hand strand of colour 3.
- Repeat step 5 for the left-hand strand of colour 4, with colour 4 ending up between colours 1 and 3.
- Repeat for the right-hand strand of colour 4.
- Do the same with the left strand of colour 5, but now between the two strands of colour 3.
- Repeat this for the right strand of colour 5.
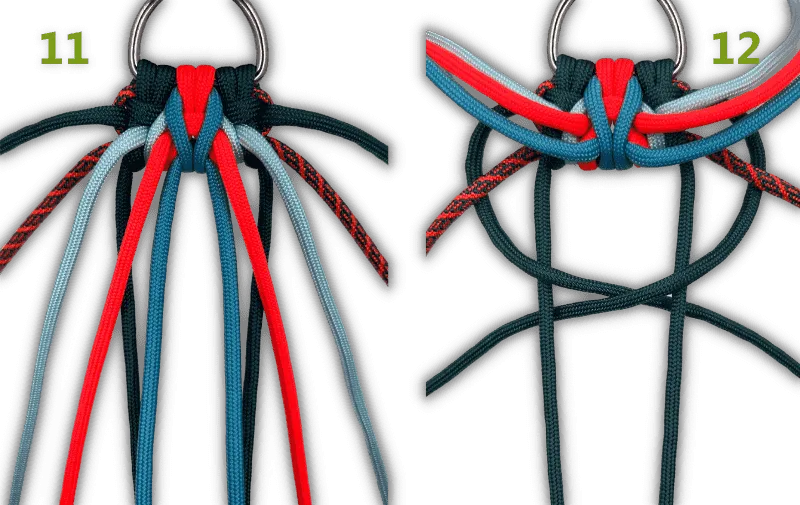
- Tighten all the strands. Do this simultaneously and gently, so that all the strands in the knot can lie neatly next to each other and you do not get any bumps at the back.
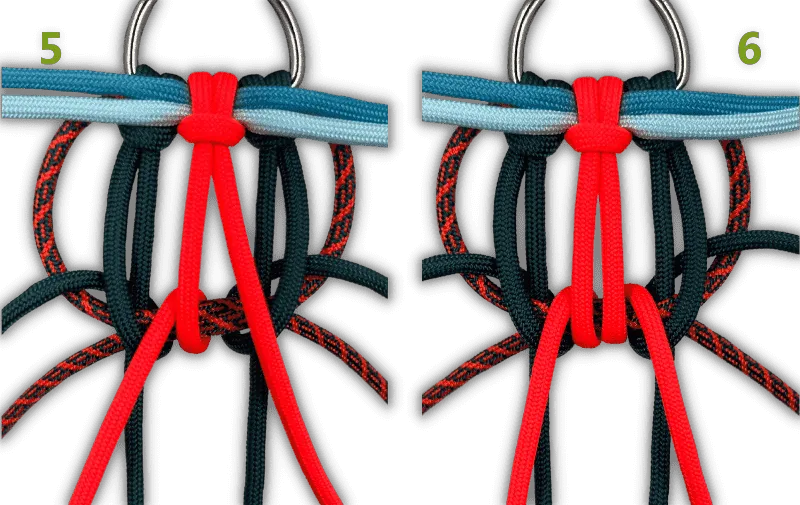
- Let both strands of colour 1 go via the middle to the back.
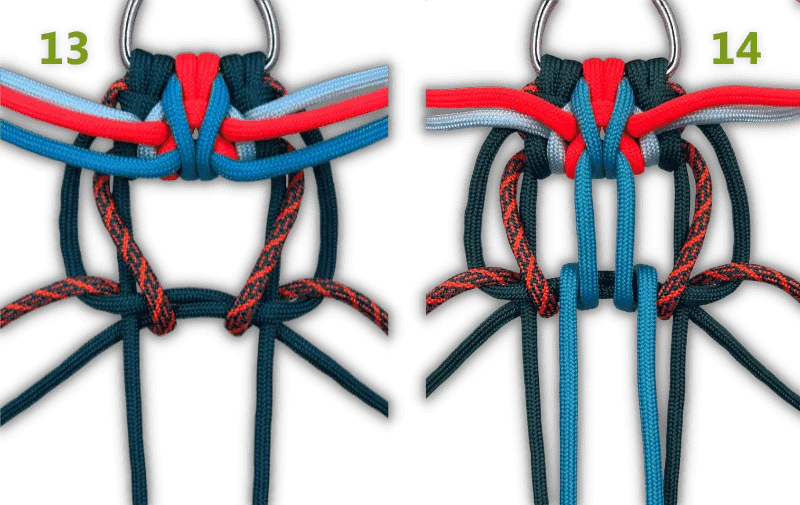
- Let colour 2 go over the horizontal strands of colour 1 to the back and insert them on both sides into the loop of colour 1.
- Colour 5 is now first to go around the horizontal strands of colour 1, coming back to the front on its own outside.
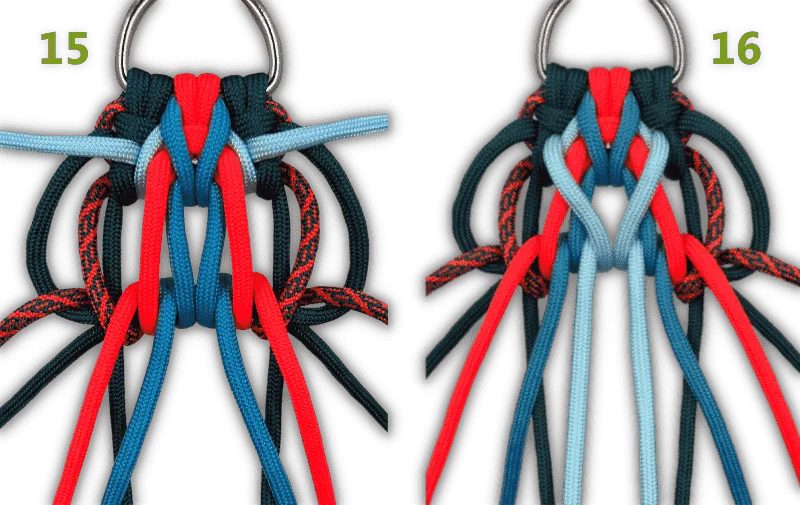
- Do the same for the strands of colour 3 on both sides of colour 5.
- Repeat this for colour 4 too, but now between the strands of colour 5.
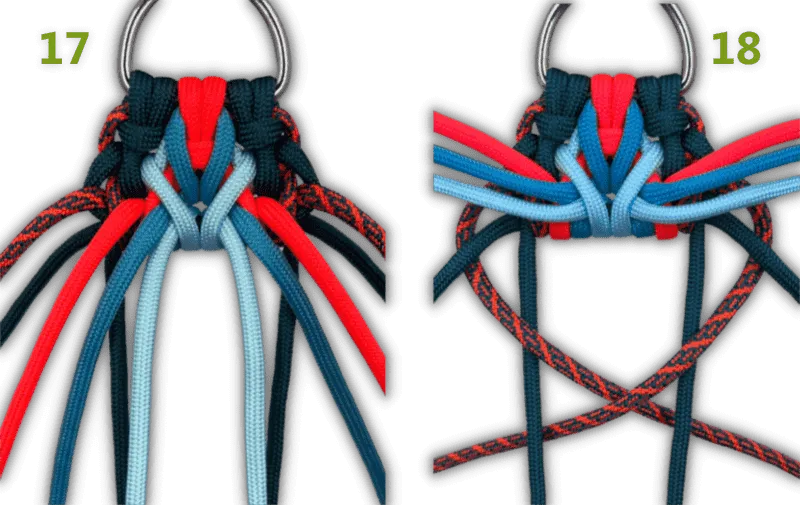
- Tighten the knot.
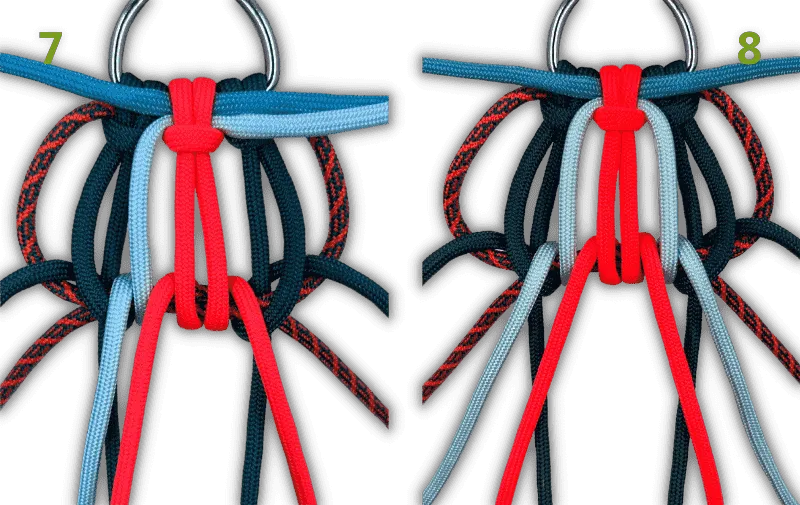
- Bring the two strands of colour 2 through the middle to the back and let them pass behind the strands of colour 1 to the other side.
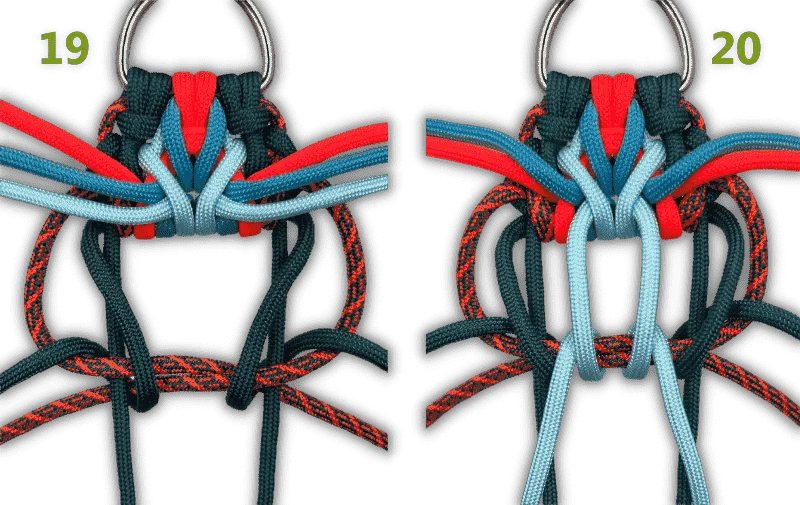
- Let colour 1 pass over the horizontal strands of colour 2 to the back and insert the strands into the loops on either side.
- Let colour 4 go around the horizontal strands in the middle and come to the front again on its own outside.
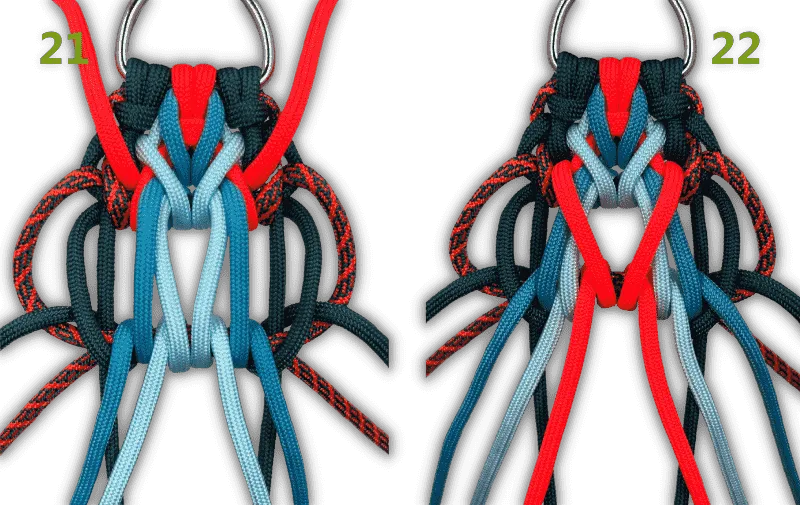
- Repeat for colour 5 on either side of colour 4.
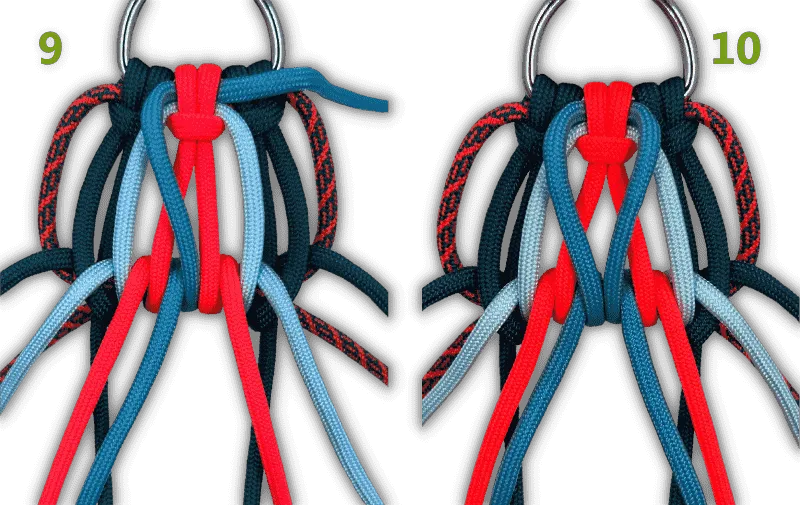
- Repeat for colour 3 between the two strands of colour 4.
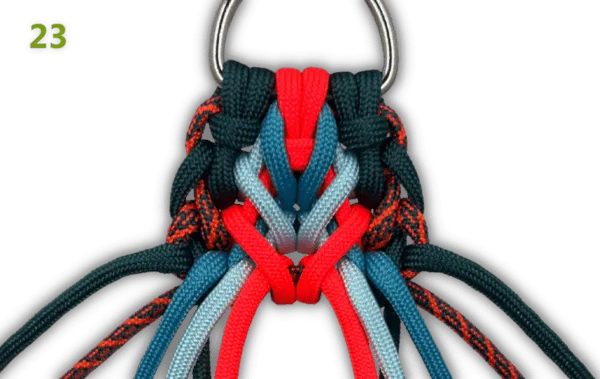
- Tighten the knot. Now start again at step 1 and continue until your work is the desired length.
Finishing Papa Mojito
Now that you have knotted the desired length, it is time to finish. As with setting up, it is important that this is done safely. Here are 5 tips for finishing your paracord creations.
We would like to thank the designer Nicola Haim-Föttinger for giving us permission to use this knot.
