Make the Niki's Butterfly knot | Tutorial
Cookie’s Wave | Tutorial
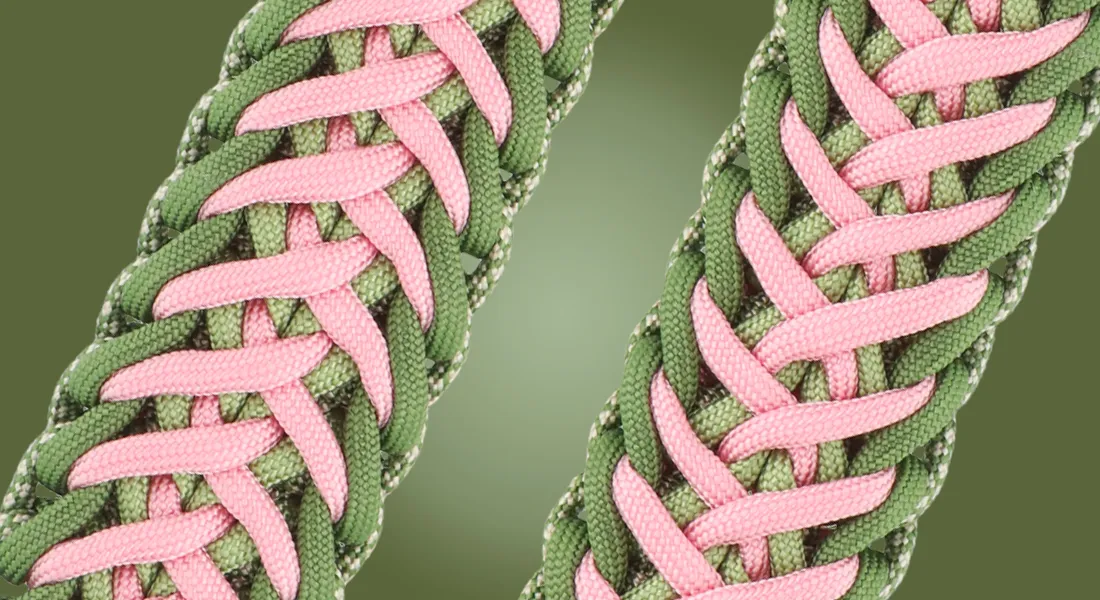
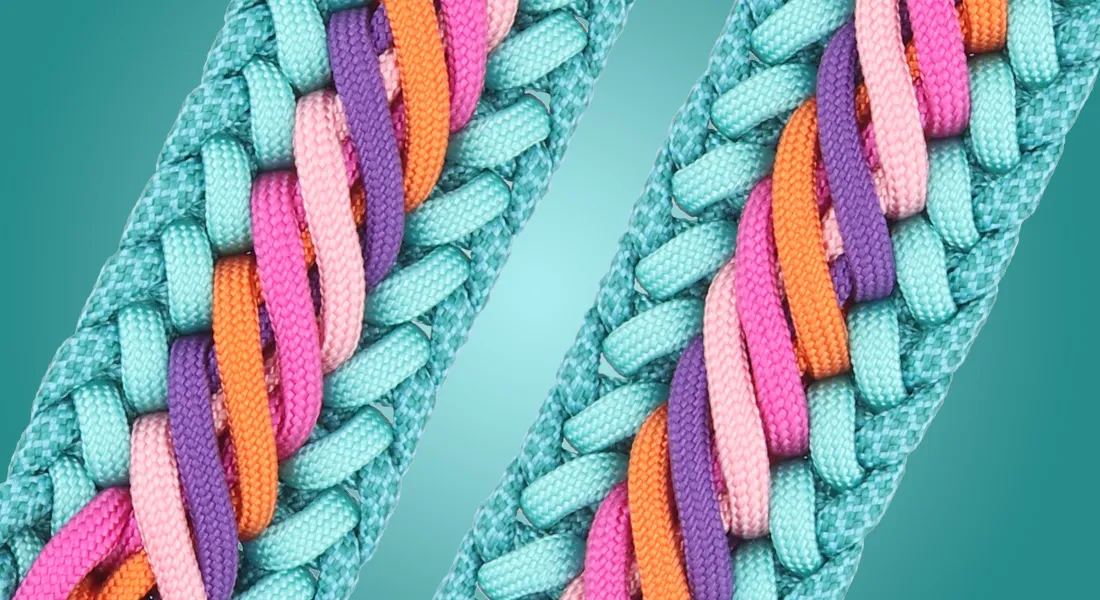
Take on the challenge of "Cookie's Wave", Silke Engels' new knot. In this tutorial, you will see step by step how to make this knot with 8 ropes.
The new knot "Cookie's Wave" by Silke Engels is made with 8 paracord ropes. This knot is about 4.4 cm wide and 1.1 cm thick when tied with paracord 550.
Because you're working with 8 ropes, keeping track can be quite complicated. Don't have much knotting experience yet? Then you can also opt for an easier knot, such as the Double KBK Bar.
Beginning of the knot
You start this knot with the Kosmetik 2.1. In the MatchMaker, you can calculate how much you need of each colour and how long the set-up should be for your project.
After you have made this double set-up, add four other ropes.
- Colour 2 goes through the three set-up knots.
- Colour 2, 4 and 5 each go through one of the set-up knots.
With each colour, make sure the left and right strands are the same length.
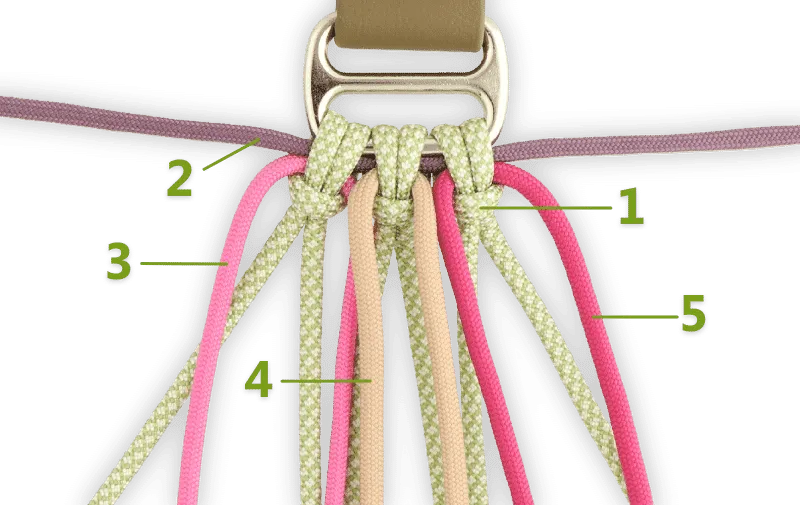
Colour 1: Holy Guacamole & White Diamonds, colour 2: Marvelous Mauve, colour 3: Rose Pink, colour 4: Mocca and colour 5: Fuchsia.
Cookie's Wave knot
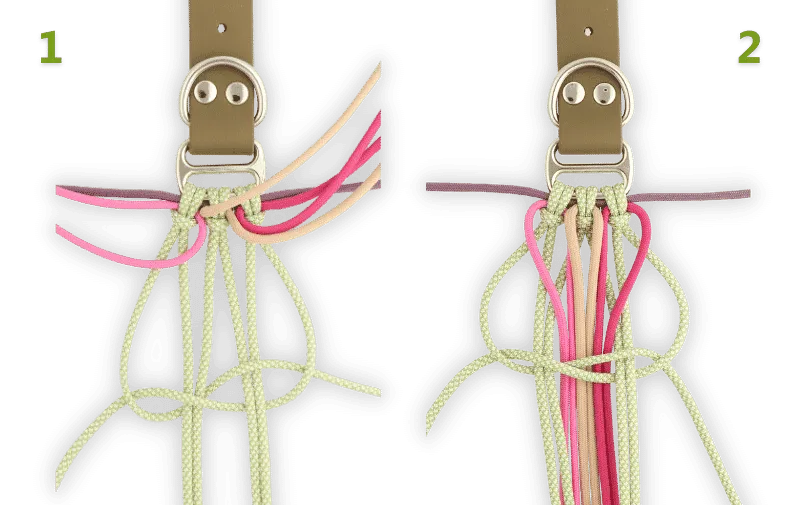
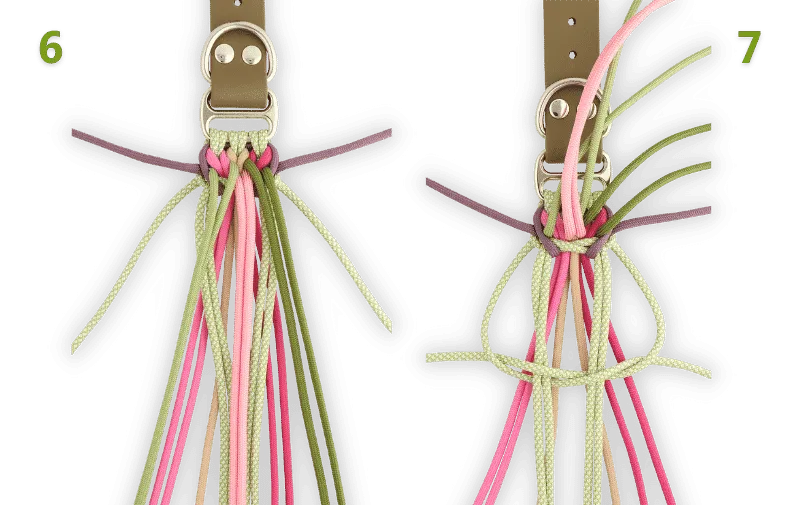
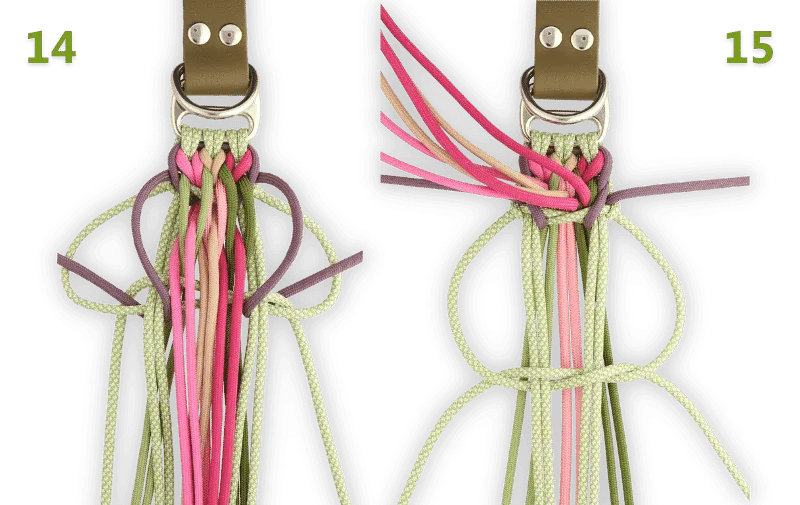
- From both sides, the strands of colour 1 first pass under two vertical strands and then over the other two vertical strands. Insert the strands on both sides into the loop.
- Let the strands of colours 3, 4 and 5 pass in the middle behind the horizontal strands of colour 1.
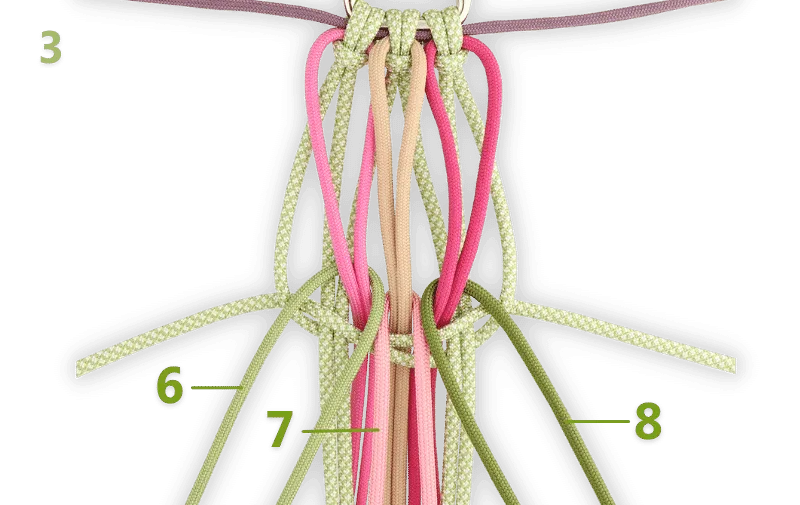
- Now add the other three colours. Colour 6 goes around colour 3, colour 7 goes around colour 4 and colour 8 goes around colour 5. Make sure the strands of each colour are the same length on the left and right.
Colour 6: Holy Guacamole, colour 7: Pastel Pink and colour 8: Fern Green.
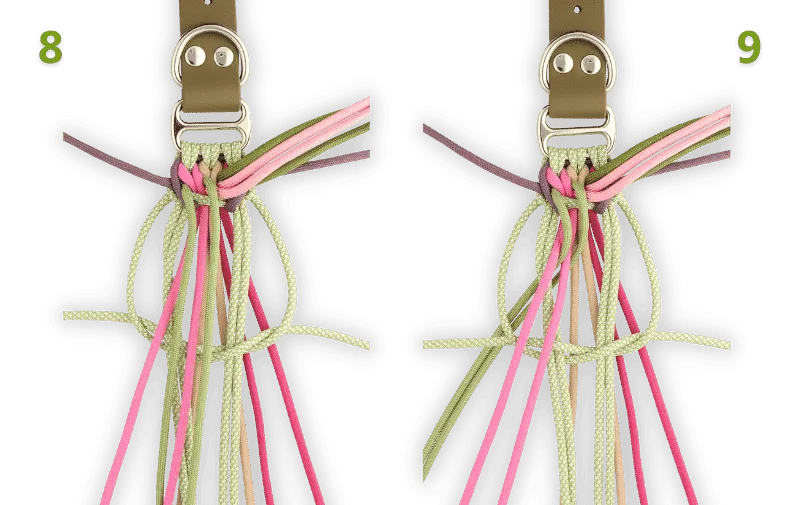
- The left strand of colour 2 now passes next to colour 6 under the horizontal strands of colour 1. Insert the strand through the loop on the side.
- Repeat for the right strand of colour 2.
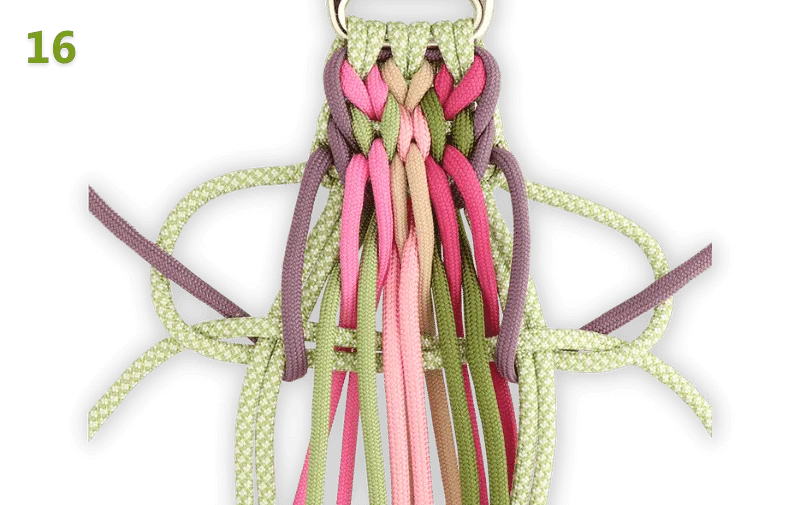
- Tighten the knot. With this knot, it is important to always pull on both the 3 colours at the front and the 3 colours at the back firmly to tighten the knot.
- From both sides, the strands of colour 1 first pass under two vertical strands and then over the other two vertical strands. Insert the strands on both sides into the loop.
- The strands of colours 6 and 3 go over colour 1. Lay the strands alternately, starting from the left side with the colour taken from behind (in this case colour 3).
- Next, let the strands from colour 6 go to the back.
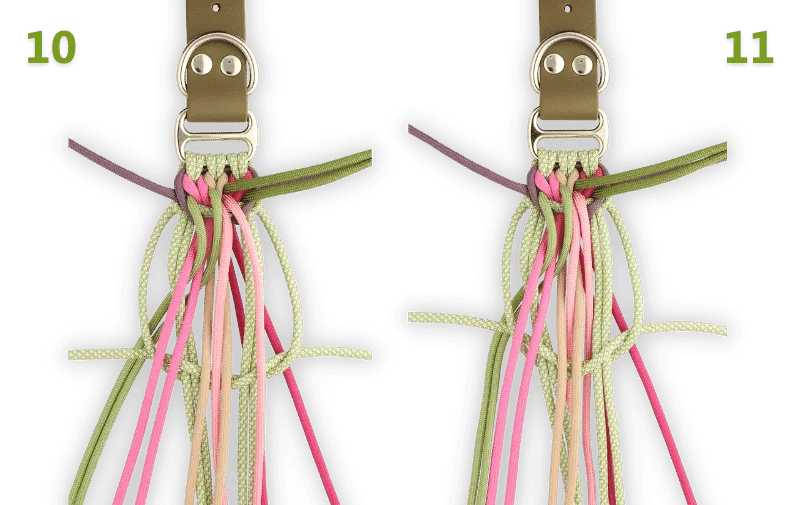
- Bring colour 4 and colour 7 to the front. Lay the strands alternately, starting from the left with the colour coming from behind.
- Then let the strands of colour 7 go to the back.
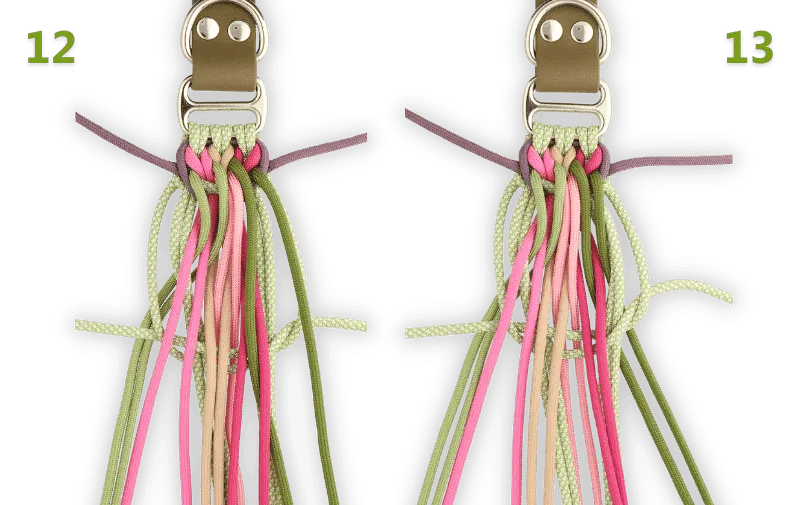
- Bring colour 5 and colour 8 to the front. Lay the strands alternately, starting from the left with the colour coming from behind.
- Then let colour 8 go to the back.
- Let the strands of colour 2 go around the two set-up strands on either side and insert them into the loop.
- From both sides, the strands of colour 1 first go under two vertical strands and then over the other two vertical strands. Insert the strands on both sides into the loop.
- Each time, bring the colours 3-8 to the front in pairs and lay the strands alternately. Make sure the colour coming from behind always starts on the left. Next, you let the other colour go to the back.
Repeat these steps until your work is long enough.
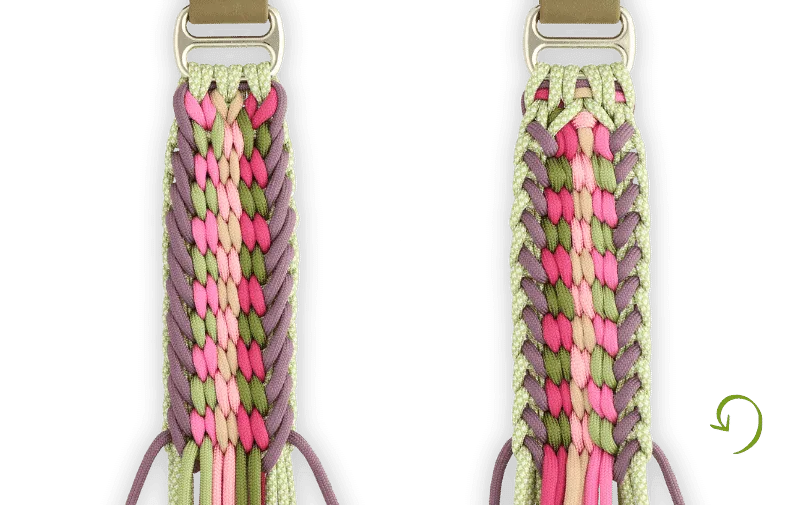
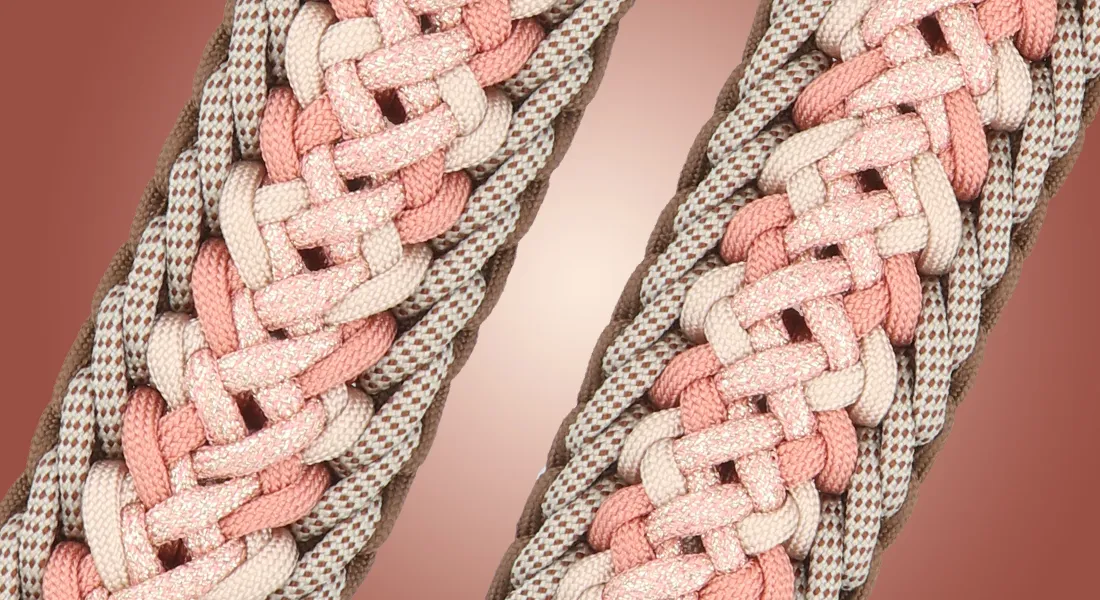
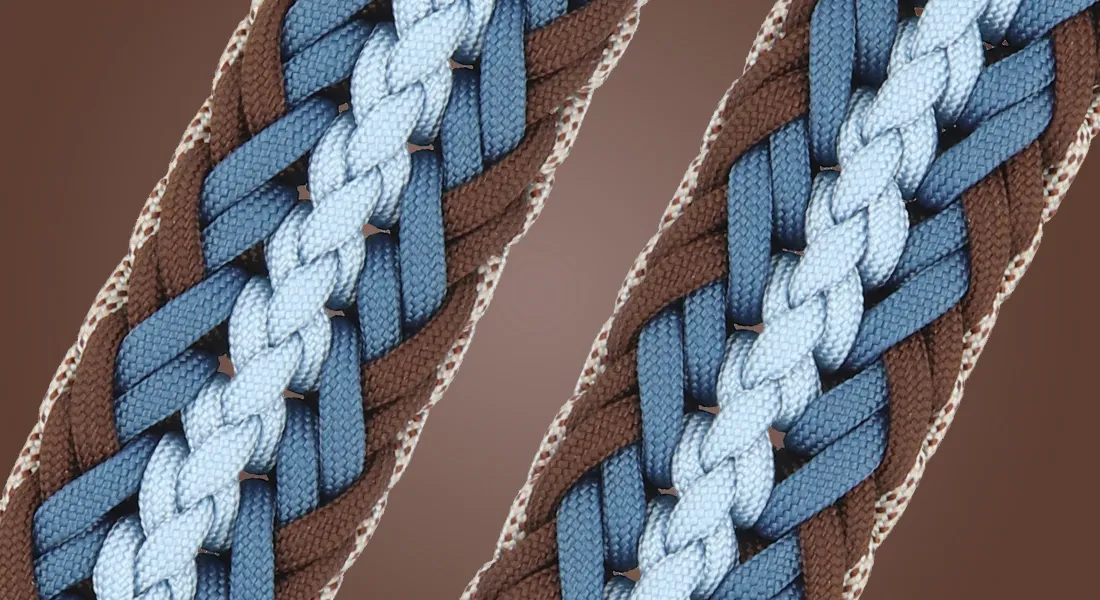
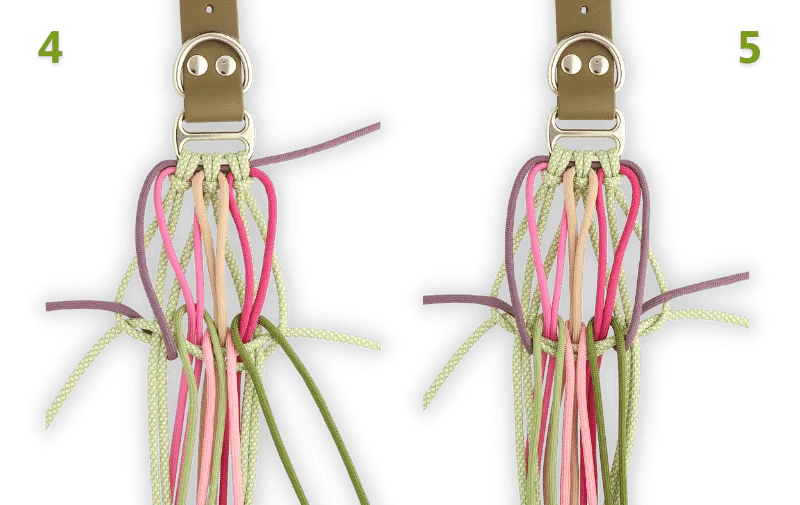
On the left in the image you can see what the front of the knot looks like and on the right you can see the back. Are the six loops in a row (i.e. from the same knot) bumpy? Then the strands are probably not pulled tight enough.
Completed your knotting and ready to finish your work? Check out these tips for finishing your paracord project.
This beautiful new knot is designed by Silke Engels. We would like to thank her for allowing us to create the first tutorial for this knot.
Want to know more from Silke or be the first to know about her new knots? Follow her on Instagram and Facebook!