Double KBK Bar | Tutorial
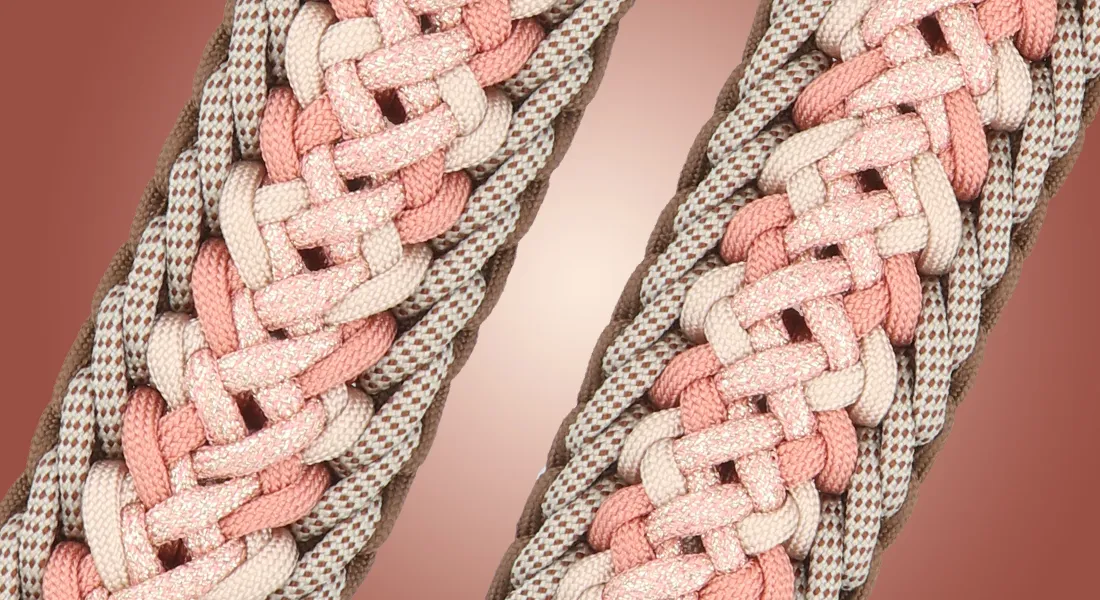
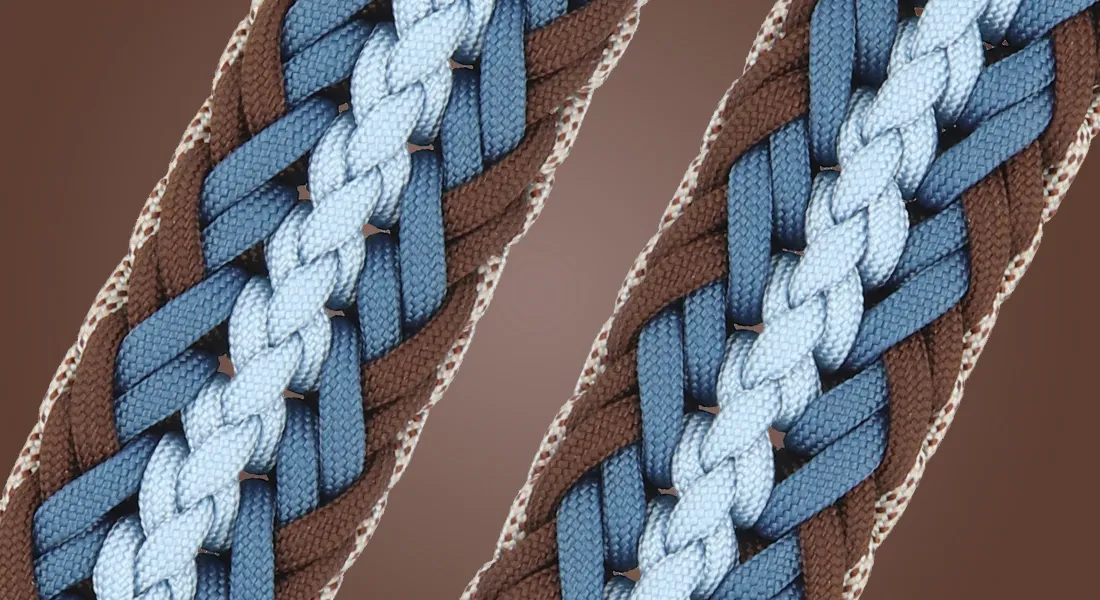
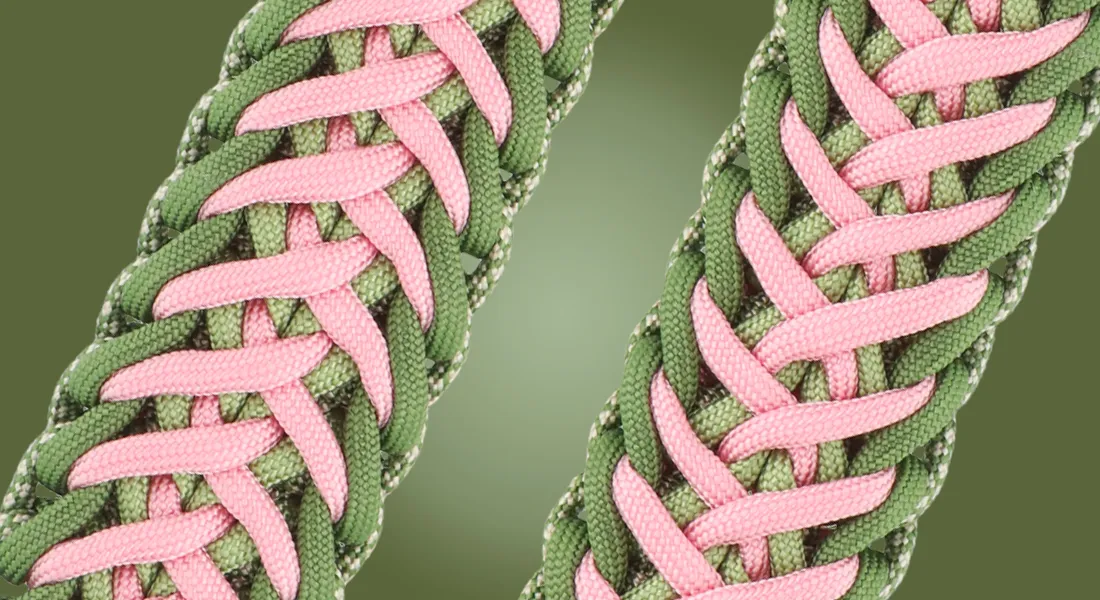
Tie the Double KBK Bar by J.D. Lenzen with paracord. In this photo tutorial you will see how to tie this knot and how to end your knotting with a clean finish.
The Double KBK Bar is designed by J.D. Lenzen. This knot is about 0.9 cm thick and 4 cm wide when using paracord type 3. The knot itself is not difficult, but the finishing off can be a little different than you are used to.
For the Double KBK Bar you use three colours of paracord. You can use different kinds of closures or spacers, in the tutorial we use two D-rings of 28 mm.
Start of Double KBK Bar
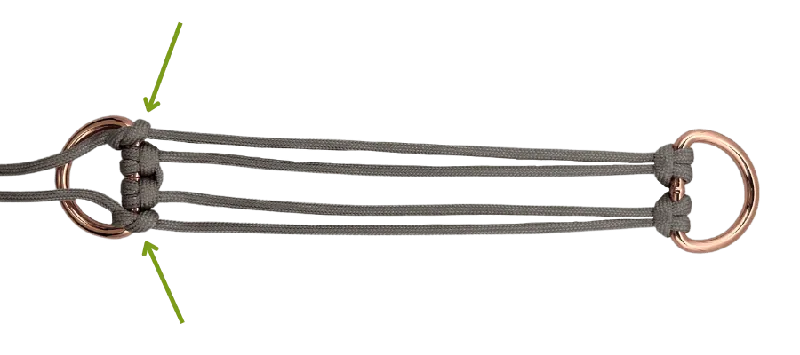
A single setup (Kosmetik 2.0) is used here, this is also safe to use for dog collars.
After you have made the Kosmetik 2.0 with colour 1, you attach the two loose strands with a temporary knot to the closure.
Then add the other colours to the setup.
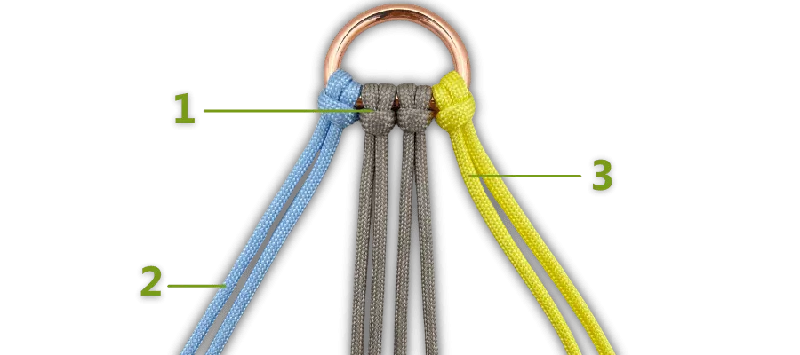
Colour 1: Taupe, colour 2: Soft Skies Blue and colour 3: Vanilla Yellow. The colours in the photos vary slightly from reality due to editing.
Measure again whether the length of your setup is correct and check whether the two strands of each colour are the same length.
Knotting Double KBK Bar
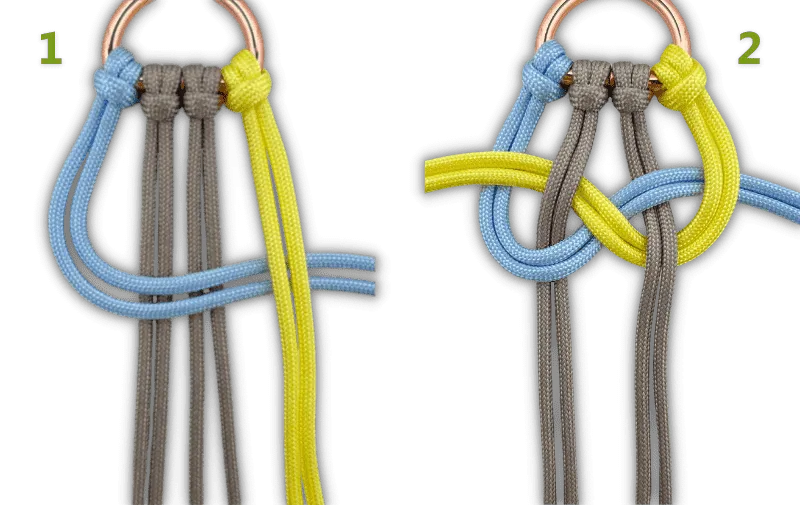
- Let the two strands of colour 2 pass over colour 1 and then under colour 3.
- Now let the strands of colour 3 pass under the two right-hand strands of colour 1, cross over colour 2 and pass under the other two strands of colour 1 and bring them to the left over colour 2.
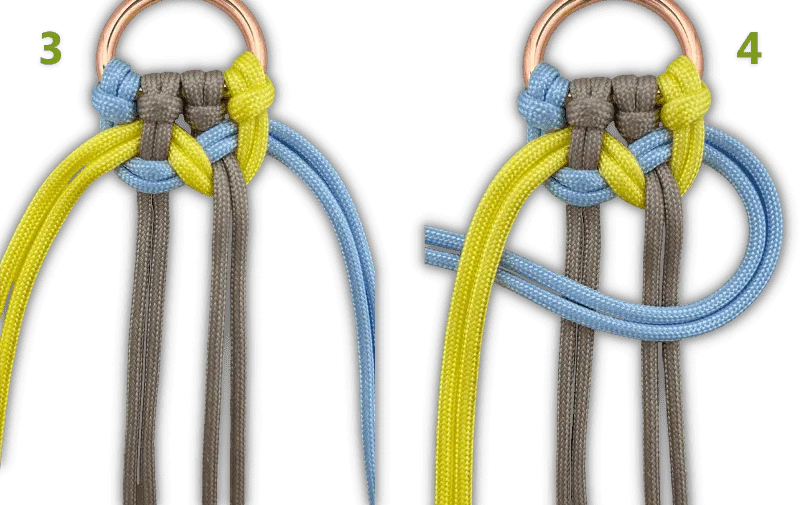
- Tighten all the strands.
- Bring colour 2 to the left over the strands of colour 1 and under colour 3.
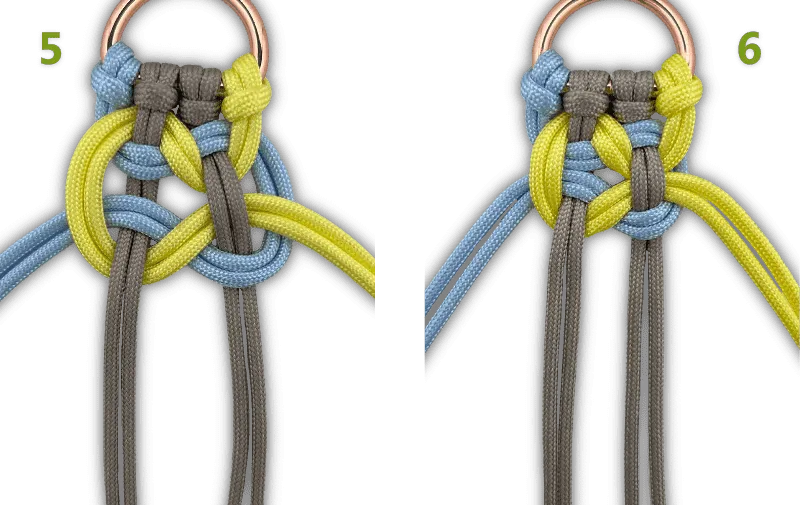
- Bring colour 3 to the right, passing under the strands of colour 1 and over the strands of colour 2 as shown in the photo.
- Now pull all the strands.
Repeat the six steps above until your knotwork is the desired length.

Finishing Double KBK Bar
After you have knotted the desired length it is time to start backstitching. This works a little differently with this knot than with most other knots. Here we will show you how to mimic the setup when finishing off.
Make sure you have these tools at hand:
- Scissors
- Tea spoon
- Paracord needle or crochet hook
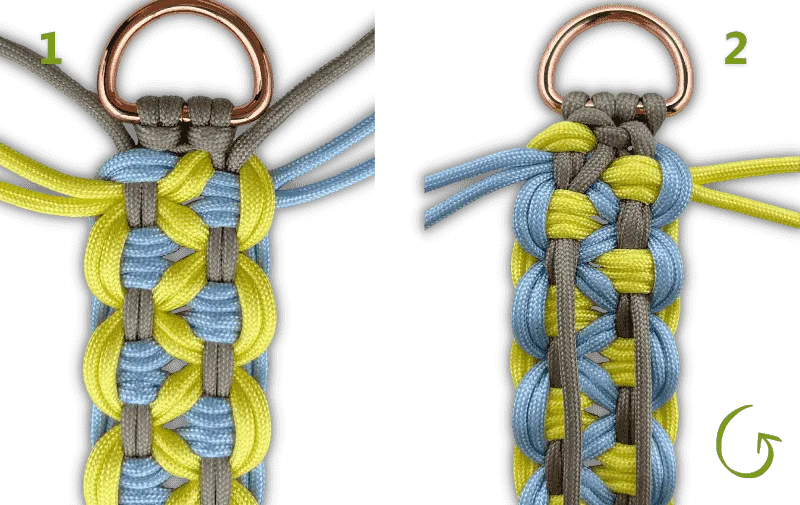
- Undo the temporary knots of colour 1.
- Turn your knotwork over. Use a paracord needle or a crochet hook to pass the loose strands of colour 1 through the cow hitch knot and under some loops of colour 3. You can see how the strands coincide with other strands of colour 1 in the process.
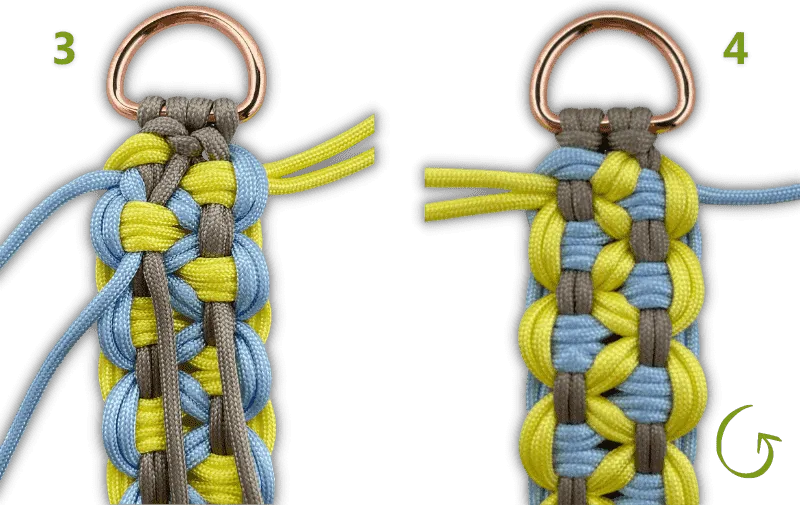
- The right-hand strand of colour 3 is now also stitched back under a couple of loops of colour 3.
- Turn your knotwork over again, so that the front is facing you.
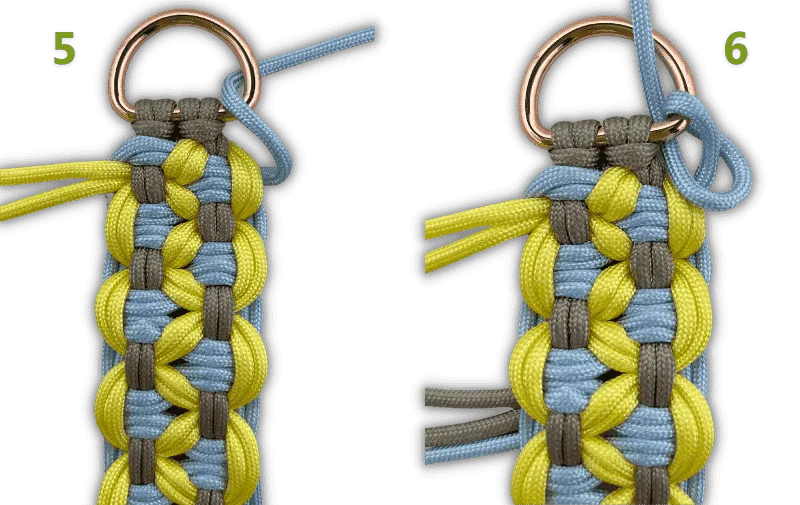
- Bring the other strand of colour 2 to the back through the D-ring.
- Let the strand come to the front again and go around itself. Insert it through the D-ring from behind.
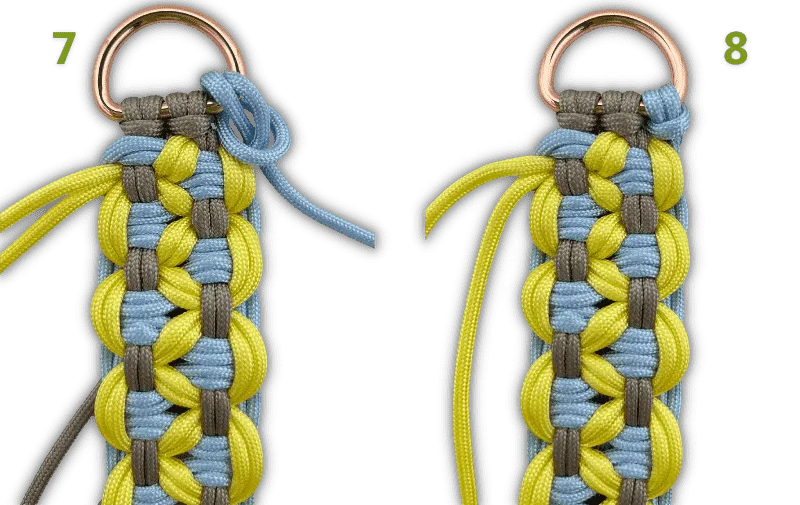
- Now insert the strand through the loop you made.
- Tighten. You can see that you have made an extra cow hitch knot.
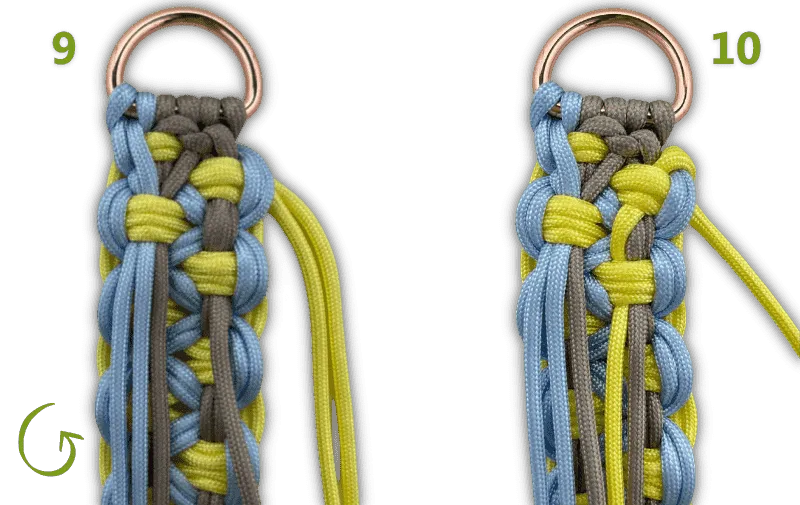
- Turn your knotwork over again. Now stitch back the strand of colour 2 under the strands of colour 3.
- Stitch back the upper strand of colour 3 under some of the strands.
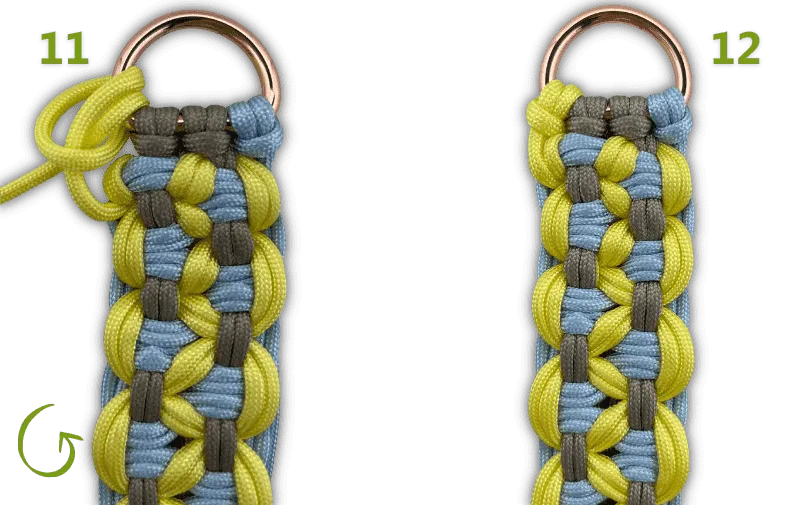
- Turn your knotwork over. Now make a cow hitch knot with colour 3.
- You can see that the end now looks the same as the beginning with the four cow hitch knots in a row.
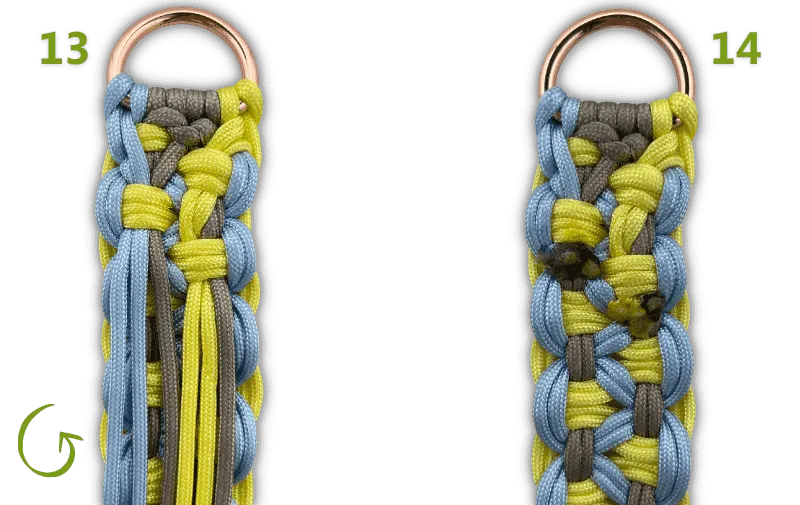
- Turn your knotwork over. Stitch back the last strand of colour 3 under some strands.
- Now cut all the strands, burn the ends and push them flat (use a teaspoon for this, for instance).

We would like to thank the designer J.D. Lenzen for giving us permission to use this knot.
