Make the Niki's Butterfly knot | Tutorial
Crazy Collar | Tutorial
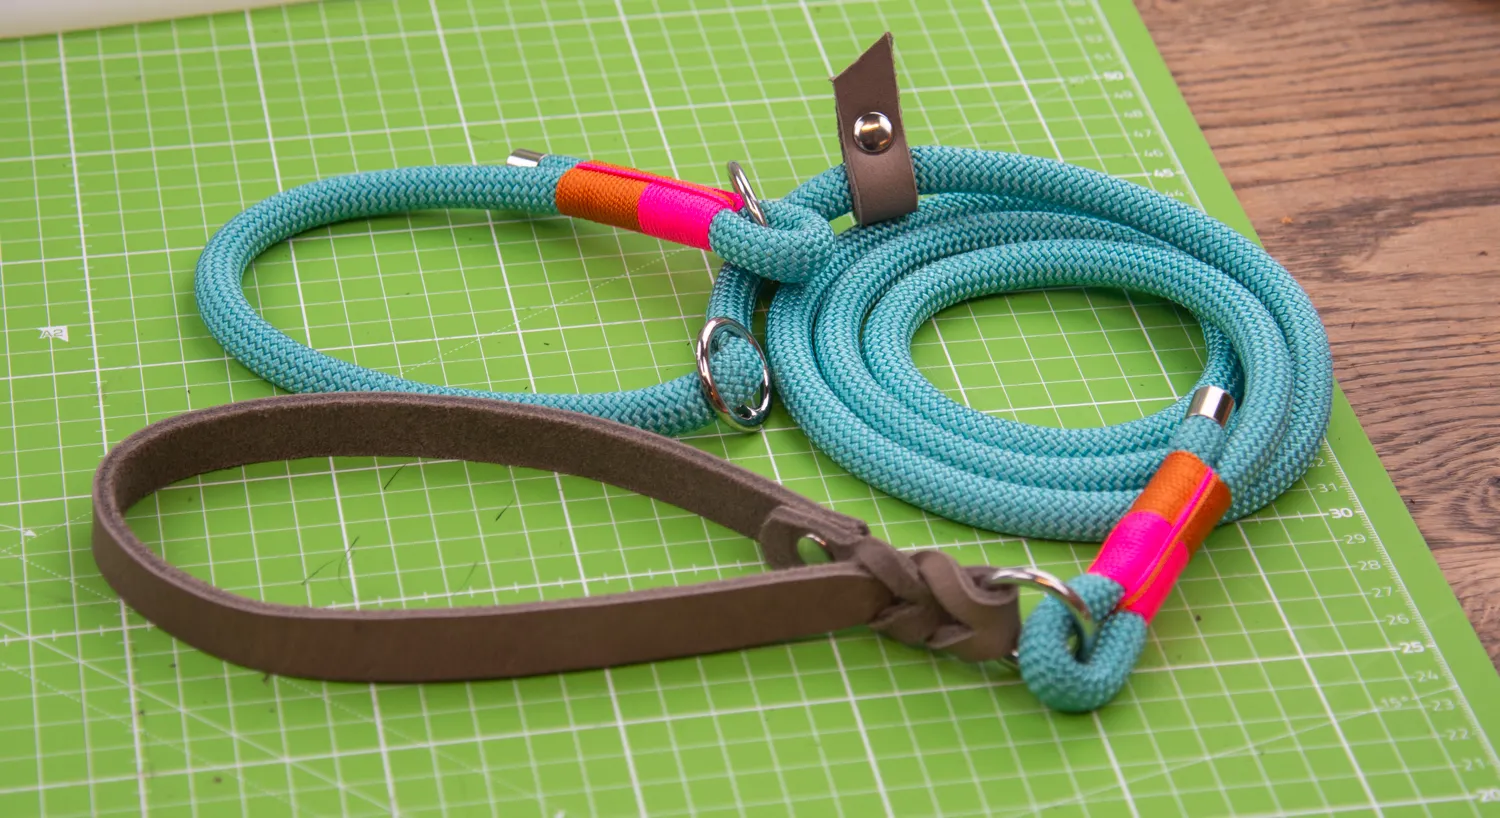
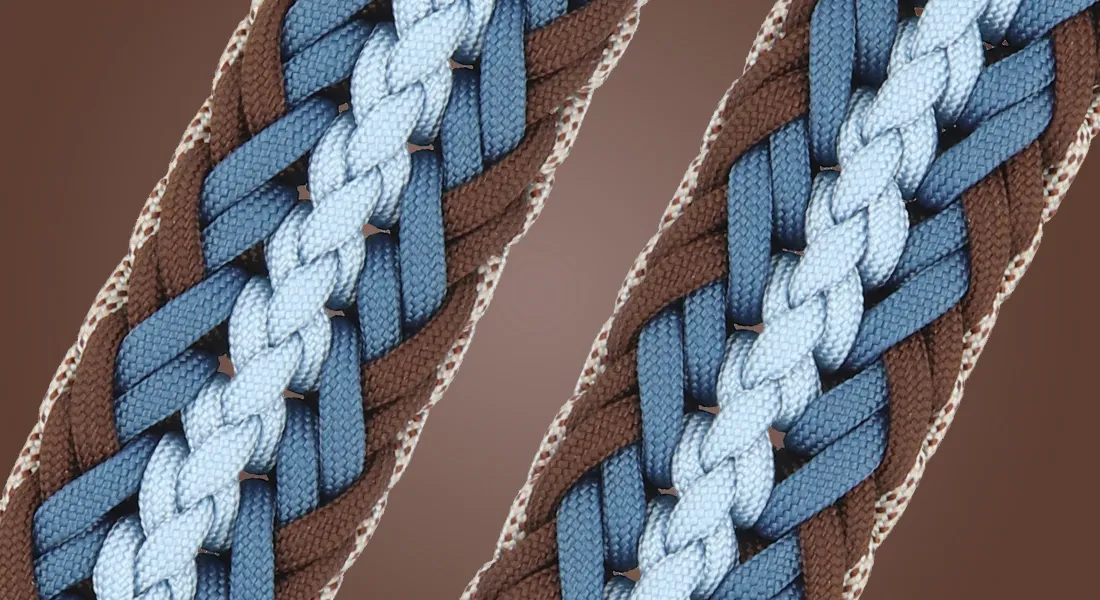
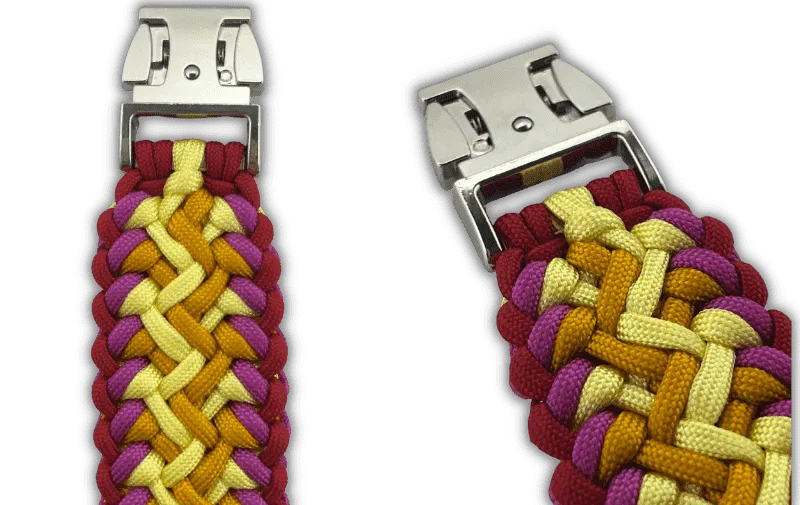
Tie the "Crazy Collar" knot with 4 paracord colours. In this photo tutorial, you will see how to make the knot and how to finish it neatly.
The Crazy Collar knot with 4 colours is great for tying your own rope collar. When you knot the Crazy Collar with paracord 550, the knot is about 4 cm wide and 1.4 mm thick.
In the MatchMaker you can choose colours and calculate how much paracord you need to use this knot for your project.
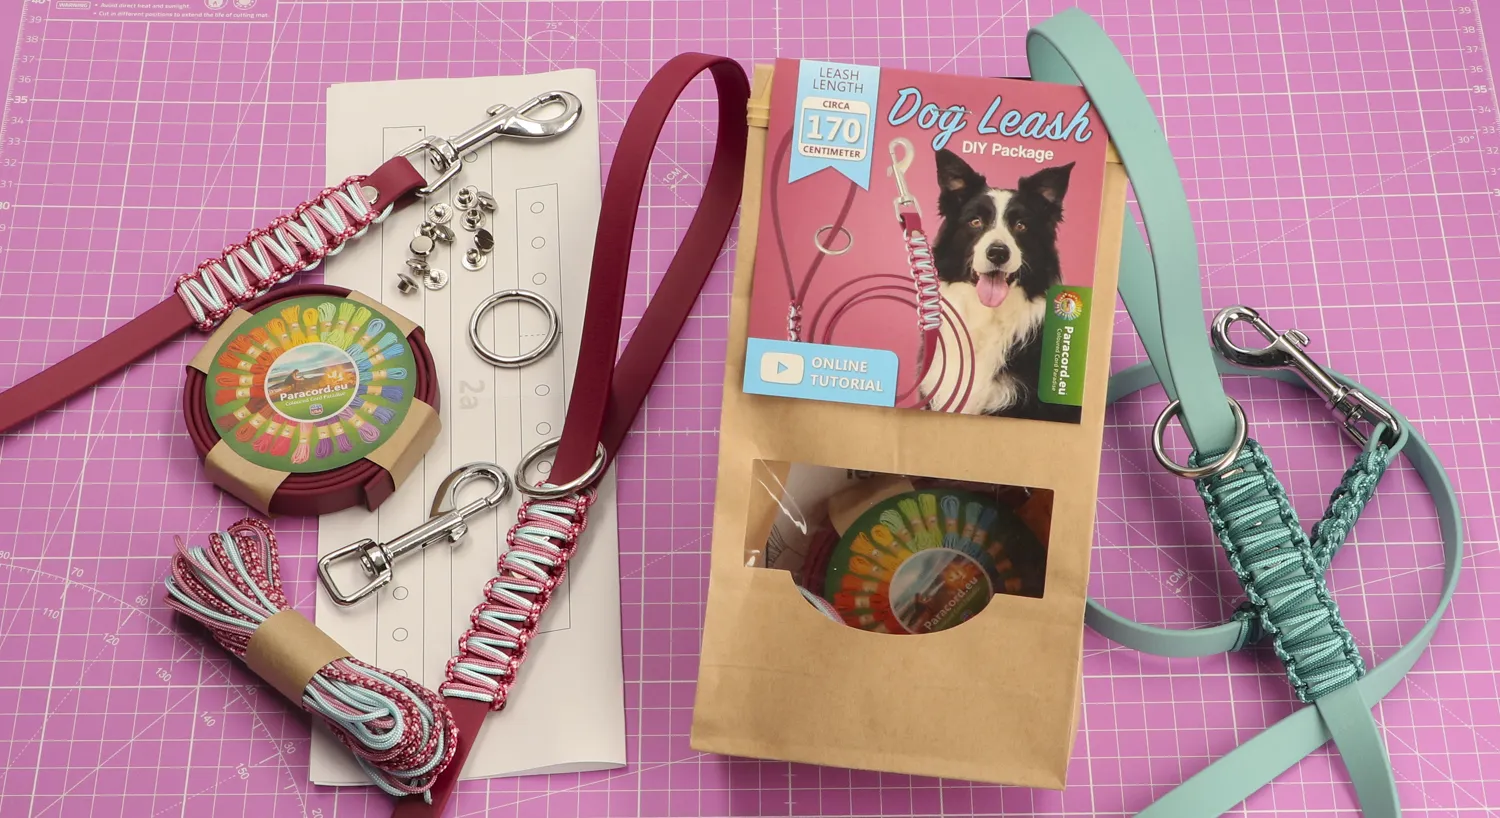
Materials:
- 4x paracord 550
- Closure
- Paracord Jig
- Tape measure
Starting the paracord knot
In this tutorial, we will use the Kosmetik 2.0 setup. After making these set-up loops, you will start adding the other colours. Below you can see where to add the colours to the set-up.
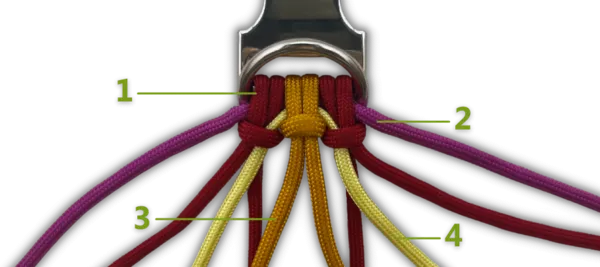
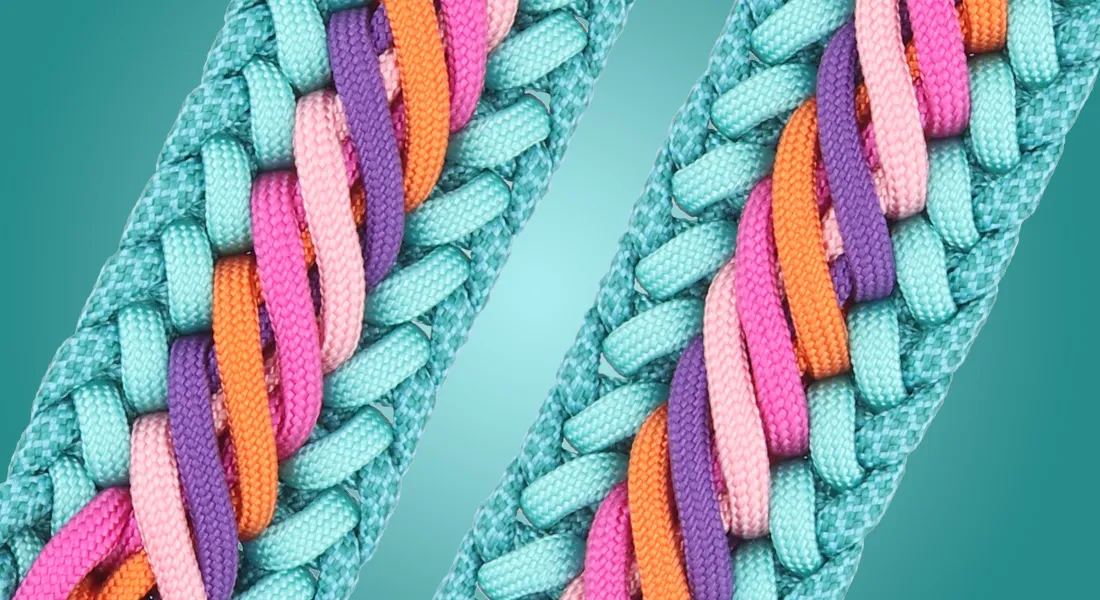
Colour 1: Imperial Red, colour 2: Passion Pink, colour: Goldenrod and colour 4: Vanilla Yellow.
Make sure the length of your set-up is still correct. Also make sure the strands of the other colours are the same length on both sides. Then you can start the knotting itself.
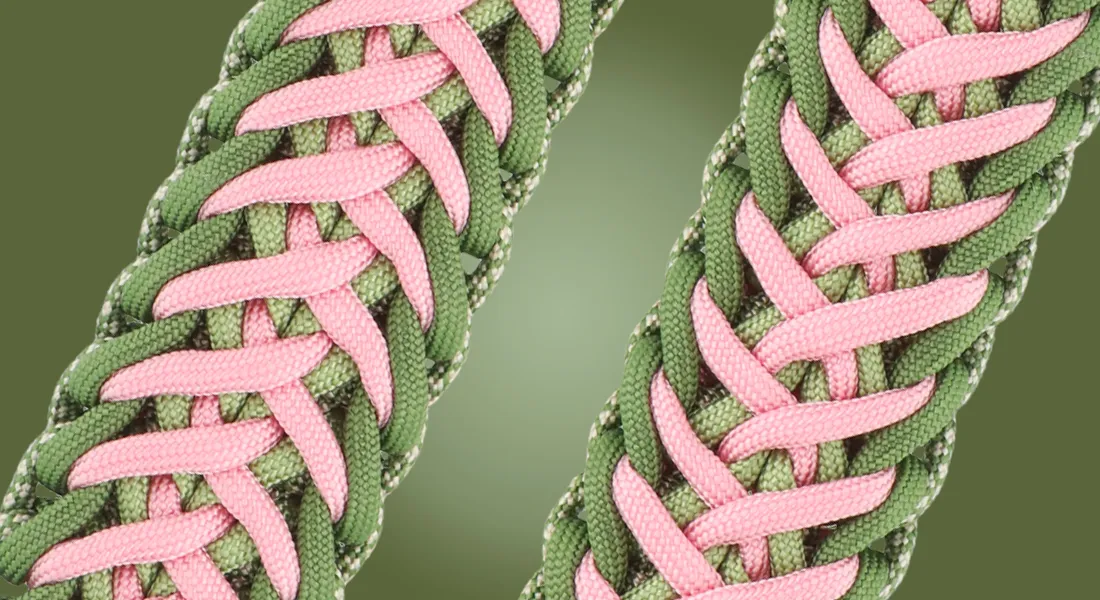
Knotting Crazy Collar
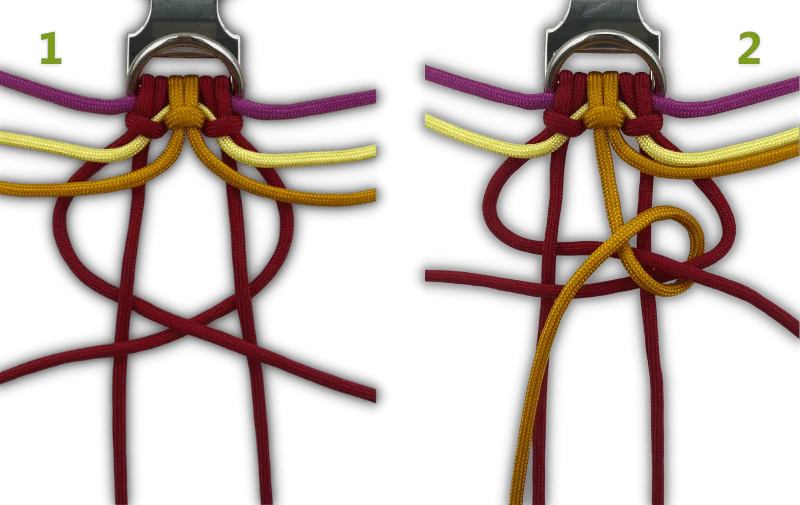
- Let the strands of colour 1 cross each other at the back and go to the side crossing over the set-up ropes.
- Let the left strand of colour 3 go around the horizontal strands of colour 1 on the right and come back to the front through the loop.
- Then let this strand go around colour 1 again in the middle.
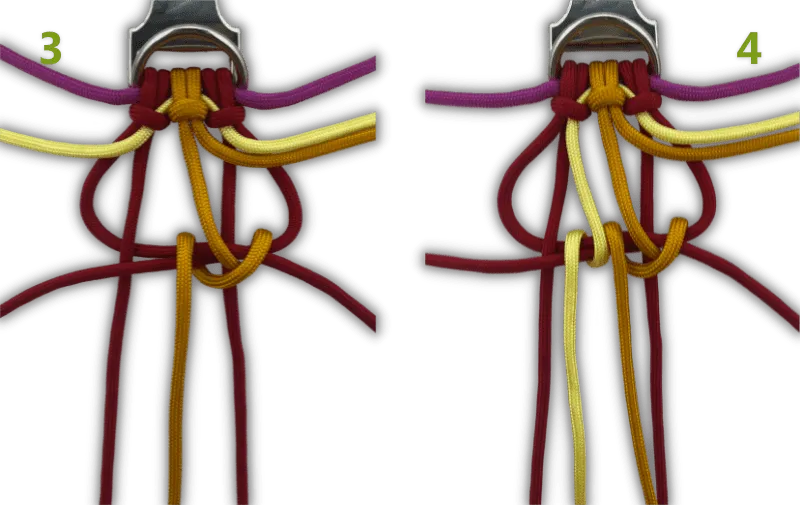
- Let the left strand of colour 4 go around the horizontal strands of colour 1 and come to the front again to its own left.
- On the left of this, let the right strand of colour 4 also go around the horizontal strands and come forward again on its own right.
- Now bring the right strand of colour 3 to the left to pass through the loop of colour 1 and come to the front again on its left.
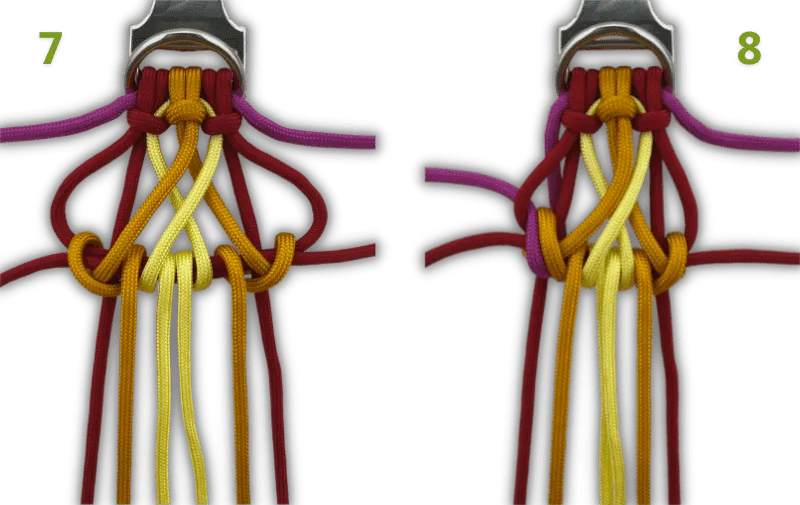
- Then this strand goes around the horizontal strands again.
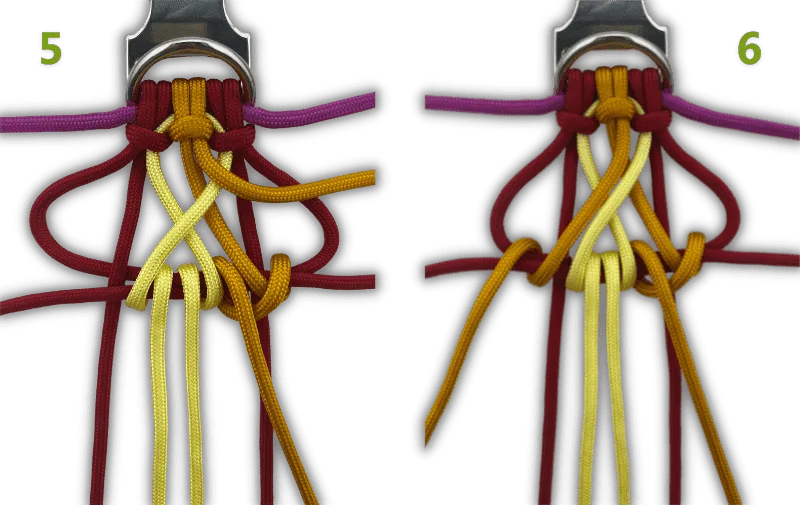
- Let the left strand of colour 2 go around the horizontal strands and insert it into the loop of colour 1.
- Repeat for the right-hand strand of colour 2.
- Tighten all the strands.
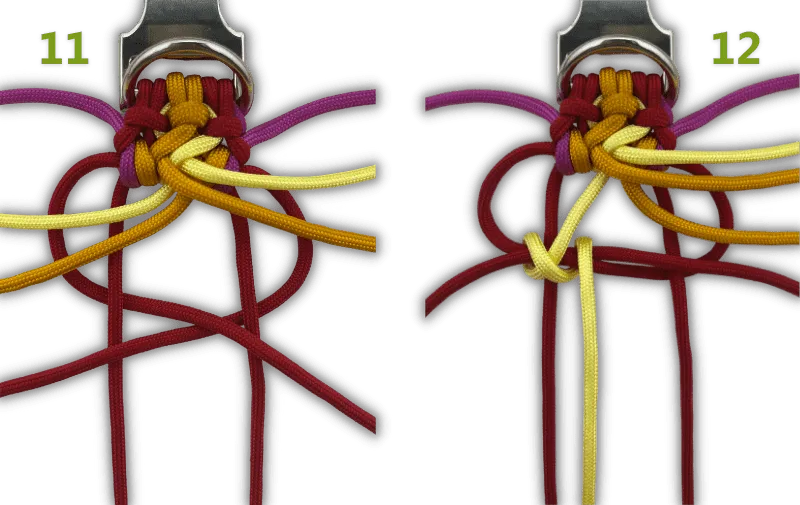
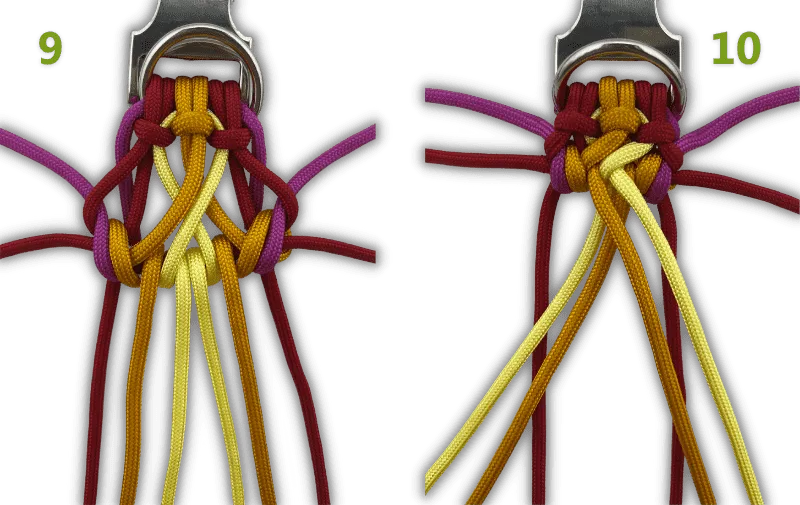
- Cross the two strands of colour 1 in the middle.
- The back strand of colour 4 goes around the horizontal strands. This strand comes back to the front via the loop and then goes around the horizontal strands again on the right.
- The back strand of colour 3 goes around the horizontal strands in the middle to come back to the front to its own right.
- The front strand of colour 3 now also goes around the horizontal strands to come forward again to its own left.
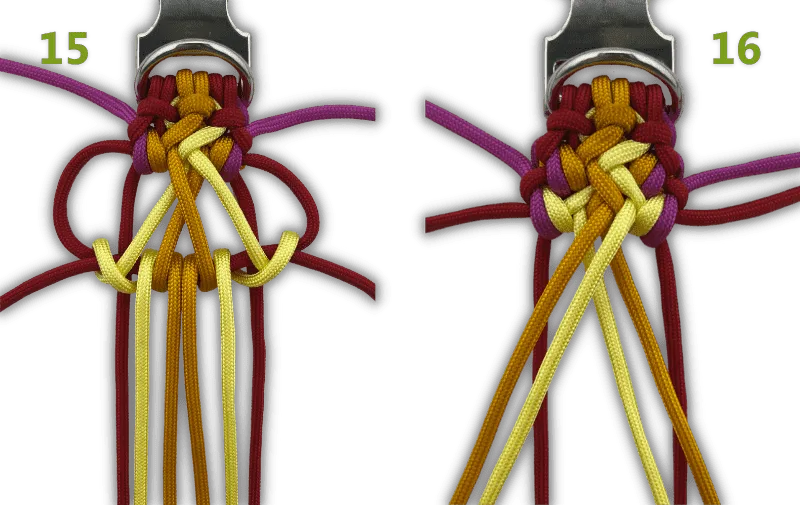
- The front strand of colour 4 goes on the right around the horizontal strands, through the loop of colour 1 and then in the middle again around the horizontal strands.
- As in steps 8 and 9, let the strands of colour 2 go around the horizontal strands and insert them into the loop of colour 1 on either side. Tighten the knot.
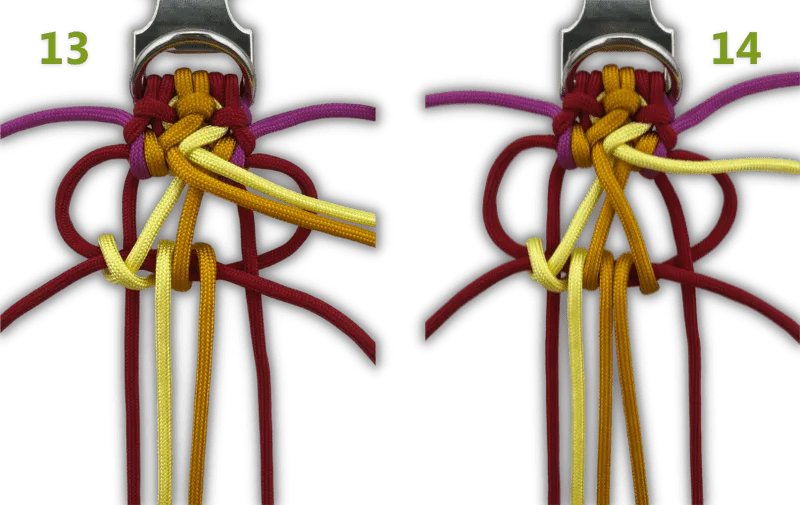
Repeat the above steps until your knotting is long enough.
Finishing off Crazy Collar
Now that you are done with the knotting itself, it is time to finish off your work. It is important that you do this firmly so that the rope does not come loose.
Tools used:
- Scissors
- Tea spoon
- Paracord needle or crochet hook
Since aesthetics is also an important aspect, we try to make the beginning and end as similar as possible.
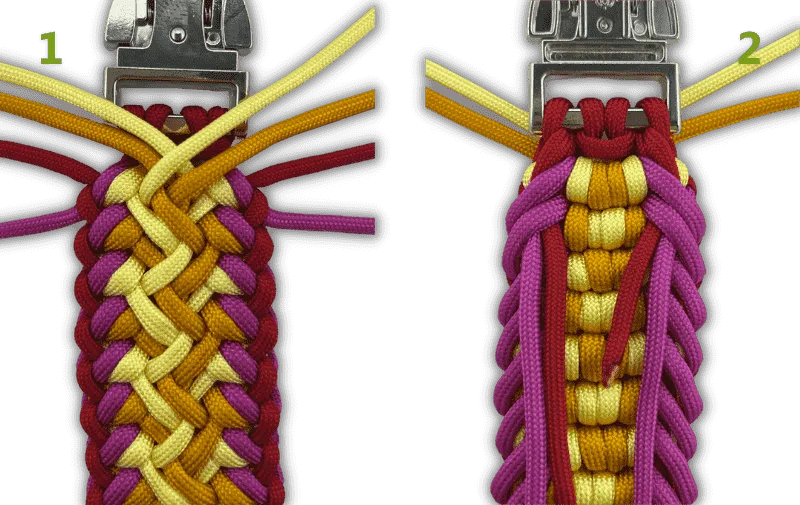
- After the last knot, the strands of colours 3 and 4 are on the front and the strands of colours 1 and 2 on the side.
- Insert the strands of colours 1 and 2 at the rear side under a couple of loops of colour 2.
- Cross the strands of colour 4 and let them go to the back between the cow hitch knots of colour 1.
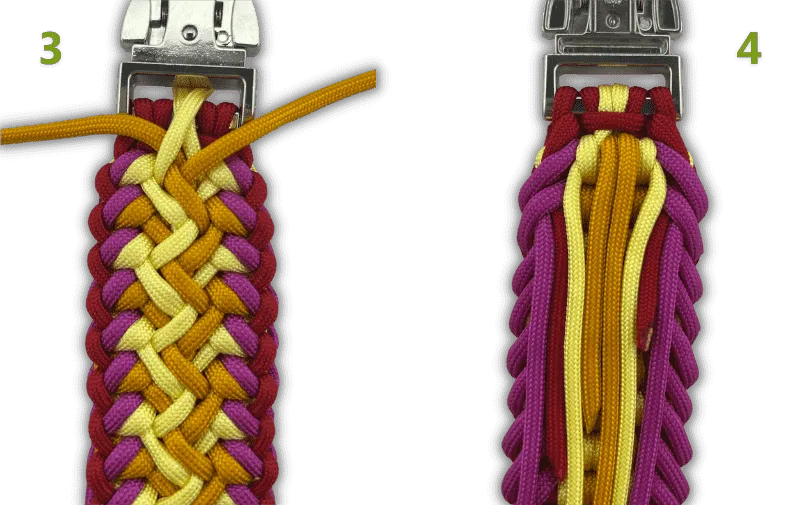
Tip: Want to make it look like colour 4 is also a cow hitch knot here? Then thread one of the strands back to the front below the buckle, cross over the strands of colour 4 and then thread the strand again through the knotwork to the rear.
- Insert the strands of colour 4 as shown in the picture under loops of its own colour. Bring the strands of colour 3 under the buckle to the back.
- Insert the strands of colour 3 twice through loops of their own colour.
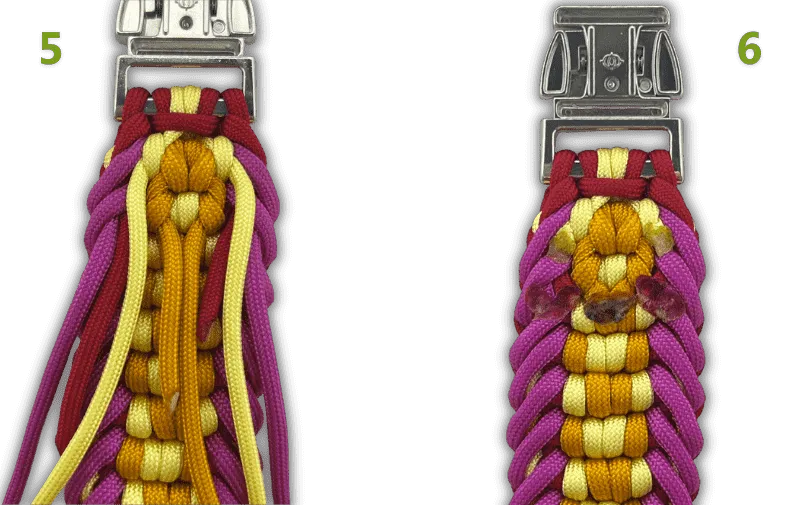
- Now cut all loose strands. Burn the ends and flatten them (you could use a teaspoon for this).
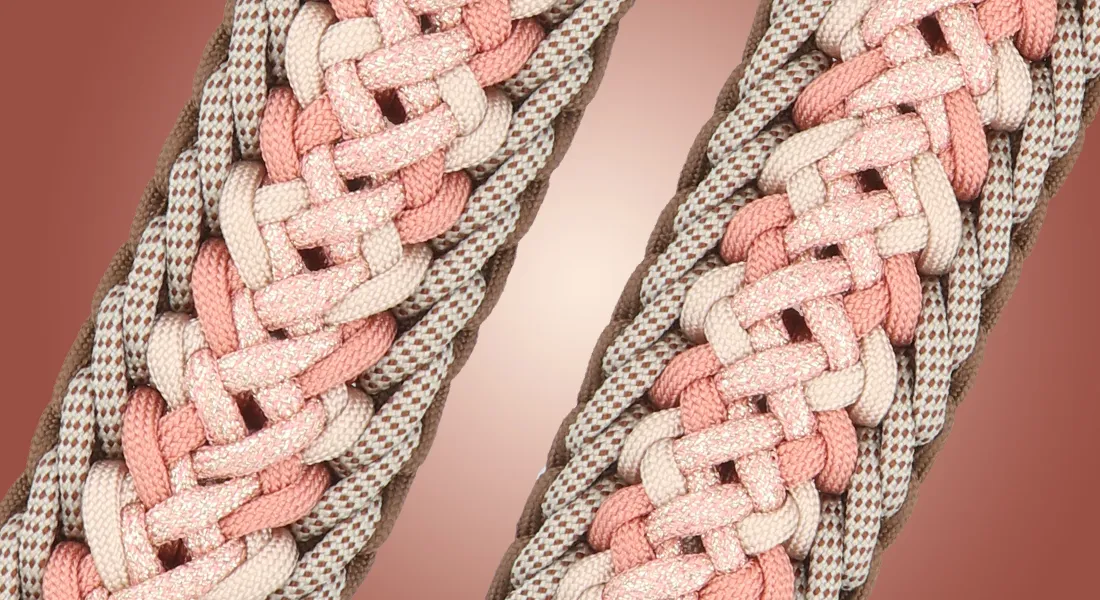
The end result is a neatly finished collar, which appears to have 3 cow hitch knots on either side of the buckle.
Finishing paracord neatly is something that can take some practice. Give yourself time to get better at this.
We thank designer Jeanette Hanf for letting us use this beautiful knot. Check out more of her work on Facebook or Instagram.