Make the Niki's Butterfly knot | Tutorial
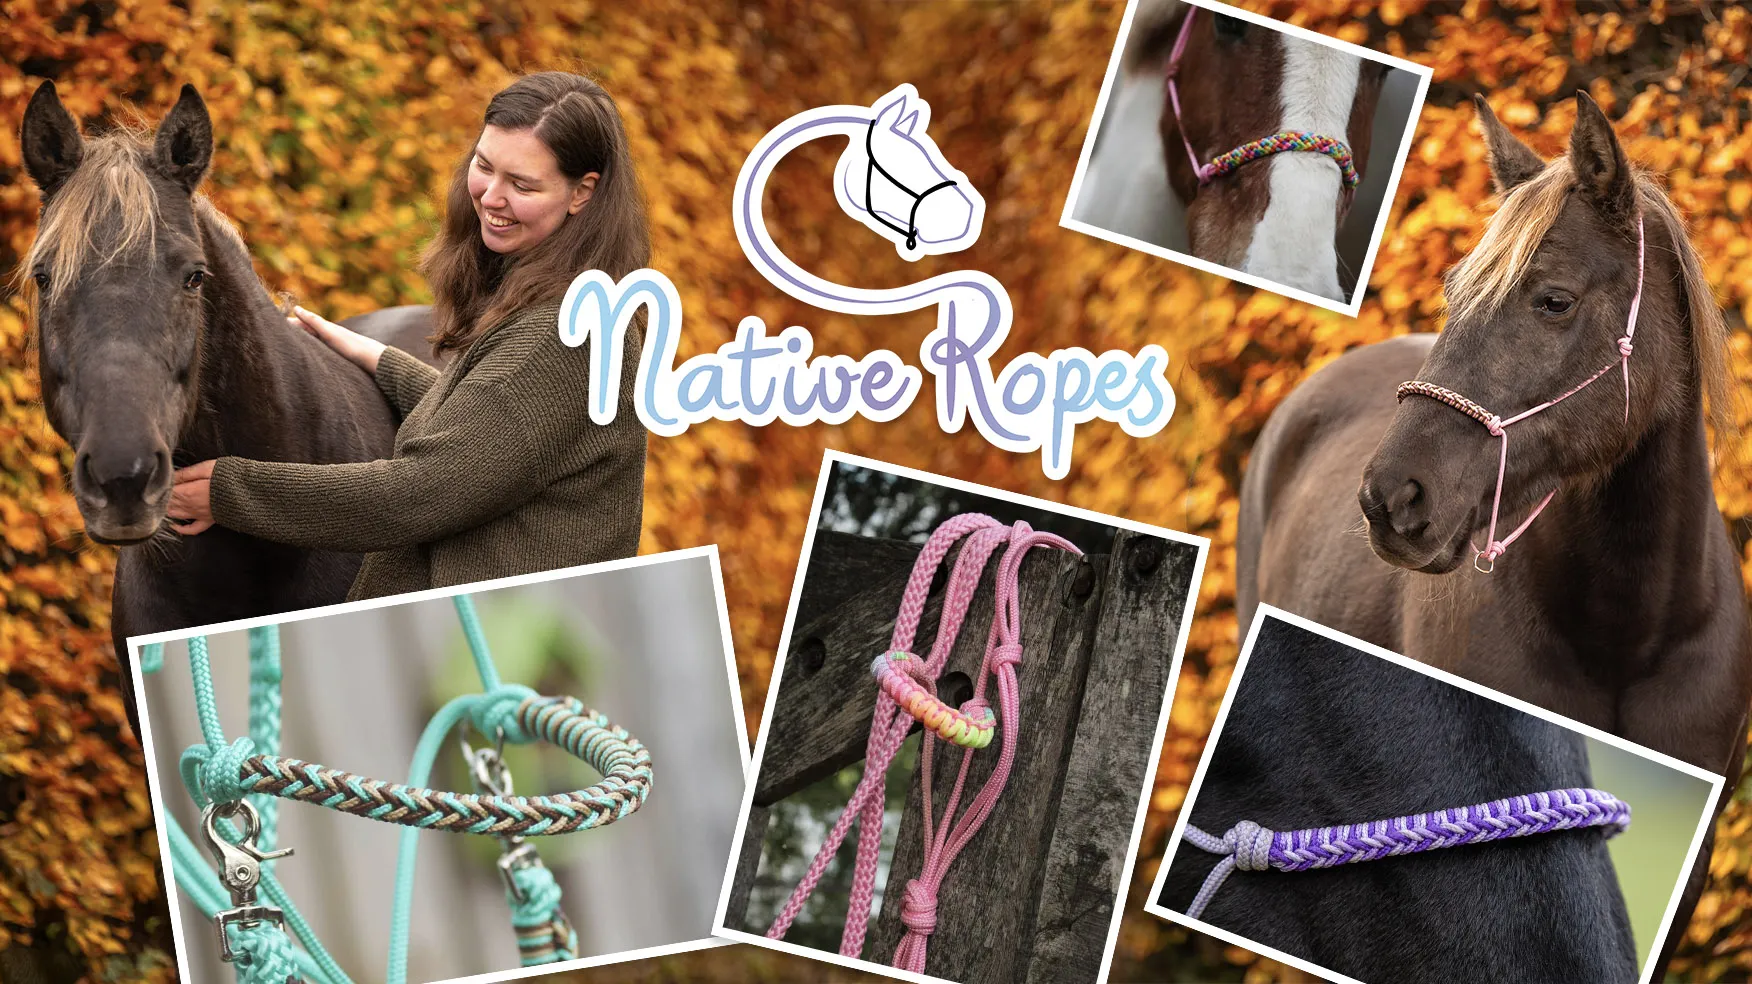
How to tie a rope halter for your horse | Tutorial
Make a beautiful rope halter for your horse or pony! In this tutorial, you will see how to make a halter with PPM rope and how to decorate the nose piece with paracord type 1.
 With the DIY kit for a rope halter, you can tie your own colourful halter out of PPM and paracord. On this page, you will see how to turn the rope in the kit into a fun halter for your horse or pony.
You can, of course, also follow this tutorial without having the DIY kit. In that case, you need to make sure you have arranged all the necessary materials.
These tools are used:
- Scissors
- Blowtorch
- Loctite 401 (alternative: 2-component glue)
- Pliers
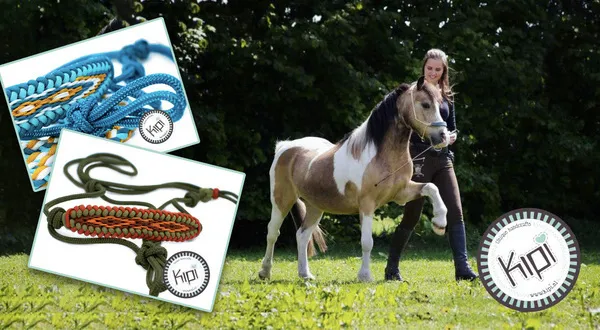
This halter was designed by Femke van der Valk of the brand ‘Kipi’. The kit and accompanying instructions were also created in collaboration with Femke. Take a look at her website and follow her on Facebook and Instagram!
Note: never use this rope halter to tie your animal to anything. This is because the rope is so strong that your horse will not be able to get loose if, for example, he gets scared and starts hanging in the halter, which could cause him permanent injury.
Determining rope halter sizes
For a fitting halter, you need to know how long each piece should be for your horse or pony. The table below shows the lengths in centimetres you will need for the tutorial's rope halter if you use standard halter sizes.
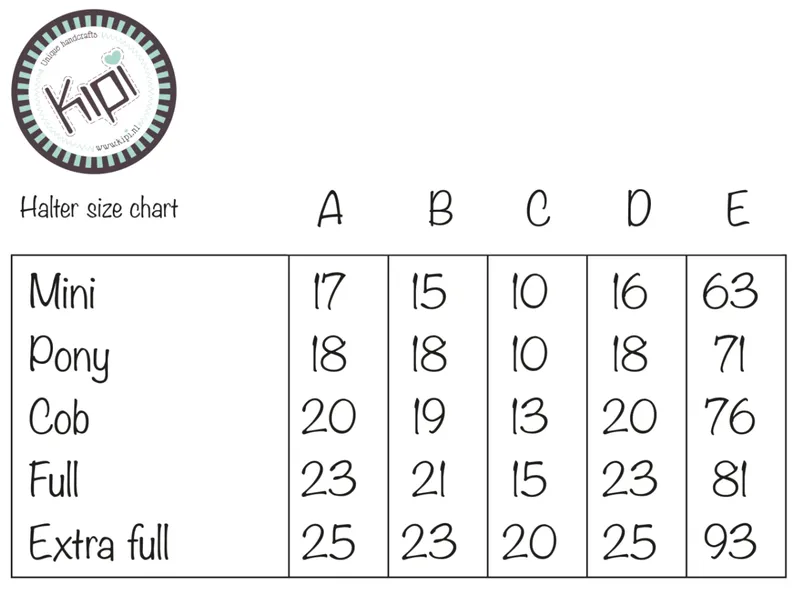
Size chart: Lengths of the halter parts in centimetres for standard halter sizes.
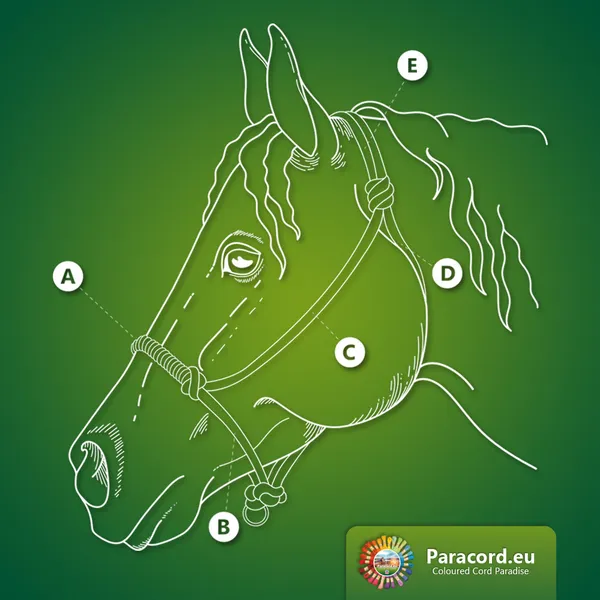
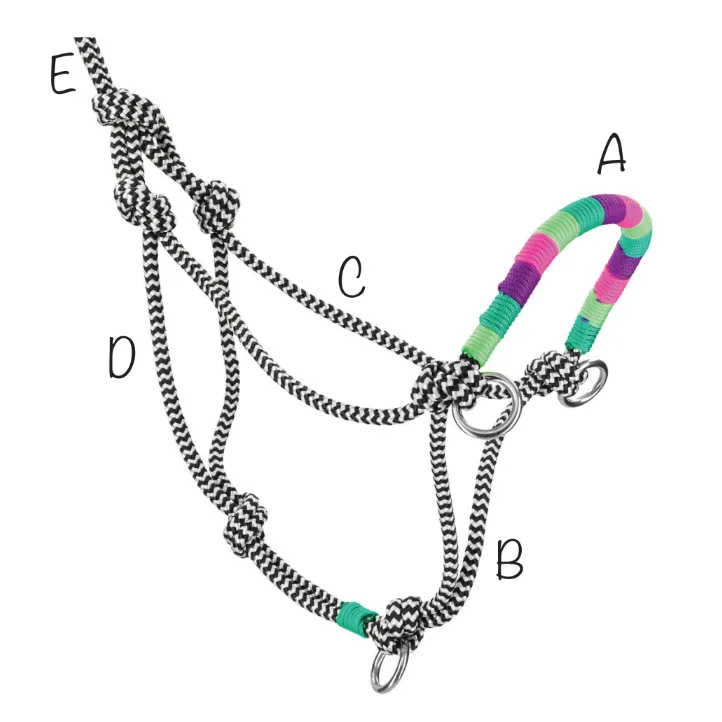 The letters A, B, C, D and E in the chart refer to the different parts of the halter. The illustration shows which parts they correspond to.
A: Nose piece
B: Chin piece
C: Cheek piece
D: Throatlatch
E: Crown piece
Don't know which category your horse falls into, or do the standard halters not fit your animal? Then you can measure your horse's measurements yourself. The picture below shows what you need to measure for the different parts. If you have an old fitting halter at hand, you can also use that to measure the lengths of the various parts.
How to make a rope halter
This tutorial shows you how to tie the rope halter. Below the video you will find additional explanations.
Nose piece and chin piece
Find the middle of the cord. This is where the first knot will be tied. If you want to make a sidepull halter, you add a ring to this knot.
To the left of this knot, you tie the second knot. For the sidepull halter, add a ring to this knot as well. The distance between these two knots is the length of the nose piece (A). Make sure this is the right size for your horse.
Next, you are going to make the knot that joins the two parts of the chin piece (B). The ring added to this knot is not optional, this is the ring to which you will attach the halter rope. The distances from the first two knots to this third knot are collectively the length of the chin piece.
Throatlatch and cheek pieces
Measure the distance from the chin piece to the throat latch and tie a knot there. The distance from this knot to the loop you will make next is the length of half the throatlatch (D).
With the same rope, you now go through the left knot of the nose piece, follow the entire knot with this strand. The distance from the loop to the nose piece knot is the first cheek piece (C). Make sure this is the right length and then pull the knot tight.
Now follow the nose piece with the rope and then also put it through the right-hand knot of the nose piece. Follow the knot in the same way as before.
You form the second cheek piece and and the second piece of the throatlatch at the same time when tying the next knot. Make sure both cheek pieces and both halves of the throatlatch are the same length. Once this is the case, you can pull the knot tight.
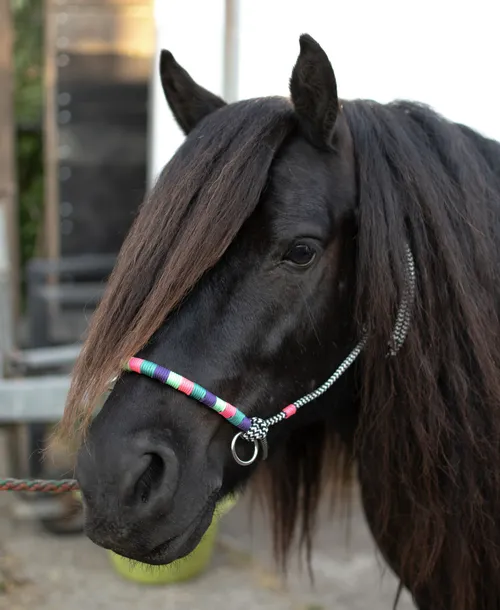
Decorating the nose piece
You decorate the nose piece with the paracord type 1 rope. You can decide the colour order yourself, you have enough of each colour to use as the first colour.
Make a loop of the colour with which you start the whipping. Make sure this is as long as the whole nose piece and that the loop is on the inside. Then start the whipping, watch carefully how this is done in the video.
When whipping, it is important that you keep tightening the cord. Also make sure that the strands stay on the inside of the nose piece, so that they fall into the ‘groove’ that prevents bumps under the whipping.
By consistently making the same number of wraps of each colour, all ‘colour blocks’ will be the same size.
When you’ve almost finished whipping the nose piece, you can cut off the colours you no longer need. As you can see in the video, put the last colours through the loop and pull them 1-5 cm under the whipping.
Making the crown piece
Now that you have finished the decoration of the nose piece, you are going to make the last part of the halter: the crown piece (E). Determine what length you need for the crown piece and add 20 cm for the closing knot. Then cut the ends and attach the end caps to the rope.
With the type 1 rope you have left, you can further embellish the halter in places of your choice.
Finally, you see how to attach the crown piece, pulling the rope for the crown piece through the loop and then tying it. This is also how you put the halter on your horse.
Want to make more horse halters? These are Femke’s 5 tips for knotting rope halters.