Make the Niki's Butterfly knot | Tutorial
Kosmetik 2.0 and 2.1: how to start a paracord collar safely
A frequently asked question: how do I start my paracord collar in a safe way? Here you can see the two most commonly used ways and how to make them.
The Kosmetik 2 or 2.0 and the Kosmetik 2.1 are the most common ways to start a collar made of paracord. You can use both techniques with different accessories to which you attach the rope. Whether you use belt buckles, metal buckles, adapters or half-check chains: the principle always remains the same.
Which technique should I use?
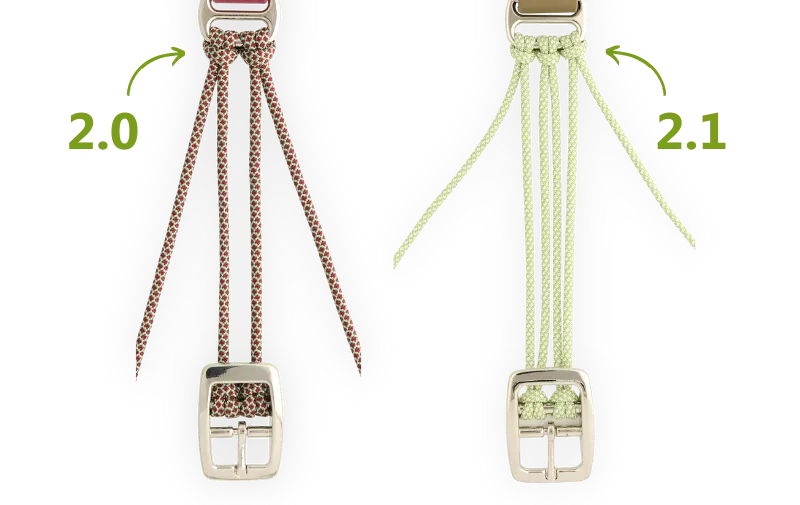
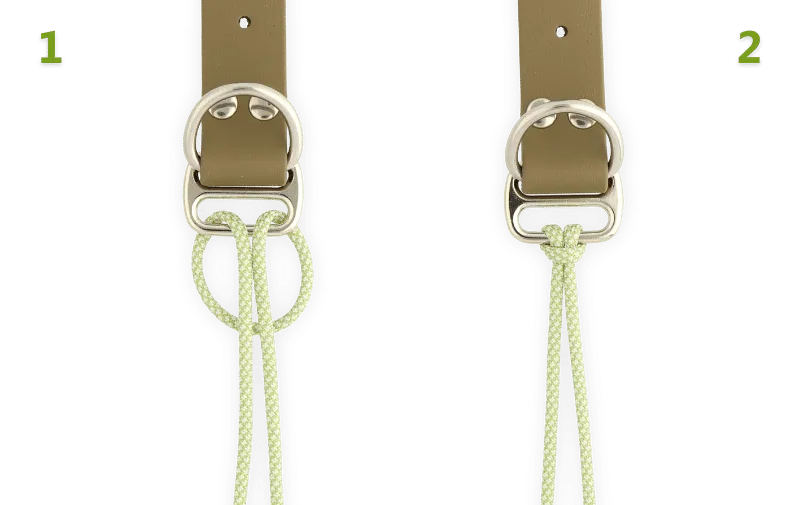
The Kosmetik 2.1 is an extended version of the 2.0, where you tie an extra cow hitch knot and get extra strands in the middle.
Usually, it doesn’t matter which set-up you use. When you use the Kosmetik 2.1, your knotting will be slightly wider. So in that respect, it’s mostly a matter of taste.
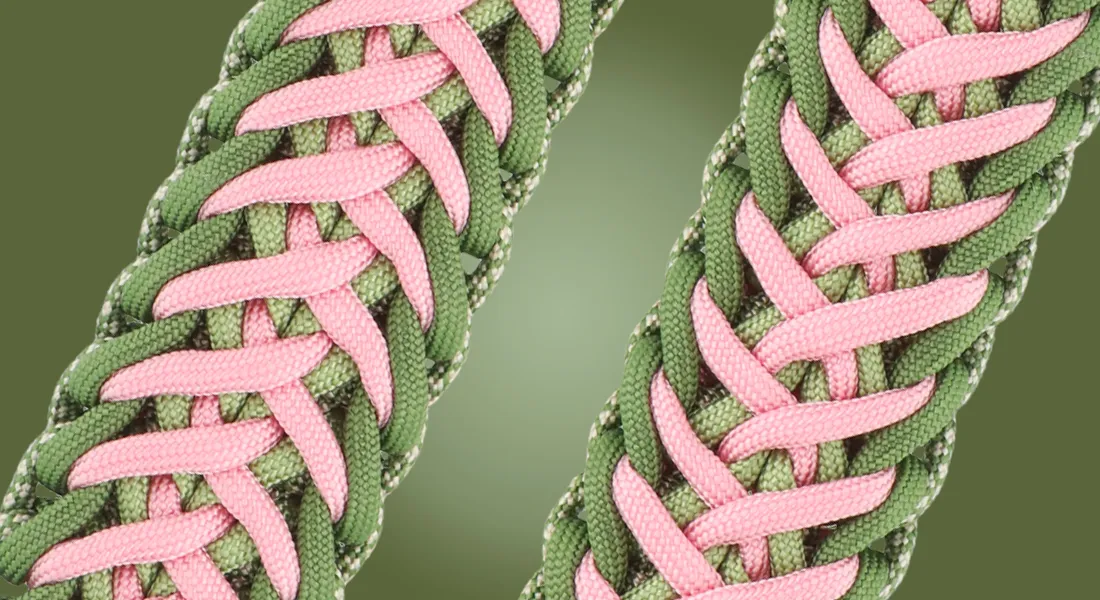
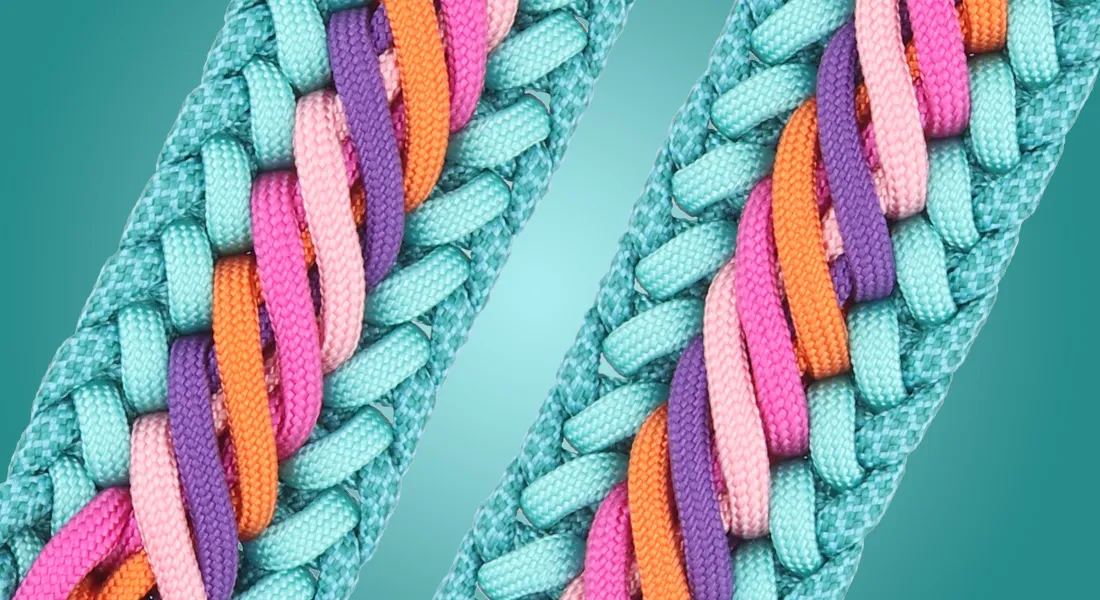
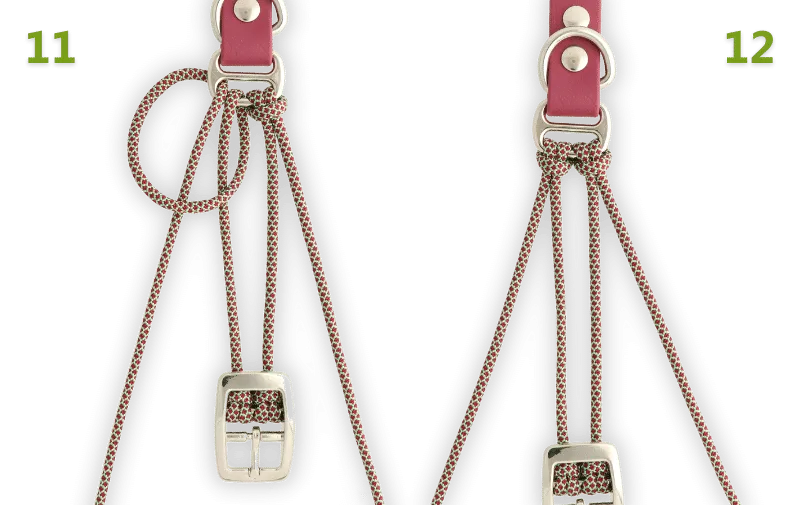
With some knots, the Kosmetik 2.1 is actually necessary, because you use the extra strands in the middle in tying the knot. You can see this in the “Palm Beach” knot, for example. In the image below, you can see the 2.0 on the left and the 2.1 on the right.
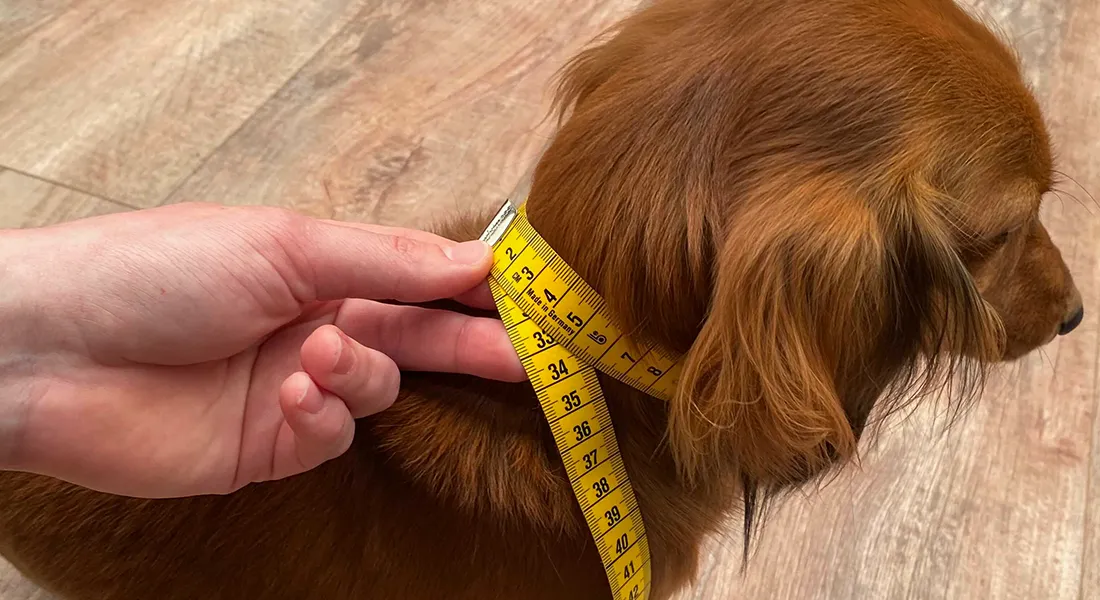
What length should the set-up be?
Before you start making the set-up, it's good to know how long it will have to be in the end. You can read how to calculate this in the article on the jig formula. It is useful to make the set-up first and only then set it to the right size, especially if you have not often made a set-up before.
In tutorials, the ropes used are often indicated by numbers. The rope used for the set-up is generally rope 1.
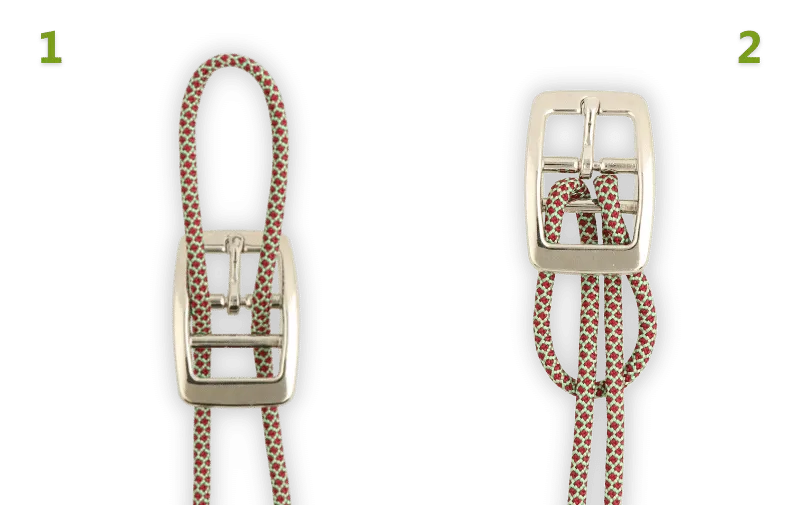
The Kosmetik 2.0: single paracord set-up
Before you start the set-up, it is useful to think about the finishing off of your knotwork. With the Kosmetik 2, the side where you tie the first knot of the set-up is also the side where you will finish the collar.
Often the finish is not as beautiful as the rest of your knotwork and if you use a biothane adapter, you can use it to somewhat hide the finishing. If you make sure the finish is on the side with the buckle, the strip of biothane will lie over the finished side when the collar is closed.
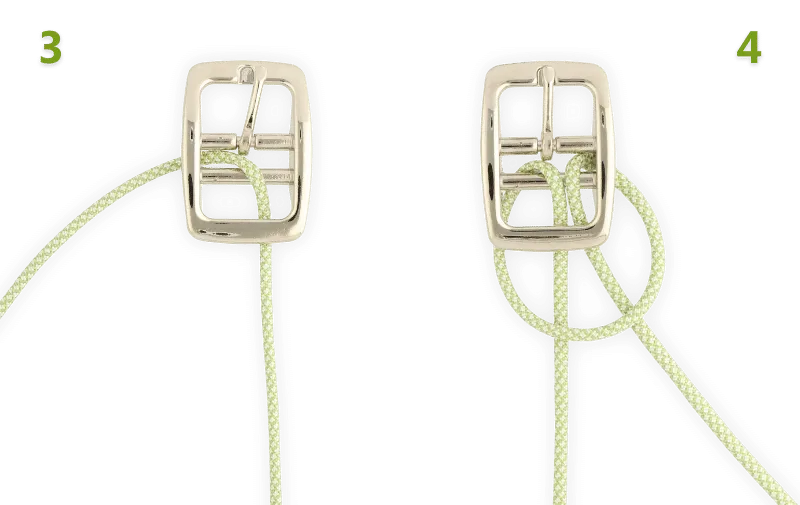
Making paracord Kosmetik 2
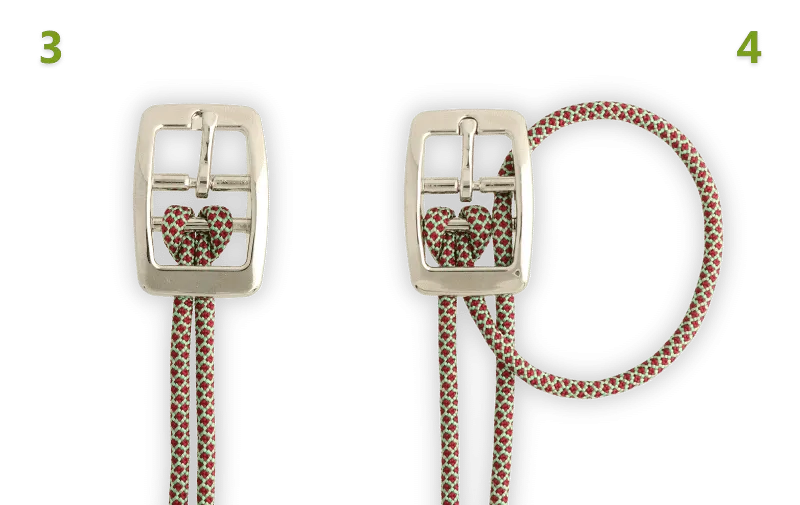
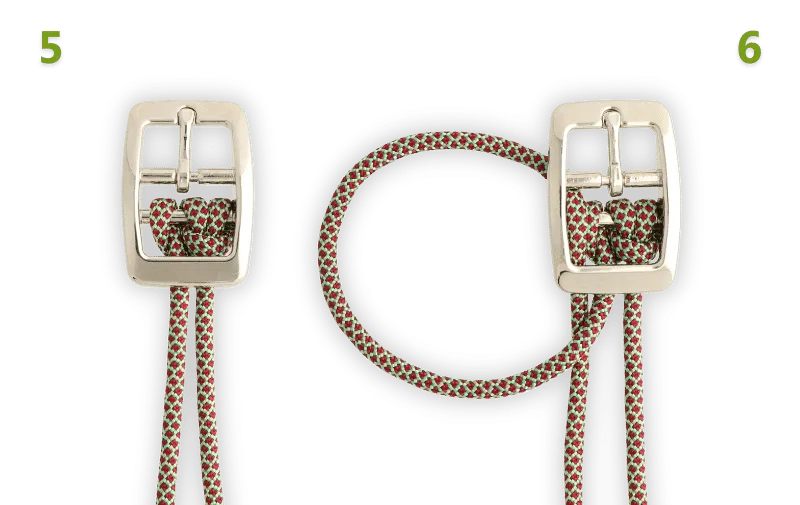

Now that the base is ready, you can start adding the other ropes for the knot to the set-up. After adding those, make the set-up the right length.
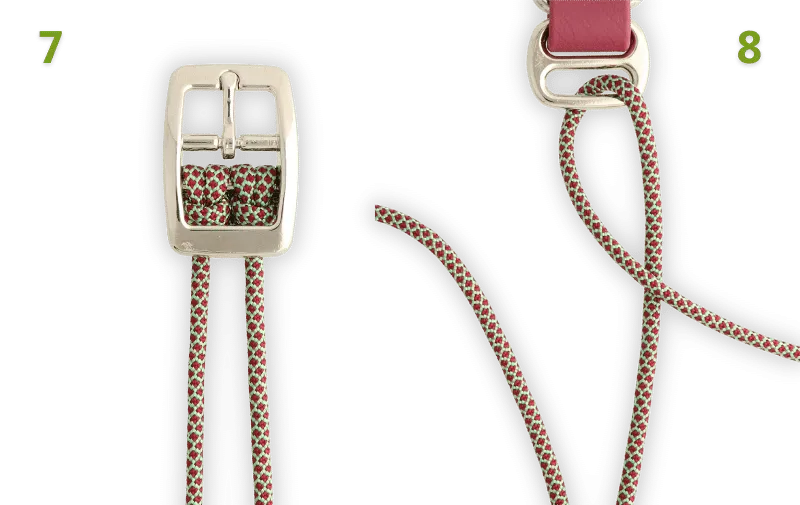
The Kosmetik 2.1: double paracord set-up
Unlike the set-up above, with this version you won't finish the collar on the side where you start setting it up, but on the other side. Again, think about which side you want to finish the creation on and make sure you start setting up on the other side.
Making paracord Kosmetik 2.1
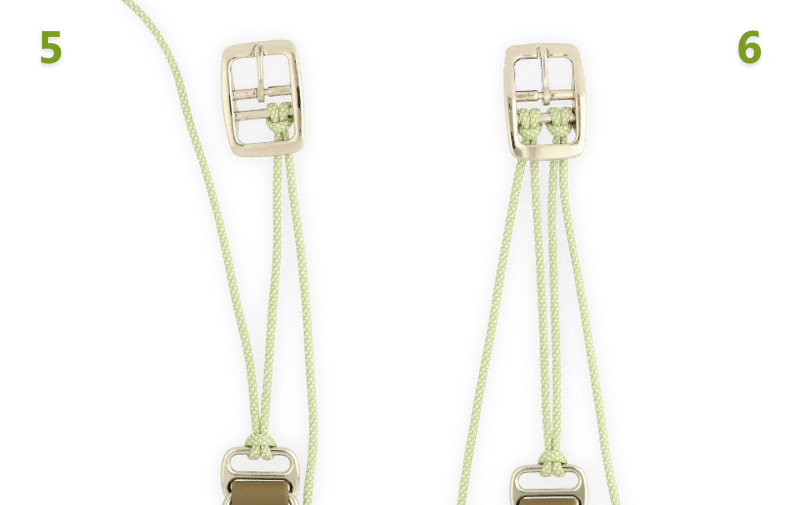


Now add the other ropes and make the collar with the knot you have chosen, and after the collar is long enough, start finishing your knotting neatly and securely.