Make the Niki's Butterfly knot | Tutorial
Valentine paracord knot | Tutorial
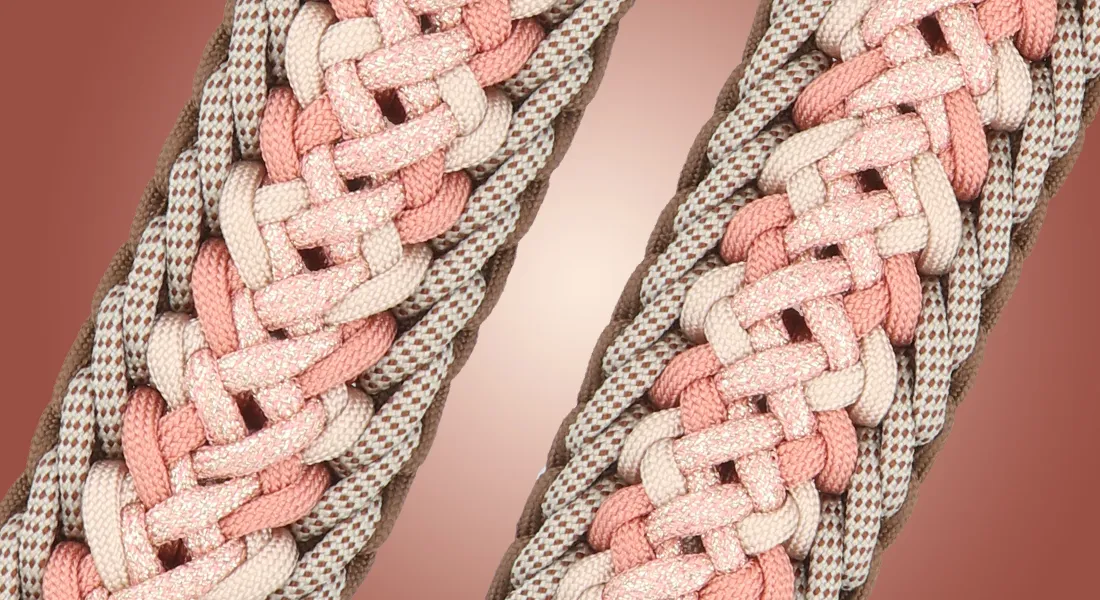
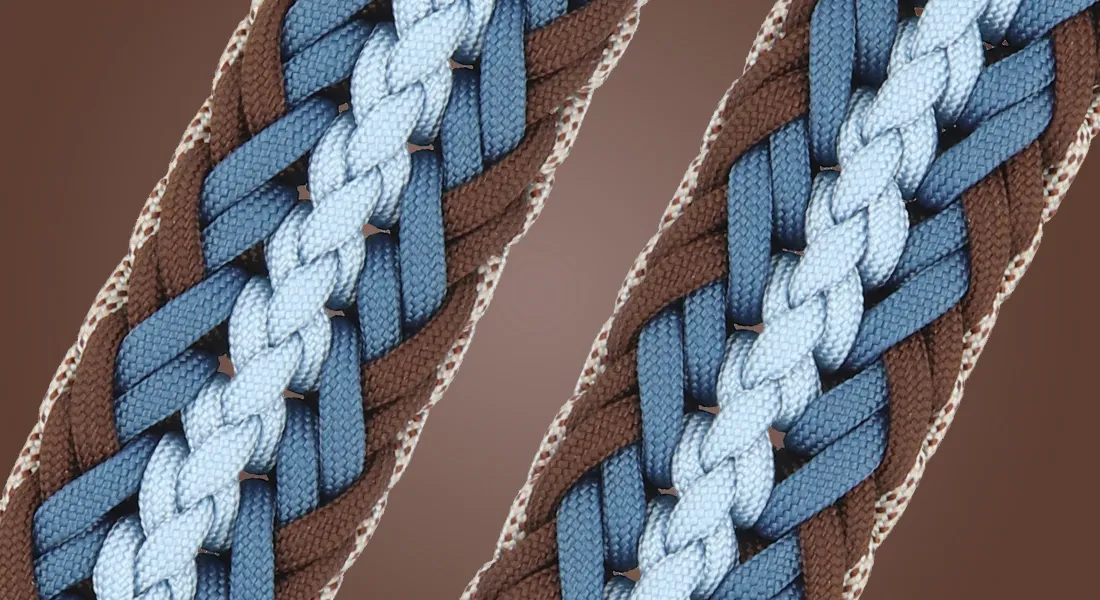
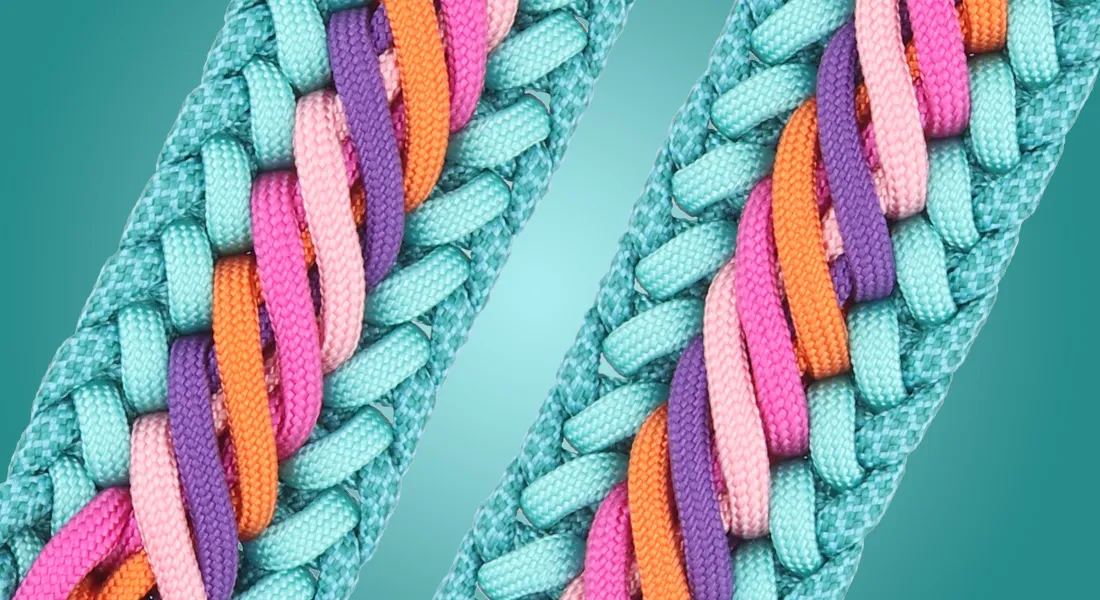
In this photo tutorial, you will see how to make Silke Engels' knot "Valentine". You use 5 paracord ropes for this knot and you can choose whether to make the knot with or without beads.
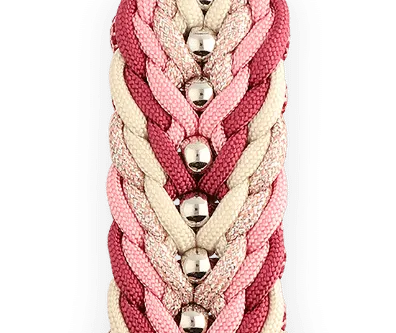
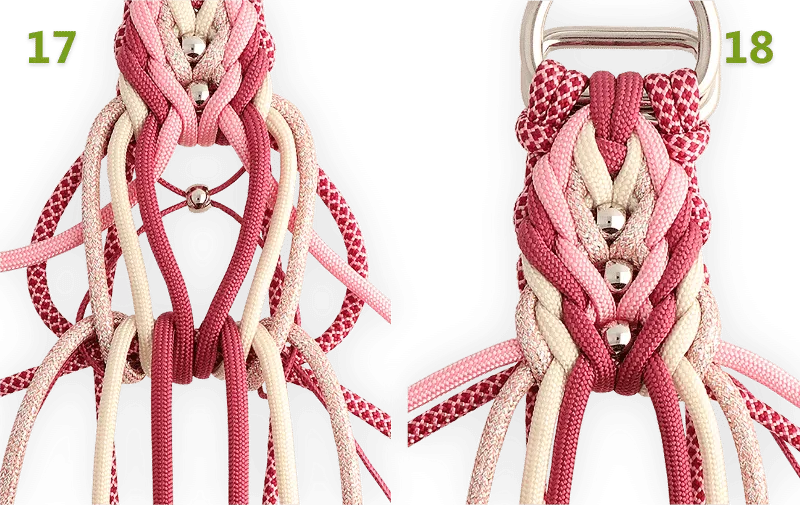
This pretty knot by Silke Engels is about 1.4 cm thick and 3.3 cm wide when you use paracord type 3 rope for knotting.
In the MatchMaker, you can combine the colours and calculate the required lengths for your project.
You can add beads to this knot, but you can also make it without beads. Do you choose the version of the Valentine without beads? Then you won't need the micro cord.
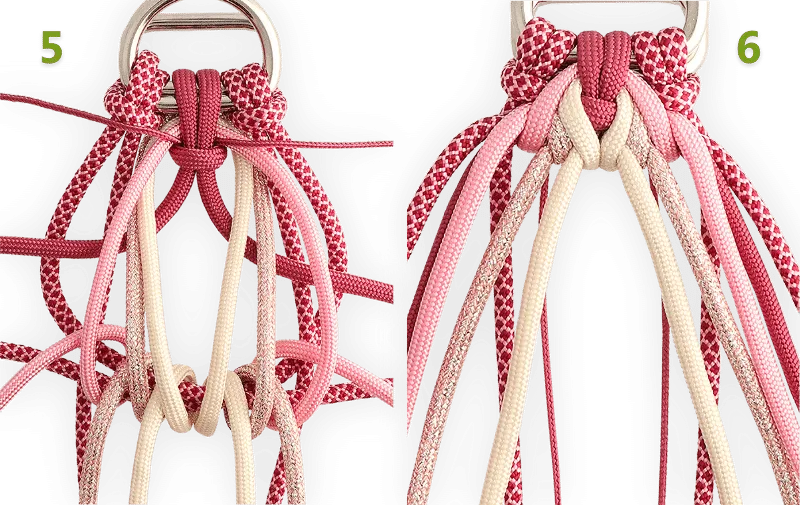
You start this knot with the Kosmetik 2.0, then add the other colours to the set-up.
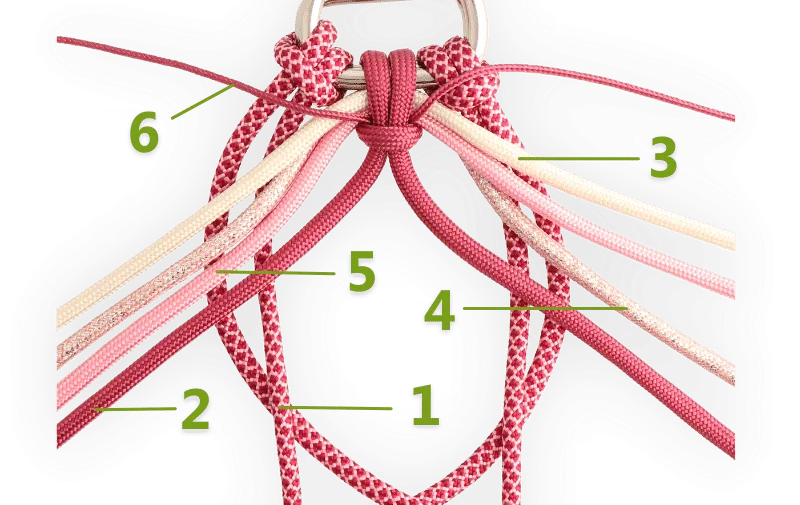
Colour 1: Rose Pink & Burgundy Diamonds, colour 2: Viva la Vino Red, colour 3: Cream, colour 4: Sparkly Rose, colour 5: Pastel Pink and colour 6: Viva la Vino Red (micro cord).

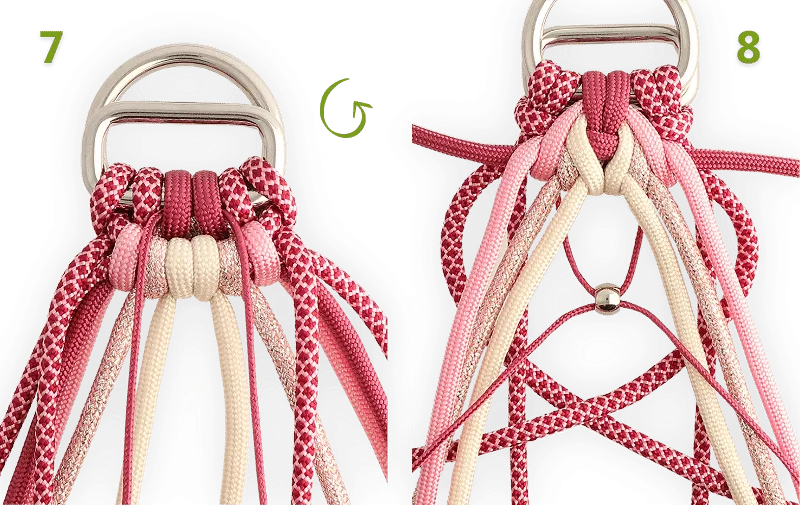
Before tightening the knot, make sure the two micro cord strands (colour 6) go to the back. In step 7, you can see how this then looks at the back.
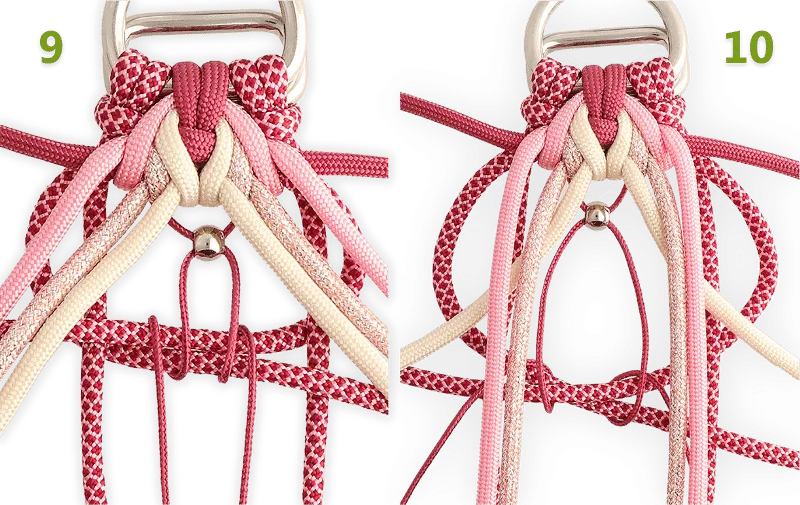
Are you making the version without beads? Then just leave out the bead and micro cord in these steps.
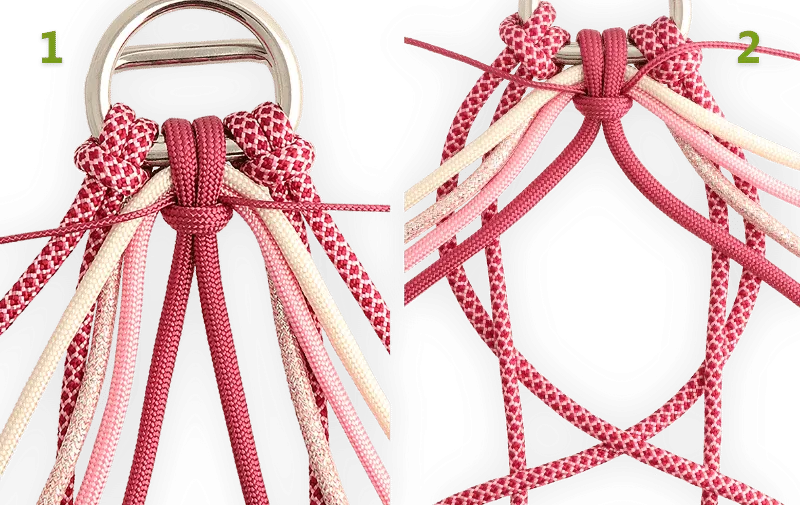
Three of the colours 2, 3, 4 and 5 will go around the strands of colour 1 and one goes to the side. Make sure you always let the innermost colour go to the side, like colour 3 in step 10.
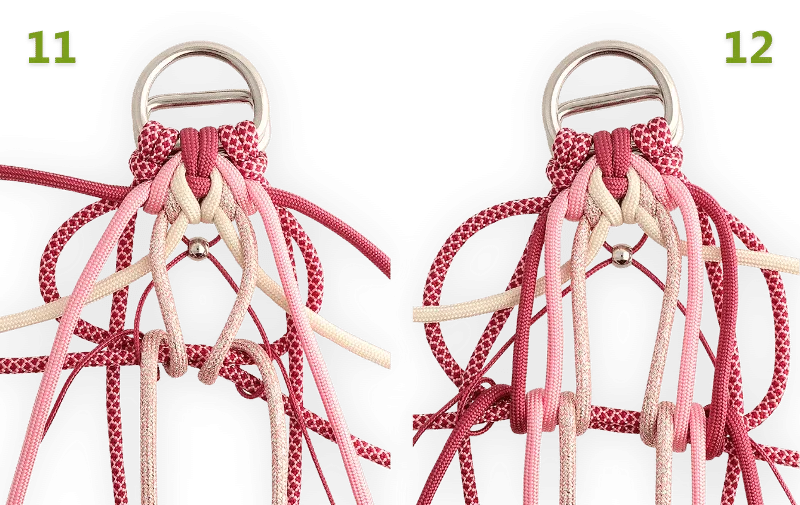
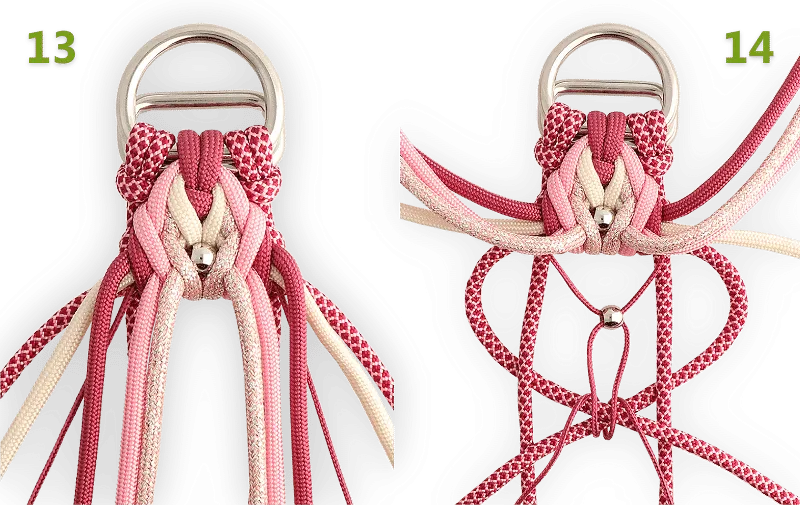
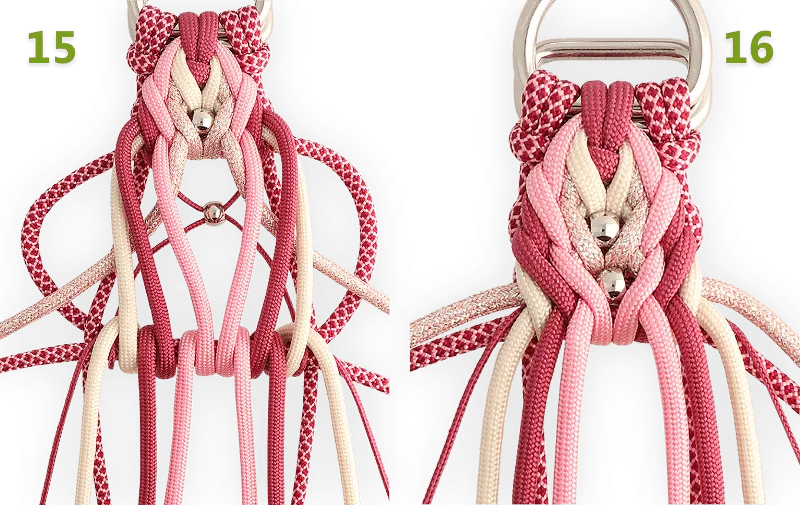
In step 15, you again let the innermost colour (in this case, colour 4) go to the side. By consistently doing this with the innermost colour, the colours keep shifting places and you create this alternating pattern.
This knot is designed by Silke Engels. We would like to thank her for allowing us to use this knot.